
Tools
No tools specified.
Parts
-
-
Unpack the parts from the included zip-close anti-static bag.
-
Make sure all parts are present. Depending on the specific lighting kit you purchased, there will be different numbers of light strips, connecting cables, and connecting adapters present.
-
-
-
If you are going to mount the light strips, make sure you've checked that they fit into the space you intend to mount them before peeling the self-adhesive backing.
-
Before mounting the strip, make sure the connecting wires from the light strip will reach either to the next strip in a chain, or to the power source.
-
Make sure you're mounting the light strips to a smooth surface, and that the surface is dry and free of dust and dirt.
-
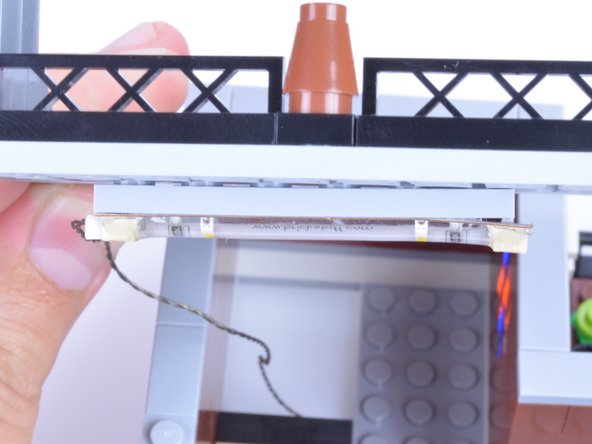
When you're ready to mount the light strip, carefully peel the adhesive backing, mount the strip, and press firmly and evenly to make sure the strip is securely attached.
-
As a general rule, you should not remove and re-attach a light strip-- doing so will decrease the holding power of the adhesive.
-
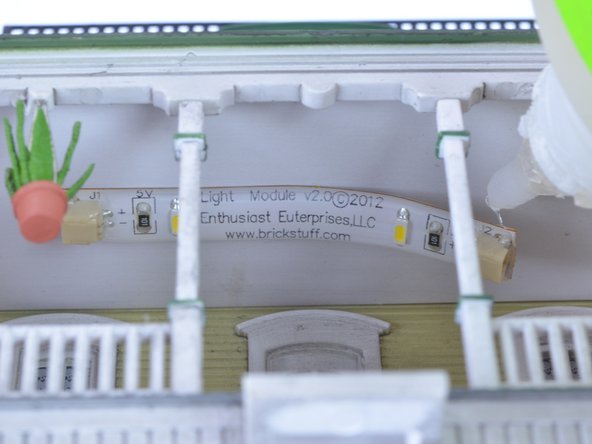
If mounting the light strip to a LEGO® creation, it's a good idea to first mount the strip itself to a 1x6 plate, then attach the 1x6 plate to your creation. This will allow you to re-position the strip by moving the 1x6 plate.
-
-
-
Once the light strip is securely mounted, attach the connecting cable.
-
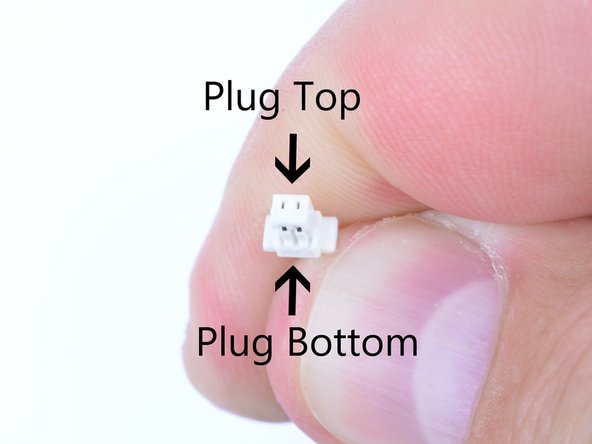
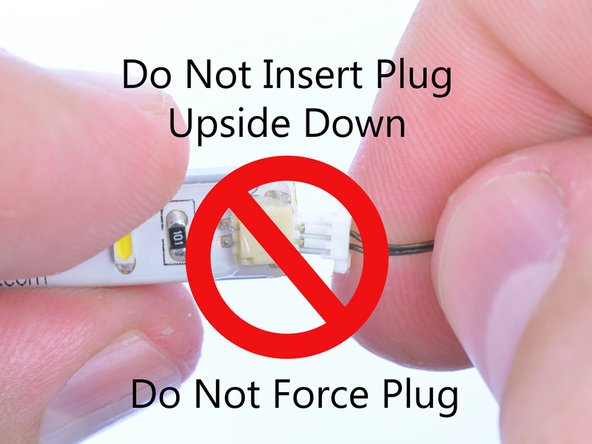
Note that connecting cables can only be inserted one way-- the connecting plugs have ridges on the bottom, and the plugs should only be inserted ridge-side down.
-
If a plug won't fit easily into a light strip connector, don't force it. Doing so will damage the plug and the connector.
-
-
-
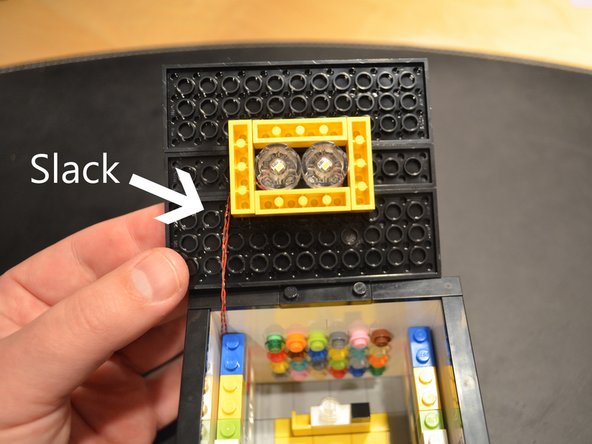
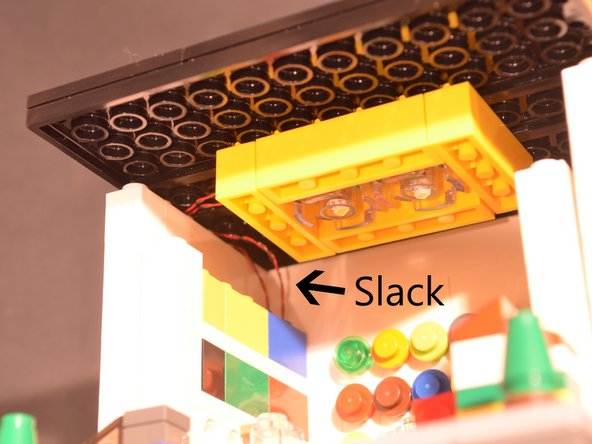
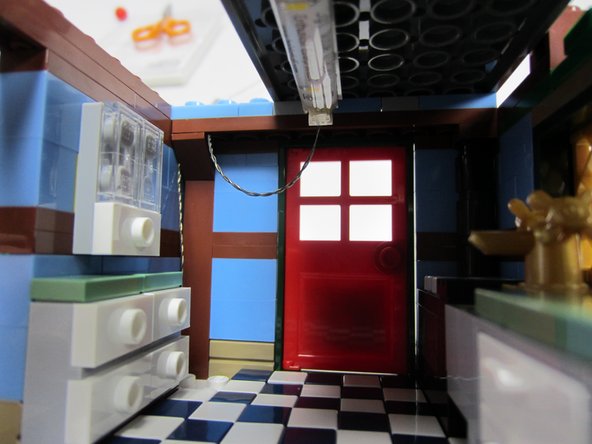
If you will be running wires through a structure or through a tight space, make sure you leave enough slack in the wire leading up to the light strip so the plug won't be pulled out or damaged by friction over time.
-
If you are installing the light strip on a roof or other surface that will be opened or moved frequently, it's even more important to make sure you have enough slack.
-
With some planning and a couple of test runs, the slack can be made to fold up beneath or into the space around it, so you won't see the wires in the final installation.
-
-
-
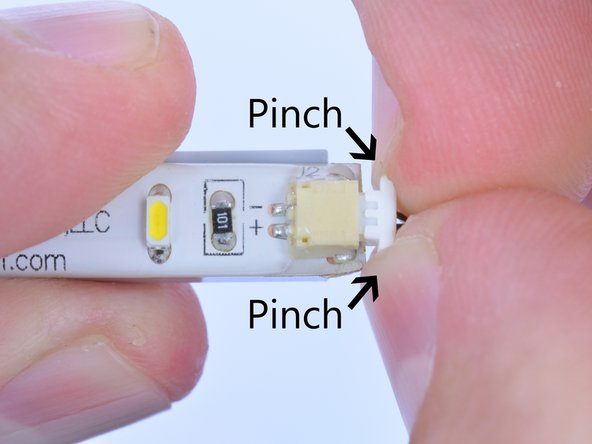
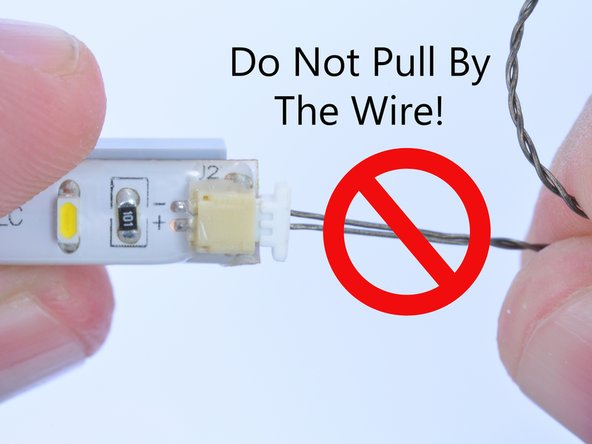
If you need to remove a plug from a light strip, don't pull the plug out by pulling the wire-- doing so could cause the wires to break away from the plug or pull out of the plug.
-
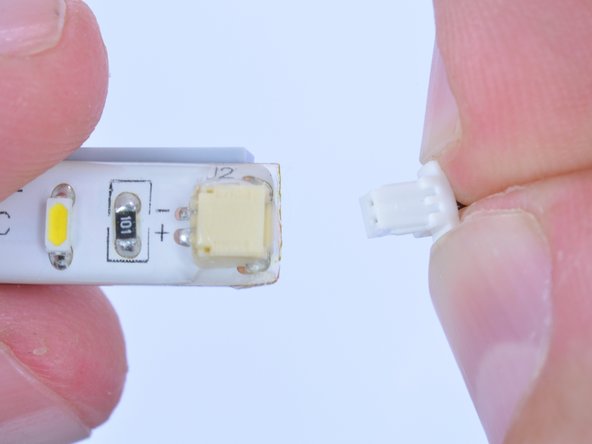
To remove a plug, pinch its tabs gently with your finger and pull straight out, pulling from the tabs and not the wire.
-
-
-
If a light strip pulls away from its mounting over time, it can be re-attached using double-sided tape or a small amount of glue appropriate for the material the strip is mounted to.
-
Note that using glue may leave residue if the light strip ever needs to be removed, or may make removal of the strip difficult or impossible without damaging the strip.
-
-
-
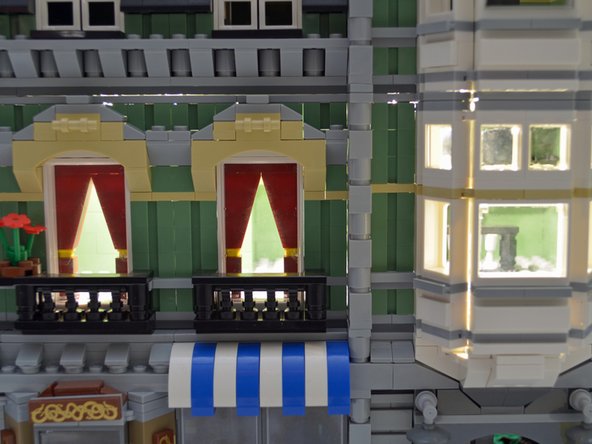
Once all of your light strips have been mounted and connected with cables, attach one end of the string of light strips to a 5V DC power source such as our 3AA battery pack.
-
Your lights should light up, and you should have a beautiful creation!
-


Cancel: I did not complete this guide.
8 other people completed this guide.

4 Comments
are the light strips able to be trimmed so that they become recessed into the lego bricks??
Matthew Bear - Resolved on Release Reply
Hello, thanks for your question. They are not able to be recessed because of the antistuds that are inside the LEGO bricks.
Rob K -
Hi Jason, thanks for your note. For your buildings, we'd recommend starting with a Light Strip Starter Kit-- this should give you enough to light up both buildings on the inside. Pick up some warm white Pico LEDs if you want to add lights to the outside as well. You might also want to also buy a 4-pack of 1:2 expansion adapters and a 4-pack of 24" cables, just to make sure you have enough. If you'd also like to buy lit lamp posts, maybe add a 1:8 adapter with large plugs. We hope this is helpful-- please let us know if you have any additional questions, and thank you for your interest!