Tools
Parts
-
-
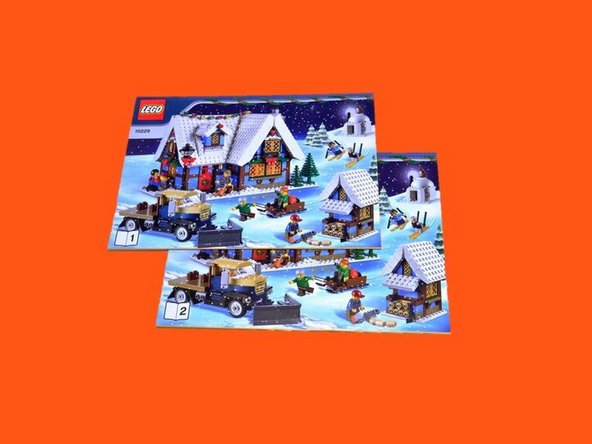
The LEGO® Winter Village Cottage is one of our favorite kits! In December 2012, we put a video up on our YouTube channel describing how to add Brickstuff lights to this wonderful model, and many people asked how they could do this same project themselves.
-
That's what this online guide is for! We heard customer feedback that it was hard to know which parts to buy for which specific installation, so we added a single kit (available from tindie.com) you can use along with this guide to light up your own Winter Village Cottage.
-
Of course, if LEGO® isn't your thing, or if you have something else to light besides a Winter Village Cottage, hopefully you'll still find the ideas and approaches presented in this guide to be helpful.
-
-
-
Once you've picked up a Winter Village Cottage kit of your own, and once your Brickstuff Micro LED Light Board Starter Kit has arrived, you're ready to get started. The kit includes everything you need:
-
One 3xAA battery pack with on/off switch
-
Eight Micro LED Light Boards with warm white LEDs
-
Seven connecting cables of varying lengths
-
Two sets of eight self-adhesive mounting squares
-
Four adapter boards with micro connectors
-
Three adapter boards with standard connectors
-
-
-
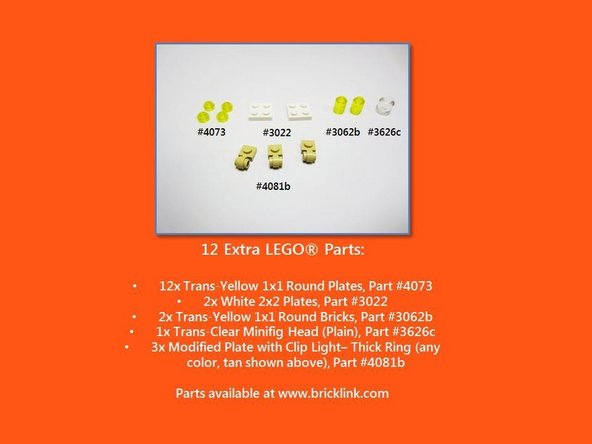
These instructions make reference to a total of 12 LEGO® parts not included with the Winter Village Cottage kit. These additional parts are used to help mount the lighting elements and to keep the connecting cables in place.
-
If you are familiar with the online LEGO® parts marketplace, Bricklink, you can order the extra parts there.
-
If you have spare LEGO® parts around the house that look something like the parts we reference, you can use those.
-
If you don't have the extra parts and can't wait to get building, have at it! You can always pick up the parts later.
-
Check the Documents section of this guide for a downloadable PDF document with links to the extra parts needed.
-
-
-
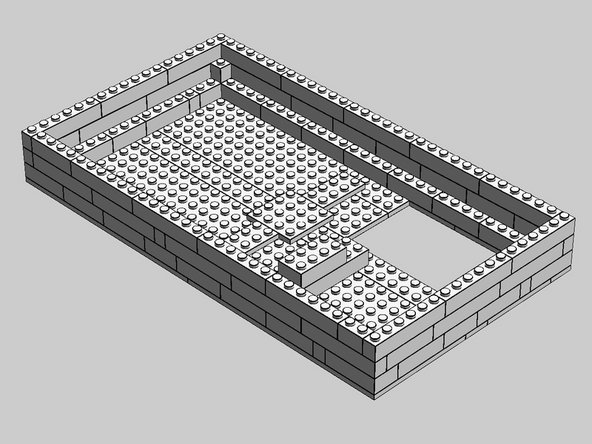
This guide features a base for the Winter Village Cottage. The base isn't required, but if you want to build one, you can pick up the parts on Bricklink.
-
Check the Documents section of this guide for a downloadable PDF document with links to the Bricklink part numbers and a step-by-step assembly guide for the base.
-
-
-
Starting with bag #2 in the set (p. 38 in volume 1 of the instructions), complete building steps 1-12 as shown in the instruction manuals.
-
Did you already build your Winter Village Cottage? No problem-- follow along with the steps in this guide, save your instructions and all the parts you're going to have to wiggle loose and then re-assemble later, and you'll be fine!
-
-
-
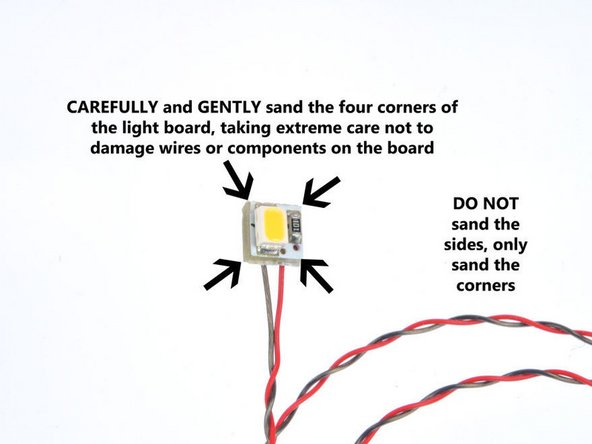
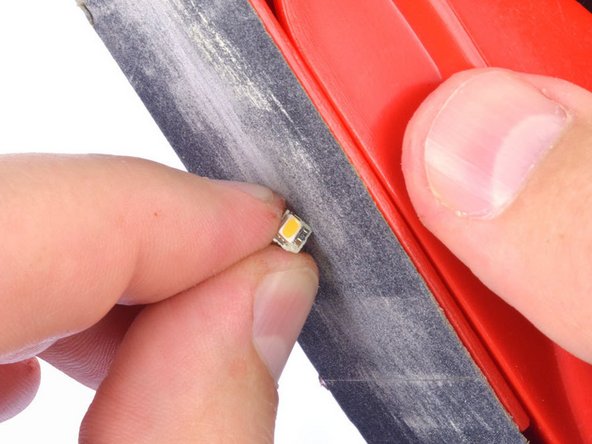
Here's where you're going to need a hand sander with very fine grit sandpaper. You will need to carefully round the edges of seven of the eight Micro Light Boards.
-
Take time with this step-- it may be the most important step in the entire guide, and it is key to getting a professional, clean finished result.
-
DO NOT use a power sander or any sander with coarse or even medium grit sandpaper-- you will damage the light board!
-
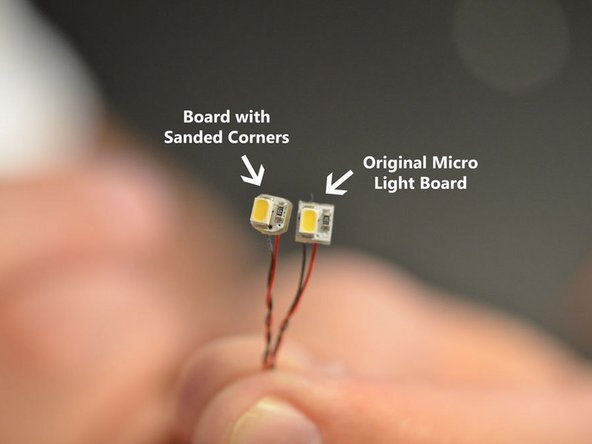
Holding one of the Micro Light Boards in your hand, gently sand the corners of the board until the board begins to appear round.
-
Use extreme care not to sand or damage any of the electronic components on the light board, and do not pull on the wires while sanding.
-
Use a respirator or sanding mask to prevent inhaling dust while sanding.
-
-
-
One of the most important parts of sanding anything is knowing when to stop sanding!
-
As you continue to gently round the edges of the Micro Light Boards, pause from time to time and check the edges.
-
The goal is to remove as little material as possible.
-
The photo in this step shows a properly sanded Micro Light Board on the left, compared to an out-of-the-box square board. You don't need to sand a lot to gain the desired effect.
-
Remember to take breaks between boards. It will take some time to properly sand all seven boards. Don't be in a hurry!
-
-
-
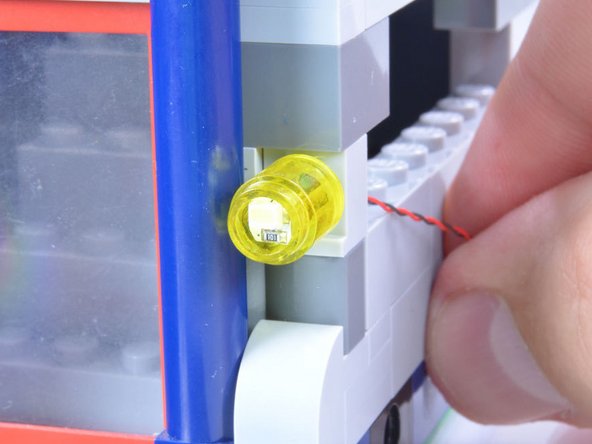
After you think you've sanded enough off each corner of a Micro Light Board, test the fit inside a 1x1 round LEGO® brick.
-
Note: the board should fit snugly, but you also should not have to force it in. Using too much force will damage the board.
-
The goal is to sand as little as possible to fit the Micro Light Board into place. If you sand too much, you will damage the circuit board or its components, and the Micro Light Board will no longer operate.
-
Remember: If you sand a board, you assume all responsibility for any damage that may be caused to the electronic components on the board. We will not replace or refund purchases on any board that has been sanded.
-
-
-
No, really, take a break. You've just sanded seven Micro Light Boards, which is exhausting.
-
Grab a cup of coffee, or if you don't drink coffee, go for a walk outside.
-
Really.
-
-
-
OK, now that you've had a nice break (you DID take a break, right?), you can get back to work.
-
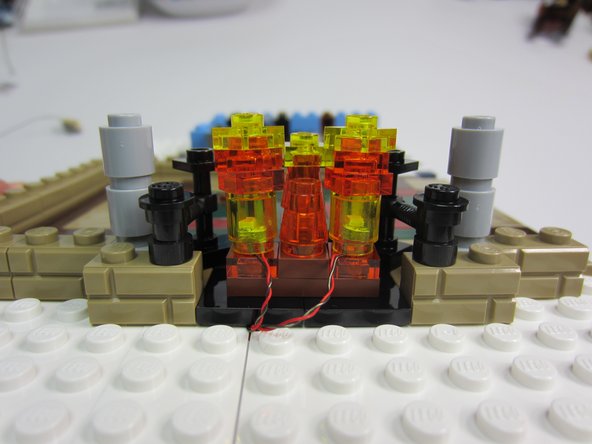
Complete step 13 as shown in the build instructions, but substitute 2 Trans-Yellow 1x1 round bricks in the base. Insert 2 sanded Micro Light Boards into round bricks before mounting.
-
Mount the fireplace element, passing the two Micro Light Board cables through the gap in the white baseplates. Cables should hang loosely beneath baseplates.
-
-
-
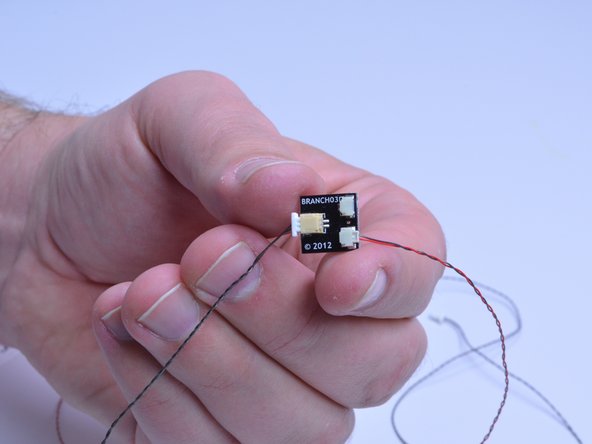
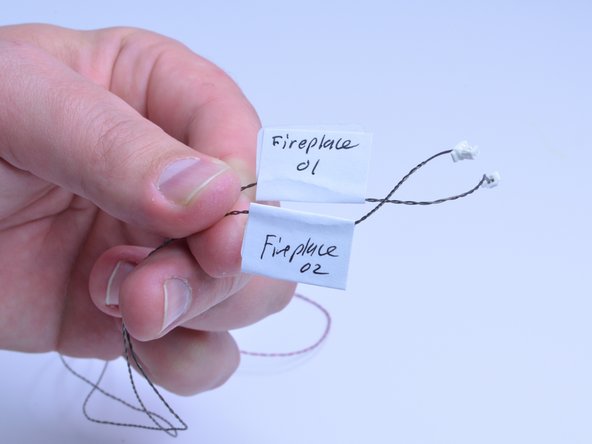
Connect each Micro Light Board to an A3 adapter board. Add a connecting cable to the large connector on the A3 board. You should have two A3 boards and two black connecting cables when done.
-
Label each connecting cable so you can identify each “channel” later on.
-
-
-
Complete building steps 14-43 as shown in volumes 1 and 2 of the building instructions.
-
-
-
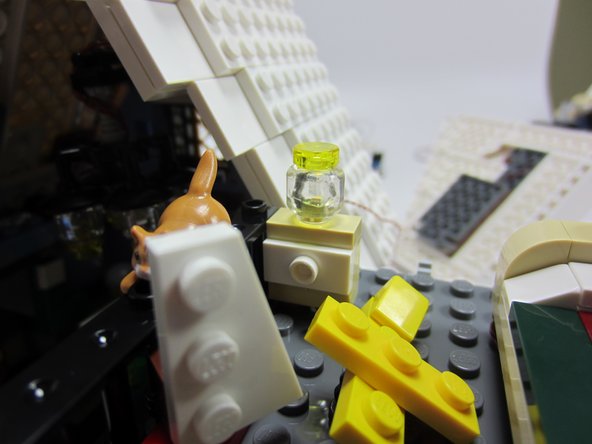
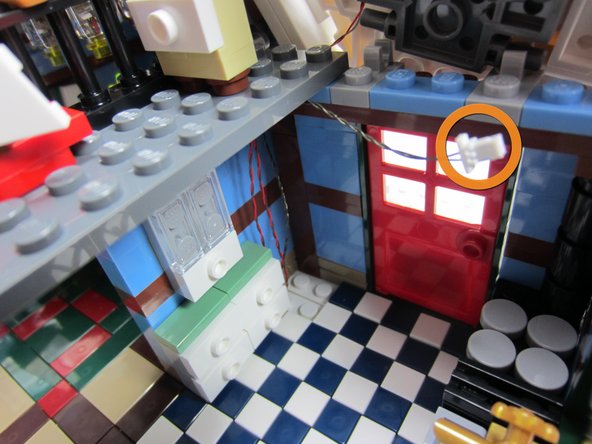
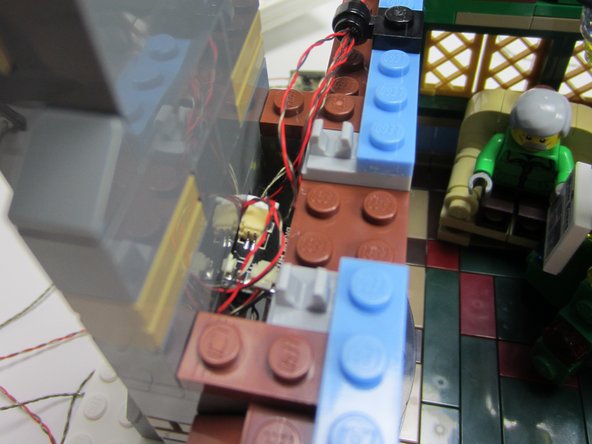
In steps 44 and 45 of the building instructions, build a night light in the bedroom by replacing the two Trans-Clear round 1x1 plates with the Trans-Clear minifig head. Place a sanded Micro Light Board inside the globe, and route the wire down through the baseplate as shown (down through the kitchen).
-
What's this extra connector plug doing, just hanging in the air? Don't mind it-- when we did the photo shoot, we tried mounting one of our Light Strips on the ceiling of the kitchen, but that's out of scope for this guide!
-
-
-
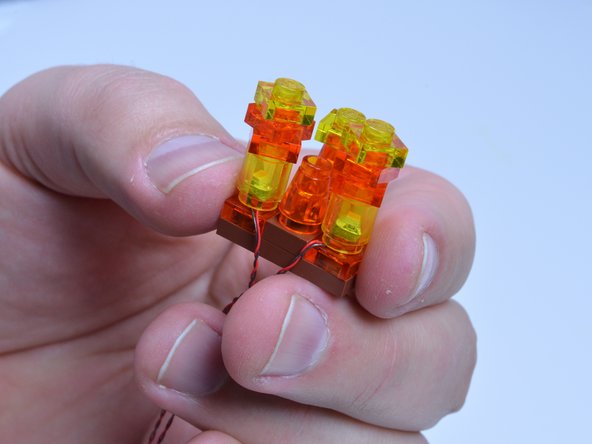
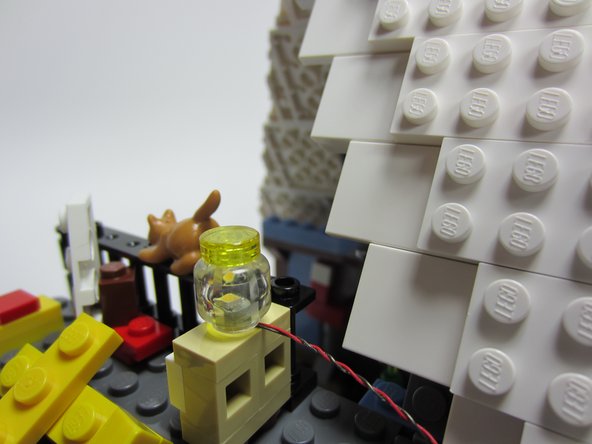
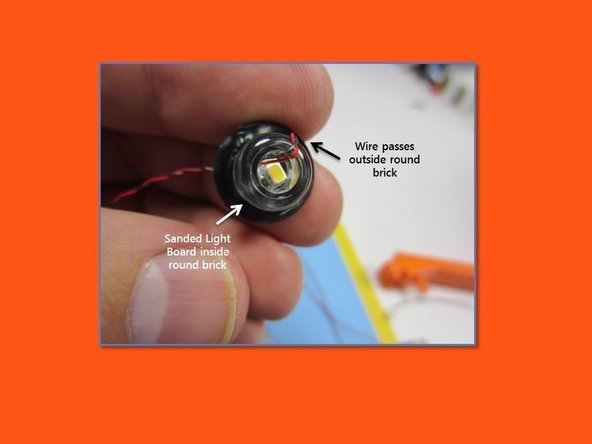
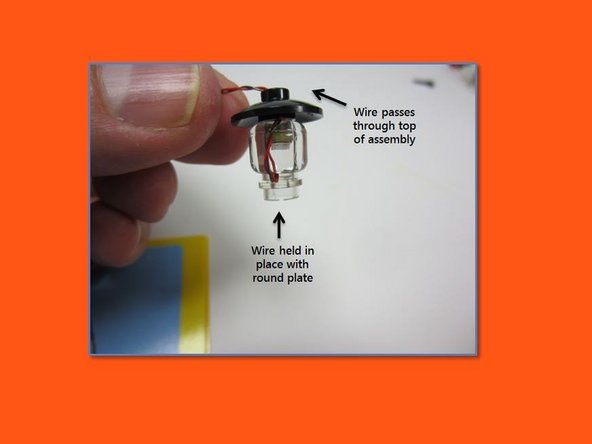
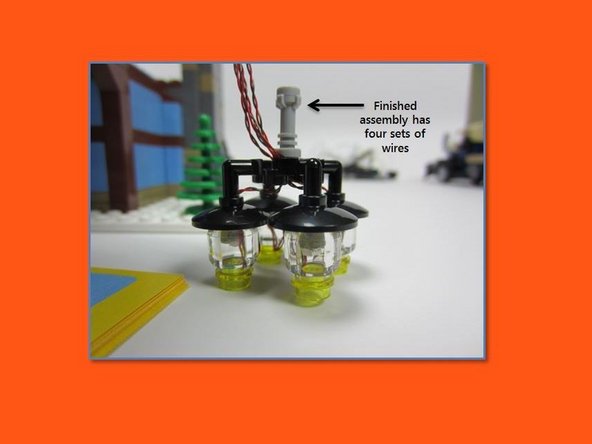
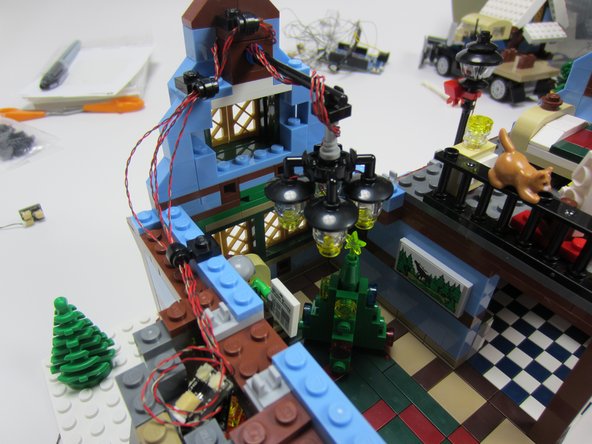
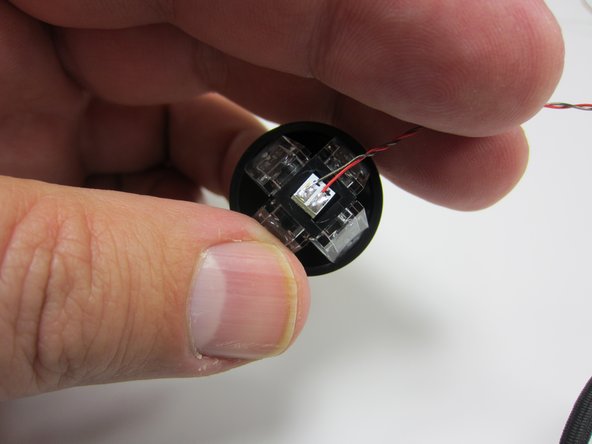
In step 46 of the building instructions, mount four Micro Light Boards inside the clear round brick elements, using 4 Trans-Yellow 1x1 round plates to hold the wires as they pass outside the globes and wrap back up the side of the assembly the through the top of the light.
-
Yes, this may be a good time to get another cup of coffee. Or to take another walk. Take your time with this step-- you'll love the results.
-
Click on the images and view them full size to see the detail.
-
-
-
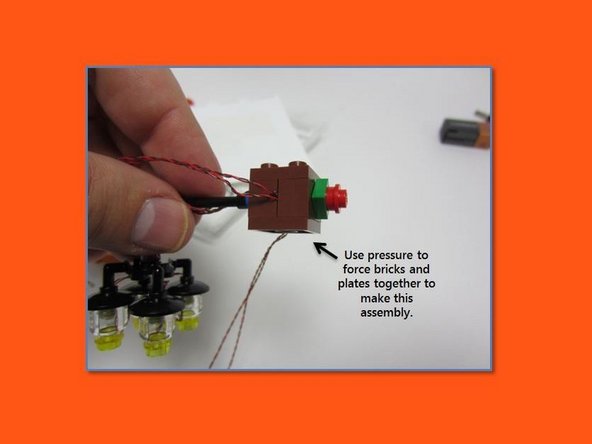
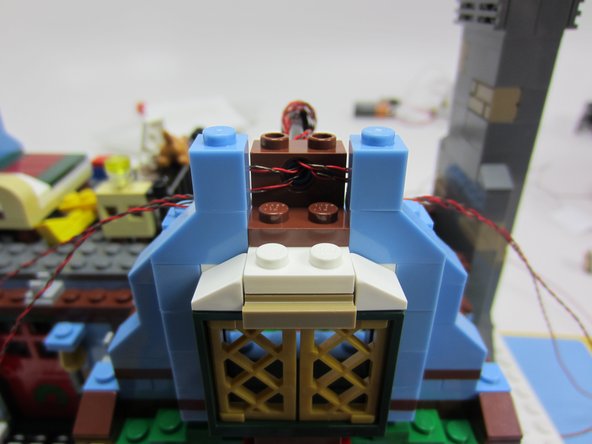
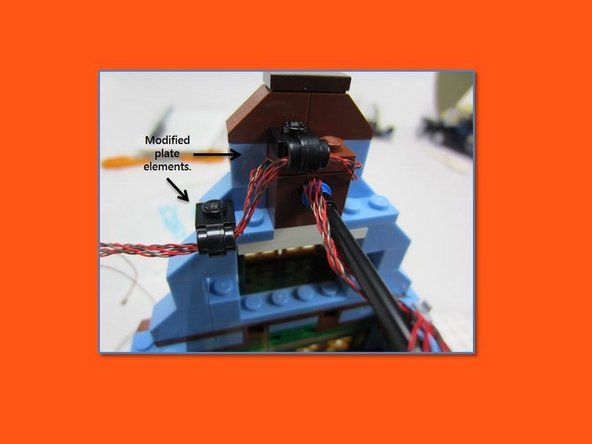
In steps 47-49 of the building instructions, mount the chandelier as shown in the photos, and use the modified plate elements to route the wires as shown.
-
This step may drive you mad. You will need to apply considerable force to get the brown bricks to stick together in the chandelier assembly. Hang in there!
-
Click on the images and view them full size to see the detail.
-
-
-
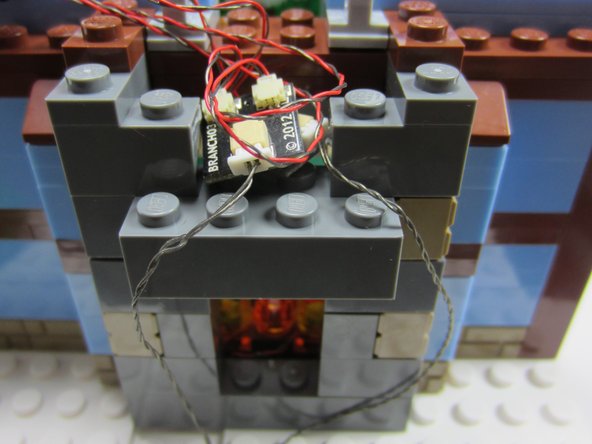
Connect the four chandelier light wires to two A3 adapter boards.
-
Carefully remove the tall part of the chimney, along with the back of the fireplace, mount the A3 boards loosely in the top of the fireplace, and carefully run the two connecting cables down through the gap in the baseplate at the base of the fireplace.
-
Carefully re-assemble the chimney.
-
Label the wire.
-
This step may also drive you mad. The chimney bricks are very squirrelly, and they will resist your best efforts to get them back together. Do not give up!
-
-
-
At this point in the build, you should have one Micro LED Light Board left. You can use it either to:
-
Light the cottage's front lamp post
-
Light the cottage's bedroom dormer window
-
The rest of this step covers the lamp post (see the next step if you want to do the dormer).
-
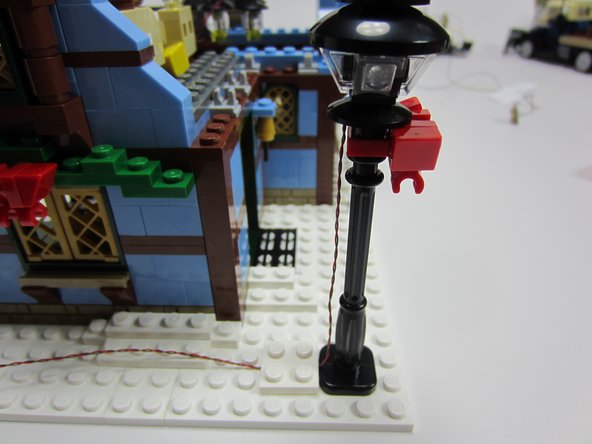
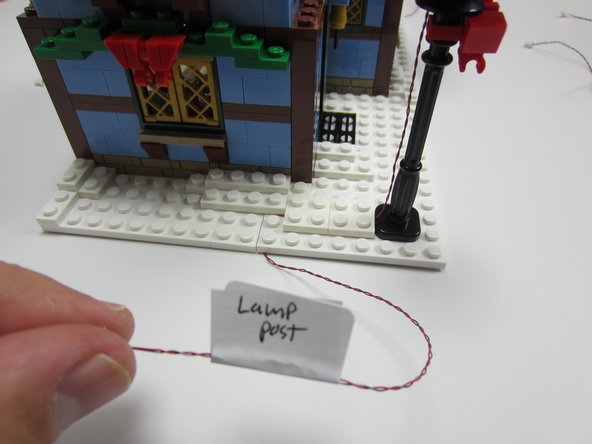
Following step 49 of the building instructions, build the lamp post as shown. Insert a Micro Light Board in the bottom of the lamp assembly, and route the wires down the back of the lamp post.
-
Cover the wires along the ground with two 2x2 white plates, and route the wire through the gap in the baseplate along the side of the cottage.
-
Label the wire.
-
-
-
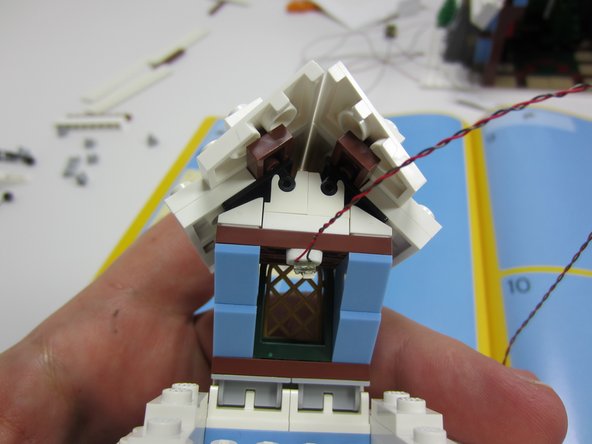
If you elected to use your 8th Micro LED Light Board to build a light for the bedroom dormer window, follow the steps here.
-
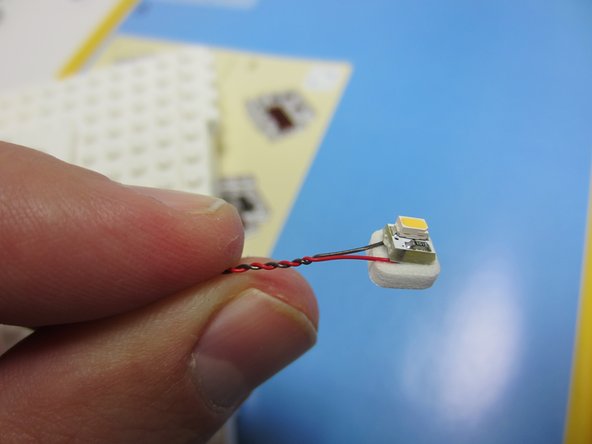
Attach one of the self-adhesive squares (provided with the Micro Light Board kit) to the back of one of the Micro Light Boards.
-
Mount inside the dormer window as shown.
-
Route the wire through the roof and down through the kitchen as you did with the Night Light.
-
Label the wire.
-
-
-
The photo in this step shows a summary of how the lights and adapters should be arranged after you've completed all the steps in this guide.
-
Click on the image to see it full-sized. (hover in the upper left-hand corner of the image and click "View Huge")
-
There is a higher-resolution PDF document of this image in the Documents section of this Idea Guide.
-
-
-
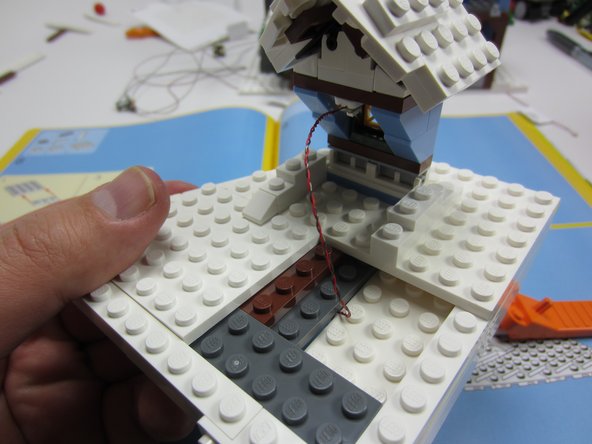
After completing the steps in this guide, you should have a bunch of wires passing through the baseplate of the Cottage.
-
If you decided to build a base for the cottage in Step 4, you can conceal the wires inside the base.
-
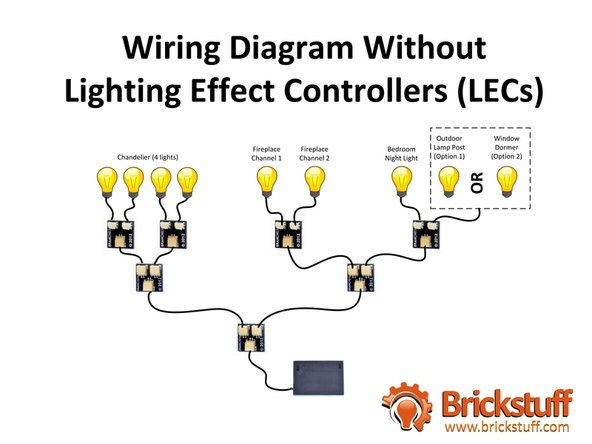
Connect the wires as shown in the illustration for this step, and connect to the battery pack.
-
Click on the illustration to see it full-sized. (hover in the upper left-hand corner of the illustration and click "View Huge")
-
Turn the power on and enjoy!
-
-
-
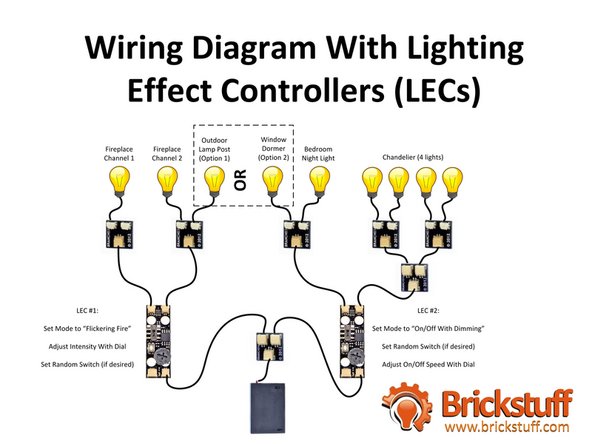
If you want to add excitement to your Winter Village Cottage, you can purchase two Brickstuff Lighting Effect Controllers (LECs) and add them to your installation.
-
See the illustration in this step for details about how to re-work the lighting connections, and also how to set the LECs.
-
Click on the illustration to see it full-sized. (hover in the upper left-hand corner of the illustration and click "View Huge")
-
-
-
Hopefully you found this guide helpful, and hopefully it gave you some ideas about what's possible with the Brickstuff lighting system in LEGO buildings.
-
This guide shows one way of lighting the Winter Village Cottage, but there are many other ways to achieve different effects, so be sure to tell us about how you lit your Cottage!
-
Cancel: I did not complete this guide.
14 other people completed this guide.


