Tools
Parts
-
-
There are several ways to read this guide:
-
Reading it on the web in your browser.
-
Downloading a PDF copy of the guide. You can do this by selecting "Download PDF" as shown by the red rectangle in the first photo. Click on the Options heading in the upper right corner of the screen (see the green rectangle).
-
In the "Dozuki" application, which is available for download from the Apple App Store and various Android and Google marketplaces.
-
If you view this guide in the Dozuki app, search for "Brickstuff" the first time you open the app, then select "Product Guides" from the categories listed under Brickstuff. Scroll down to find this guide.
-
You can also translate this guide into another language when viewing on the web. To do this, install a translator extension into your browser and use that extension/plug-in to translate the page. Using the main Google translate website (translate.google.com) does not work.
-
-
-
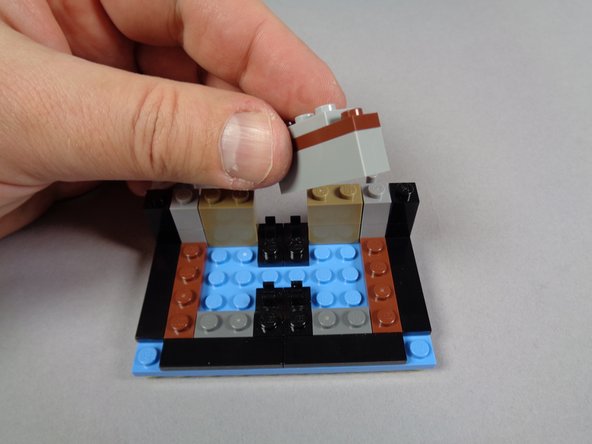
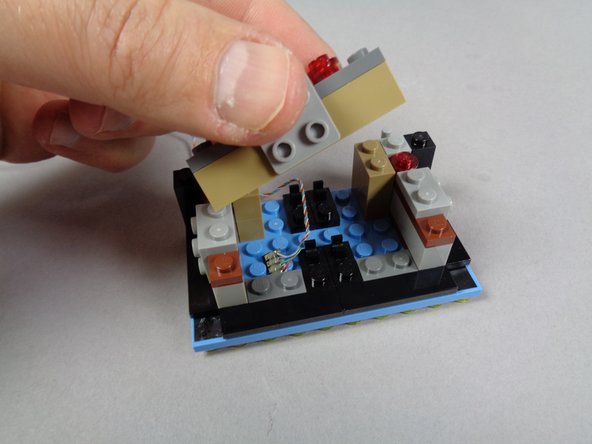
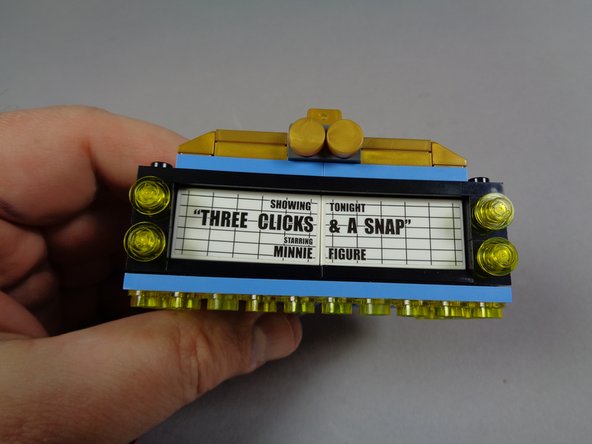
Remove your entire marquee from your Palace Cinema.
-
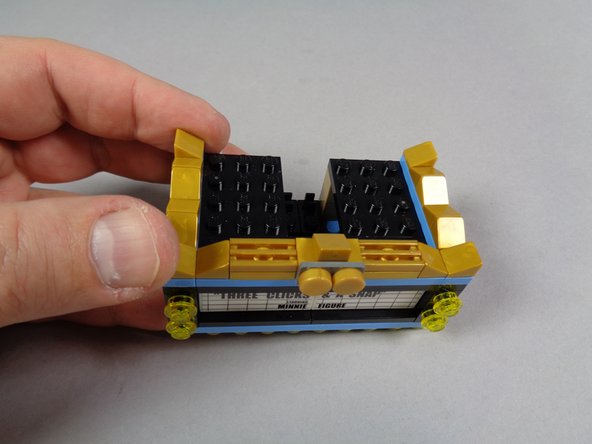
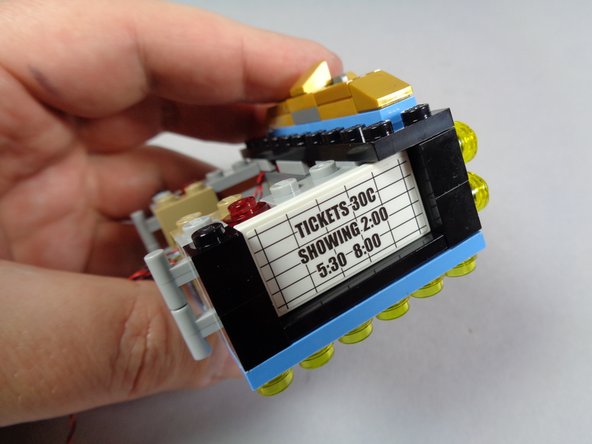
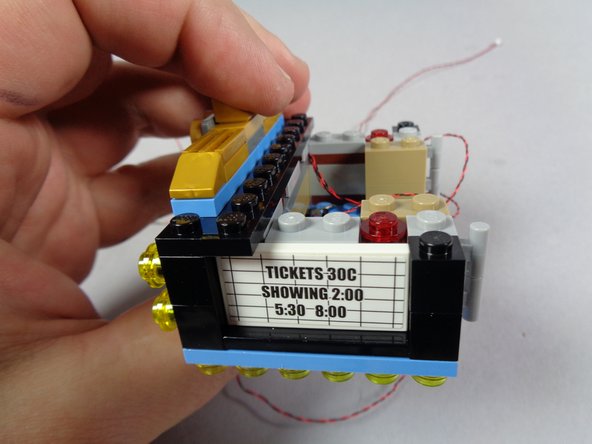
As shown in the photos for this step, carefully remove the top section of your marquee.
-
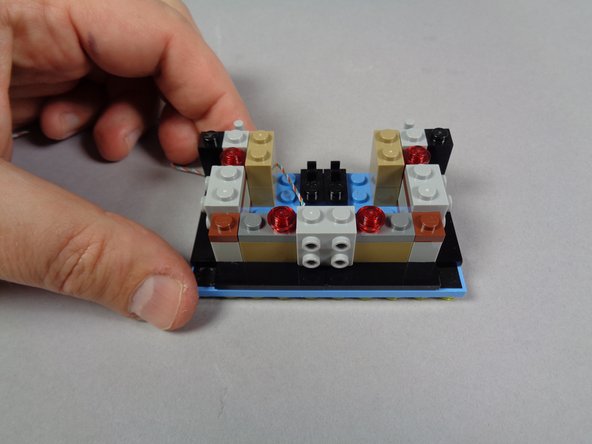
Make sure all four of the black plates with clips remain attached to your marquee base-- see the green arrows in the second photo, showing that none of the black plates are attached to the marquee top.
-
-
-
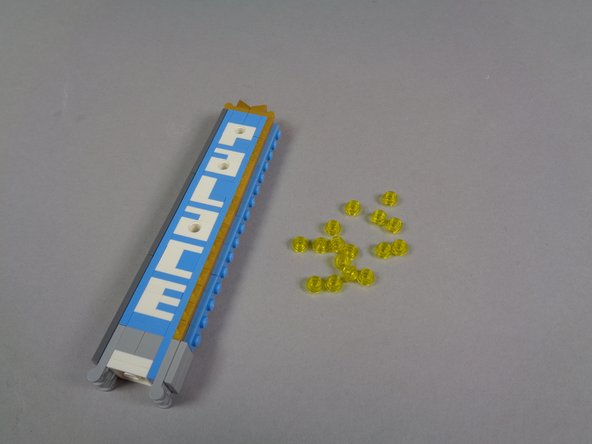
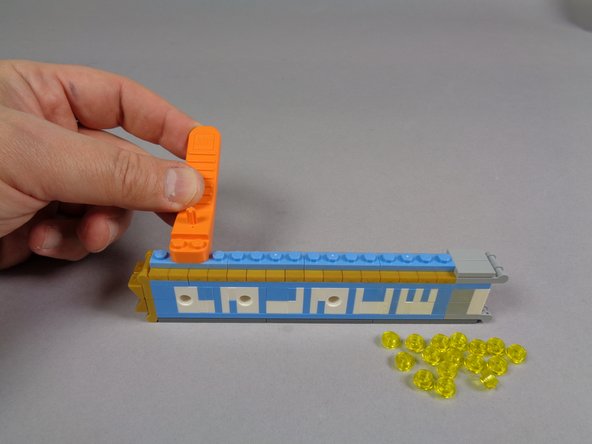
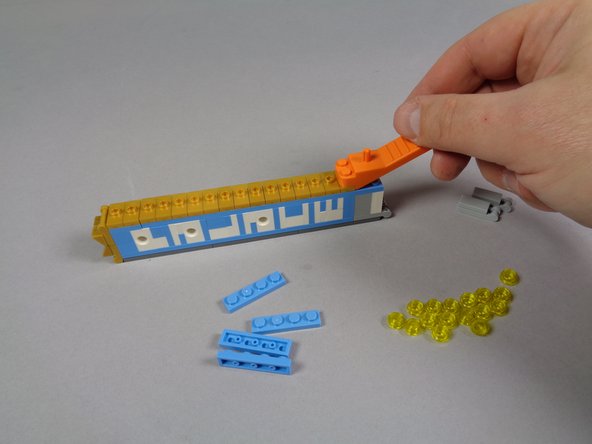
As shown in the first photo for this step, remove the 16 transparent yellow round 1x1 plates from the top of the marquee.
-
As shown in the second photo, use a brick separator to remove the light blue plates from on top of the gold jumpers.
-
When you are finished removing parts, your marquee should look like the third photo in this step.
-
-
-
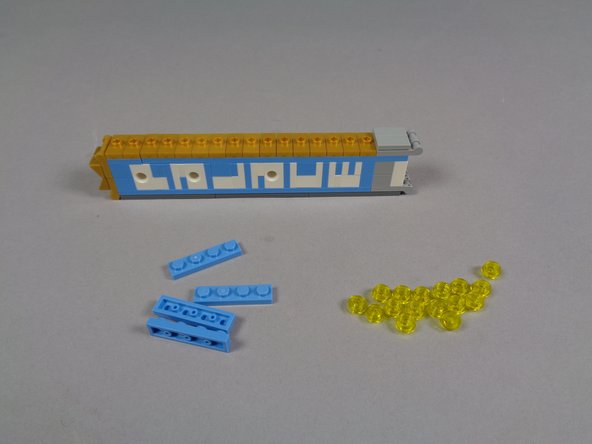
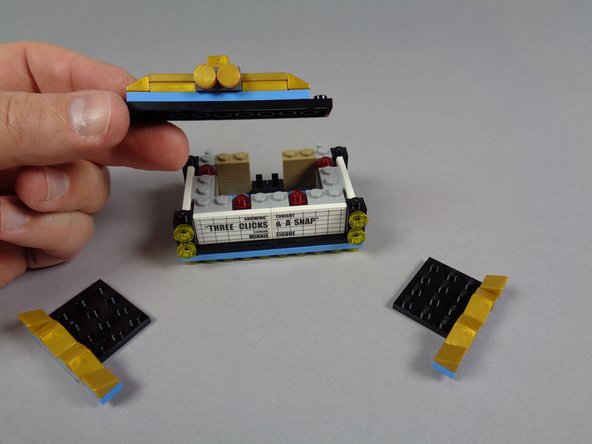
As shown in the first photo for this step, remove the two bottom gray plates and tiles from the front side of the marquee.
-
As shown in the second photo, use a brick separator to remove the 16 gold 1x2 jumper plates from the front of the marquee.
-
Your marquee should now look like the third photo of this step.
-
You can set aside the light blue and gold parts shown by the two red circles in the third photo. You will no longer need these.
-
-
-
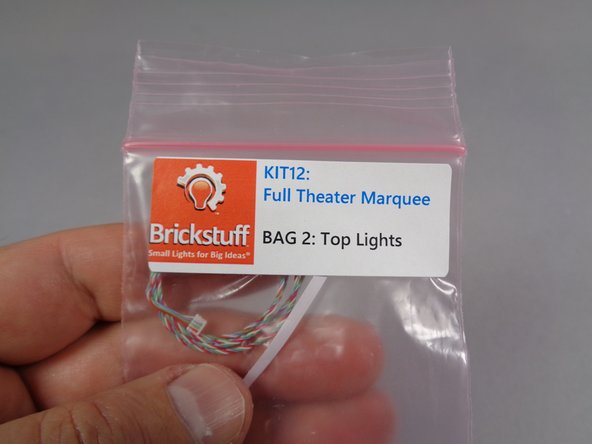
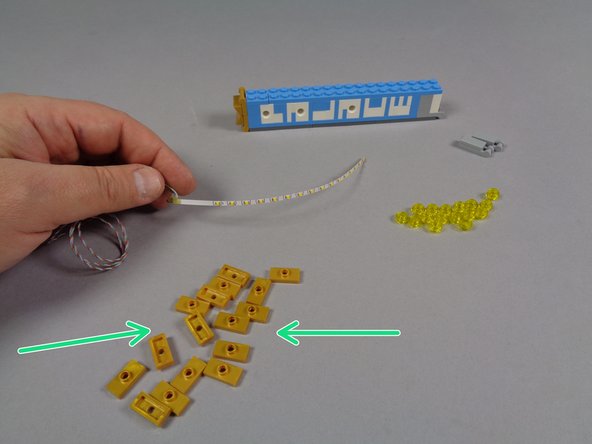
As shown in the first and second photos for this step, carefully remove the white light strip from Bag 2 ("Top Lights") in your kit.
-
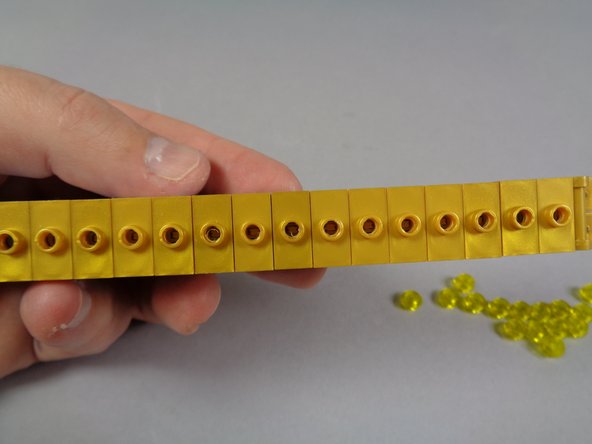
Also remove the 16 replacement gold 1x2 jumper plates from Bag 1 as shown by the green arrows in the second photo.
-
The replacement gold jumper plates included with your kit have holes drilled in their center.
-
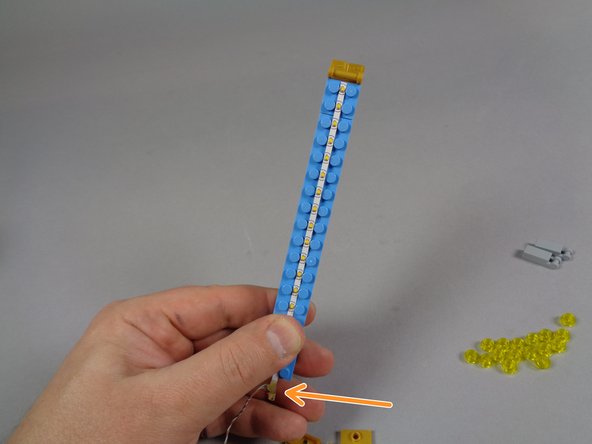
As shown in the third photo, carefully align the light strip so it runs down the middle of the long light blue plate. The light strip will fit between the studs.
-
As shown by the orange arrow in the third photo, mount the light strip so its wires are on the bottom end of the marquee.
-
The light strip and its wires are very fragile! Use extreme care when working with the light strip and wires. A damaged light strip cannot be repaired.
-
-
-
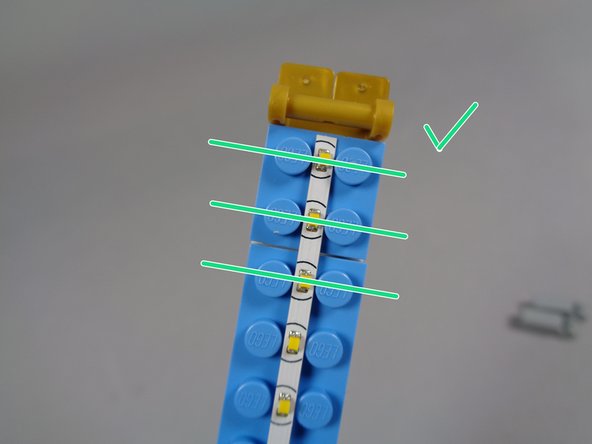
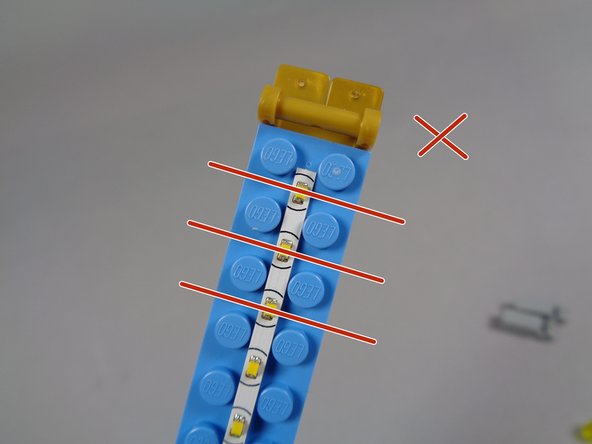
Make sure the lights on your light strip are correctly aligned as shown in the two photos for this step.
-
The first photo (green checkmark and lines) shows the correct alignment of the lights: each light should be matched up with a stud on the long blue plate.
-
The second photo (red "X" and lines) shows the incorrect alignment, with lights between studs, not aligned.
-
Before continuing, make sure your lights are aligned correctly as shown in the first photo.
-
-
-
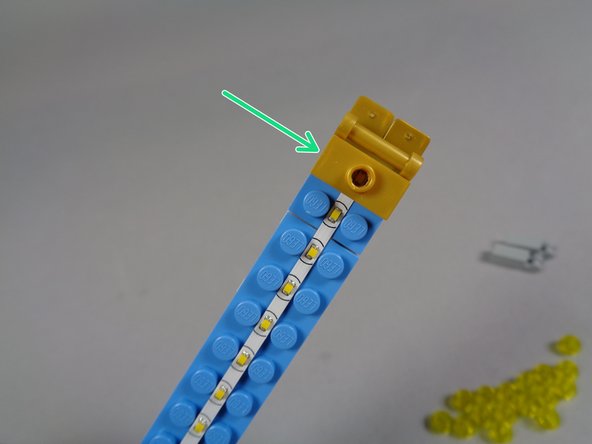
As shown by the green arrow in the first photo, take one of the 1x2 gold jumper plates included with your kit (the plates with holes drilled in the center), and use it to hold the light strip in place at the top of the marquee.
-
Make sure to use the replacement gold jumpers that came with your Brickstuff kit, not your original gold jumpers. The holes in the replacement jumpers are needed to let the light shine through.
-
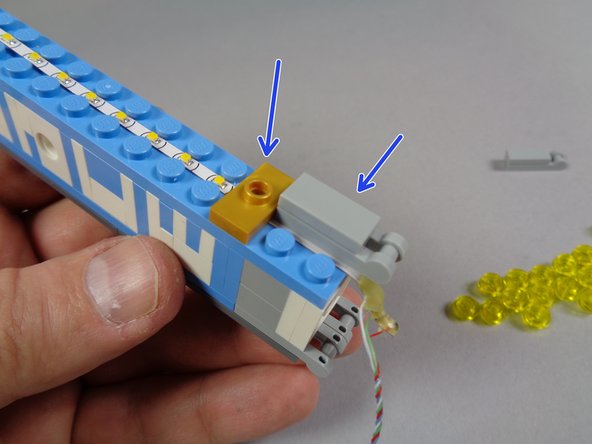
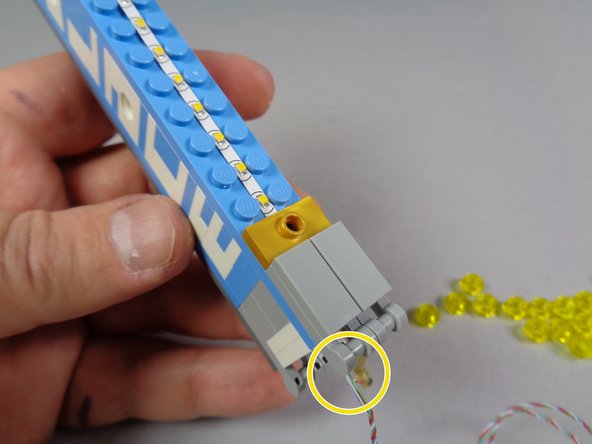
As shown by the blue arrows in the second photo, use another gold jumper with hole to secure the bottom end of the light strip, and carefully re-attach one of the two bottom gray plates with tile on top.
-
Make sure the gray parts sit on top of the light strip, and that neither the strip nor its wires pass on top of any LEGO studs.
-
As shown in the third photo, carefully re-attach the second gray plate with tile on top.
-
As shown by the yellow circle in the third photo, the wires for the light strip should now be extending out the bottom of the marquee top section, and everything should pass between, not on top of, any studs.
-
-
-
Re-attach the remaining 14 modified gold jumper plates (the ones that came with your Brickstuff kit). Make sure you are using the jumpers with the holes drilled in the center.
-
As shown in the first photo, when you have all jumpers re-attached, you should be able to see the lights on the strip through the holes.
-
If the light strip lights are not aligned with the holes in the jumpers, go back a few steps, remove the jumpers again, and re-position the light strip.
-
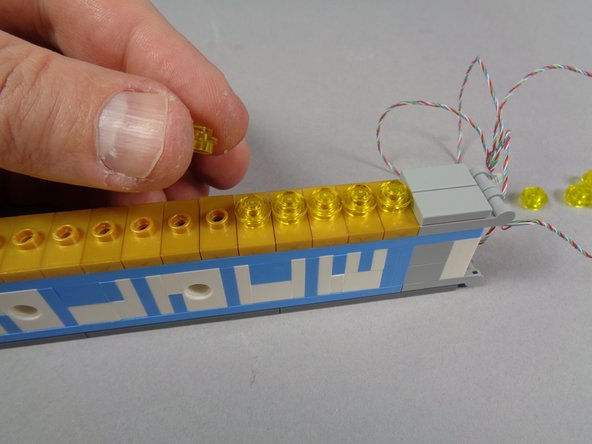
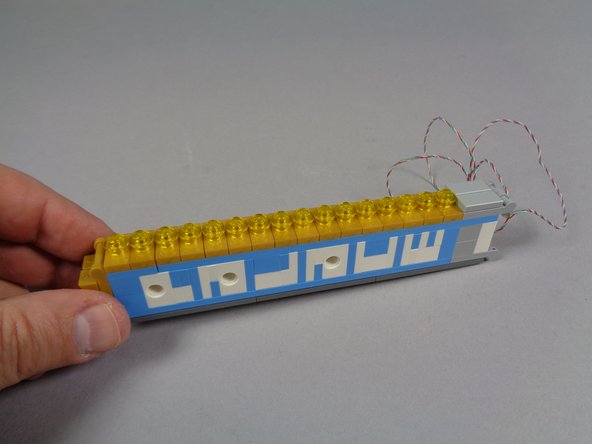
As shown in the second photo, re-attach the 16 round 1x1 transparent yellow plates on top of the gold jumpers.
-
The third photo shows what your marquee top should look like after mounting the light strip and re-attaching all parts.
-
-
-
As shown in the photos for this step, begin disassembling your marquee bottom section.
-
-
-
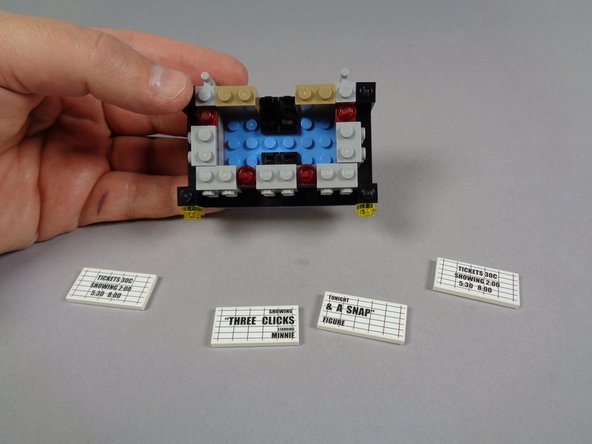
As shown in the first photo for this step, remove the two gray brackets from the front of the marquee.
-
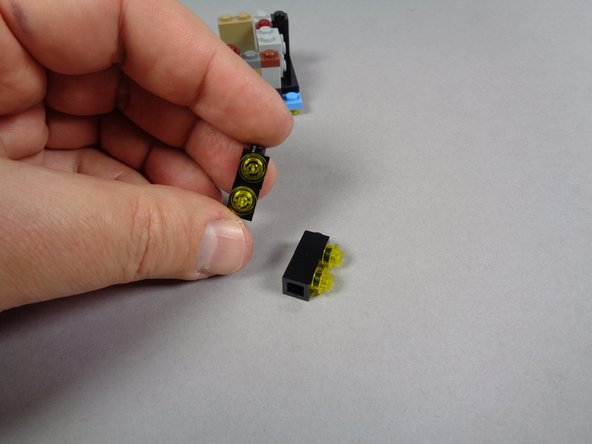
As shown in the second and third photos for this step, remove the four black 1x1 bricks from the front sides of the marquee, and remove the four transparent yellow round 1x1 plates from the bricks.
-
You can set the four black bricks aside-- you will not need them again.
-
-
-
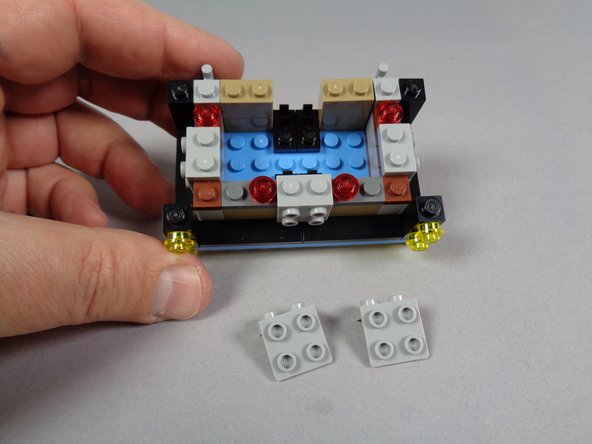
As shown in the photos for this step, continue disassembling the marquee bottom by removing the front and side inner sections.
-
-
-
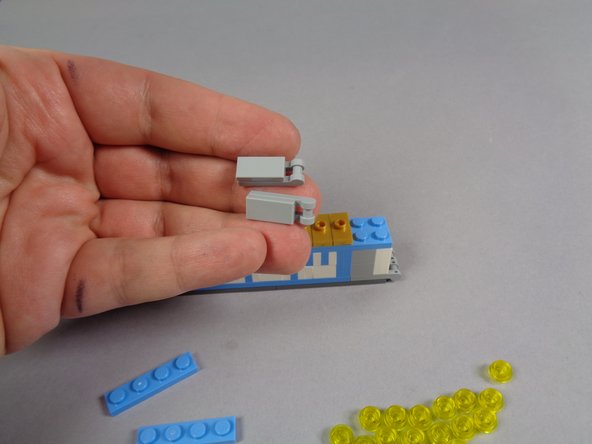
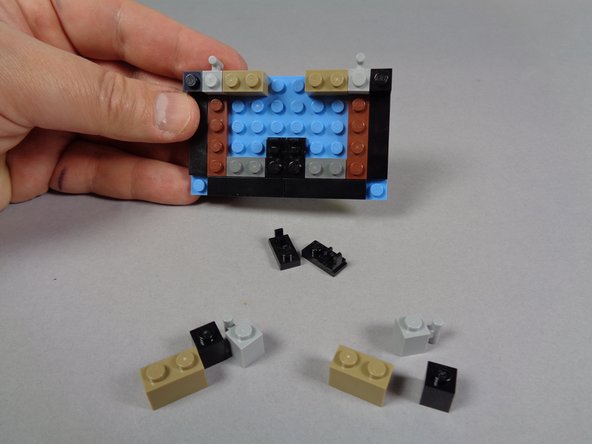
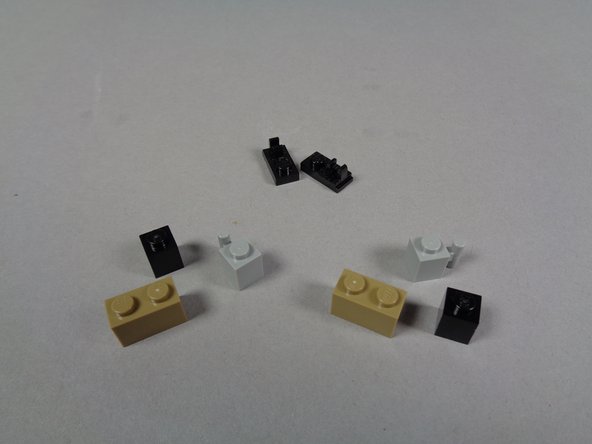
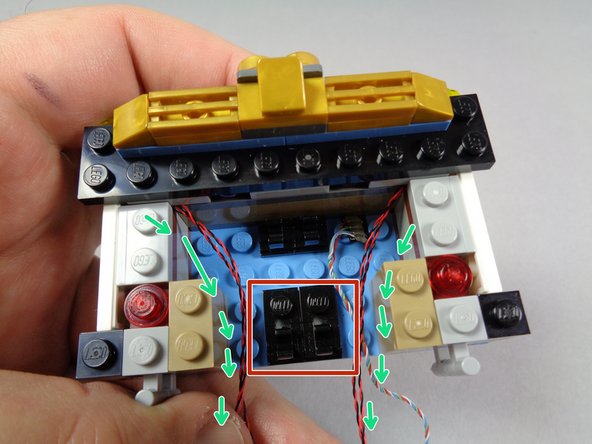
Finally, complete the disassembly of the bottom marquee section by removing these parts:
-
Two black plates with clips.
-
Two gray bricks with handles.
-
Two black 1x1 bricks.
-
Two dark tan 1x2 bricks.
-
These removed pieces are shown in the second photo for this step.
-
You can set aside the remaining bottom marquee section. You will not need it.
-
-
-
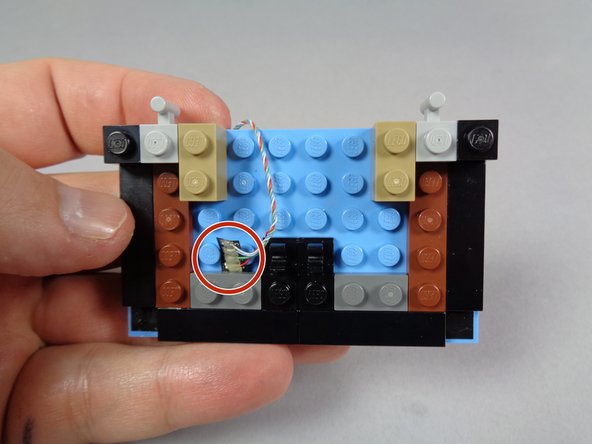
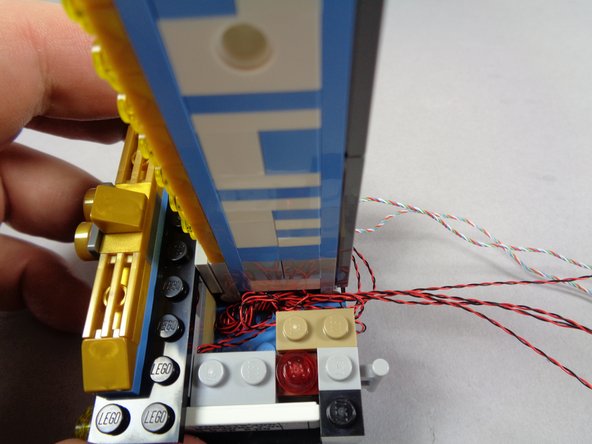
As shown in the first photo for this step, carefully remove the pre-lit replacement bottom marquee section from Bag 3.
-
The red circle in the second photo shows the wires connecting to the pre-lit bottom marquee section. Be very careful with these wires, and always make sure they do not run on top of any studs. A damaged marquee lower section cannot be repaired.
-
Do not under any circumstances remove any parts from the pre-lit marquee base. Most parts are glued in place and carefully positioned. Removing any part can cause damage to the lights or black light strip.
-
-
-
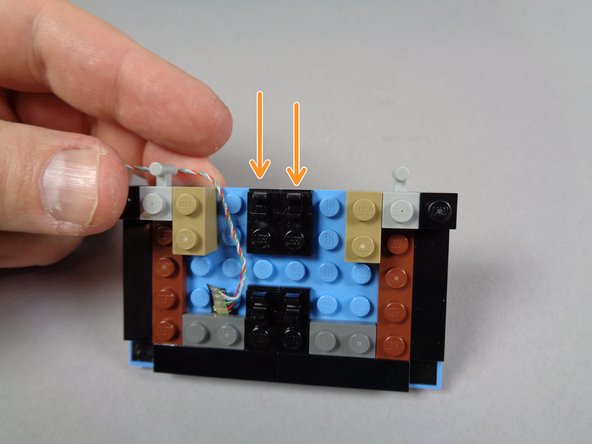
As shown by the two orange arrows in the first photo for this step, re-attach the two black plates with clips to the pre-lit marquee base.
-
Make sure the clips of the plates are pointing toward the back of the base (the top in the photo).
-
Make sure no parts are re-attached directly on top of any wires.
-
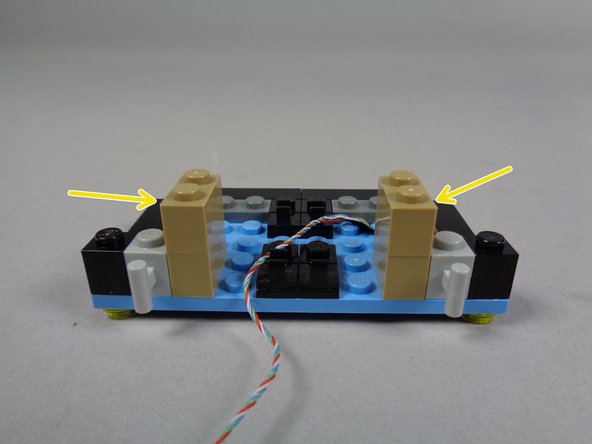
As shown by the two yellow arrows in the second photo, re-attach the two 1x2 dark tan bricks.
-
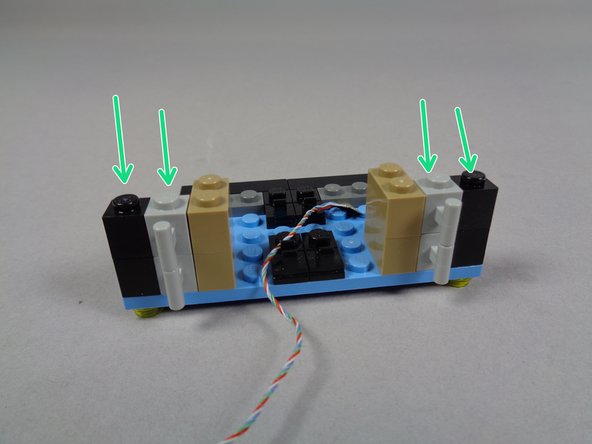
As shown by the four green arrows in the third photo, re-attach the two black bricks and the two gray bricks with handles.
-
-
-
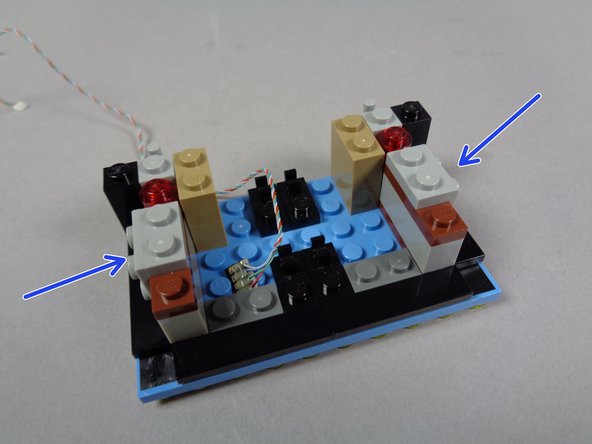
As shown by the two blue arrows in the first photo, re-attach the two inner side sections of the marquee base.
-
As shown in the second photo, re-attach the inner center section of the marquee base.
-
After following these steps, your marquee base should look like the third photo of this step.
-
-
-
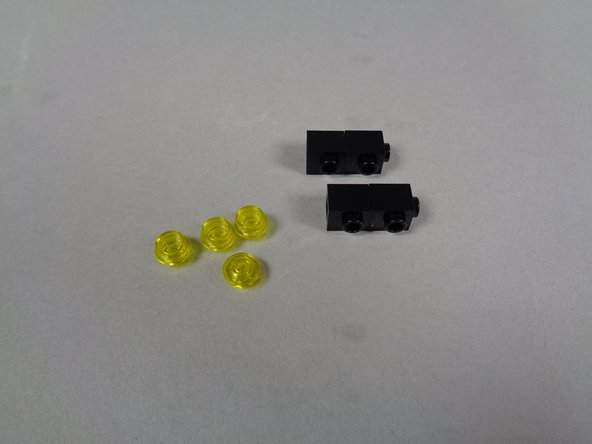
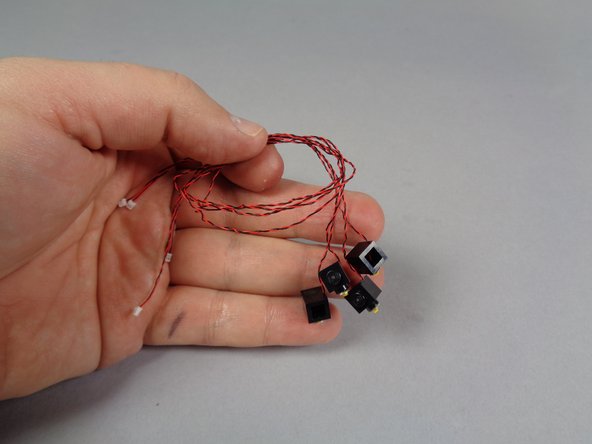
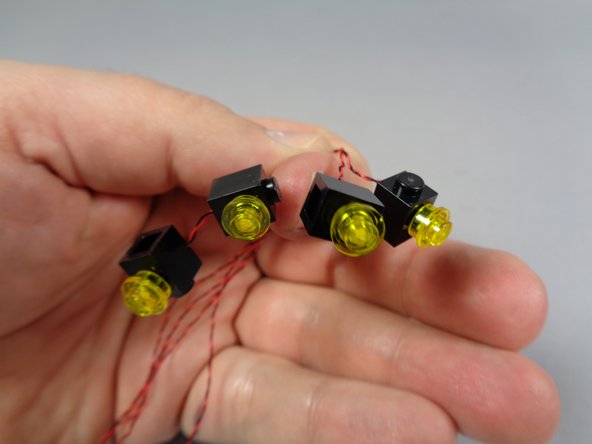
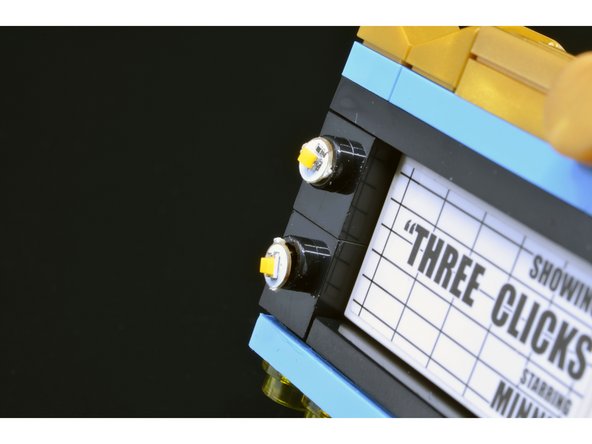
Remove the four pre-lit replacement front lights from Bag 1. These will look like the parts shown in the second photo for this step.
-
As shown in the third photo, take the four transparent yellow round plates you removed earlier and re-attach them to the four pre-lit front lights.
-
It is ok to press the transparent yellow plates on top of the lights. Just make sure the light boards are sitting flat on top of the black studs of each brick before attaching the transparent yellow round plate.
-
-
-
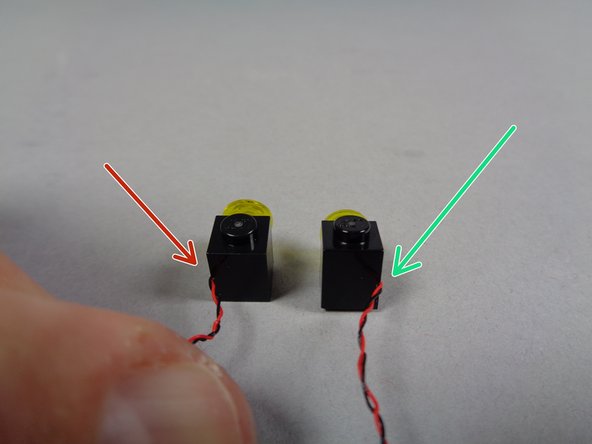
As shown by the red and green arrows in the first photo for this step, there are two different configurations of front light:
-
Black brick with the wire coming out the left rear (red arrow in the first photo).
-
Black brick with the wire coming out the right rear (green arrow in the first photo).
-
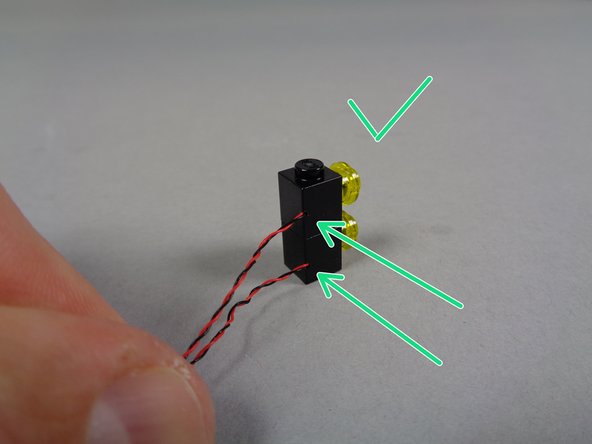
As shown in the second photo, stack the bricks in groups of two so each stack has wires coming out the same side of the brick.
-
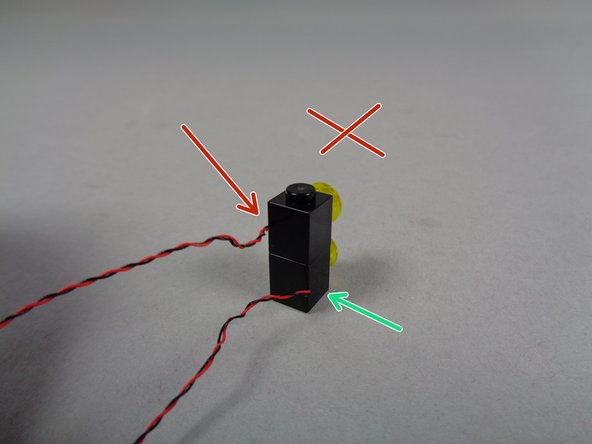
The third photo shows the incorrect stacking of bricks, with one wire coming out the left and the other coming out the right side.
-
After stacking, you should have one stack of two bricks with both wires coming out the left and the other stack with both wires coming out the right side.
-
-
-
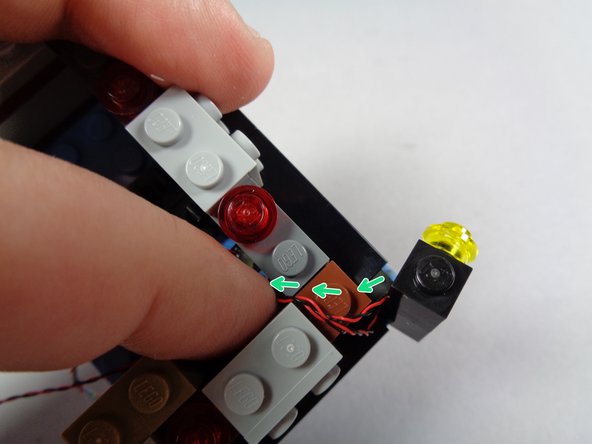
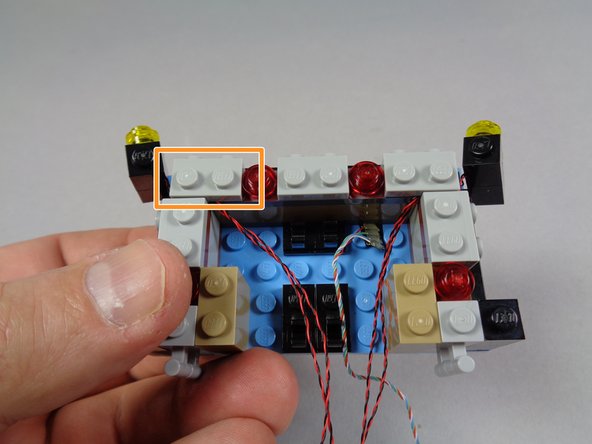
As shown in the first photo for this step, position the light stack with wires coming out the left side on the right side of the marquee bottom.
-
The wires should point toward the inside of the marquee bottom as shown by the green arrows in the first photo.
-
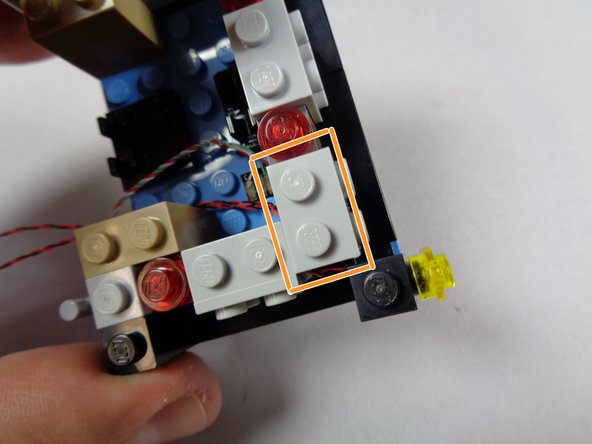
As shown by the orange rectangle in the second photo, carefully re-attach the gray bracket so the wires pass underneath. The bracket should hold the wires, and the two black bricks, in place.
-
Make sure the light wires pass between, not on top of, any studs.
-
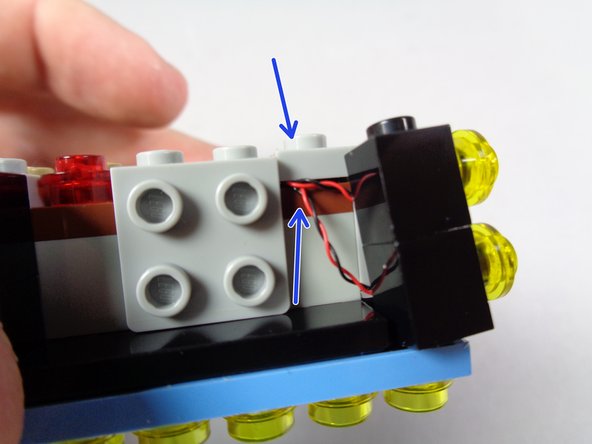
As shown by the blue arrows in the third photo, it is ok to leave a little extra slack in the wires, so the black bricks can move a small amount.
-
-
-
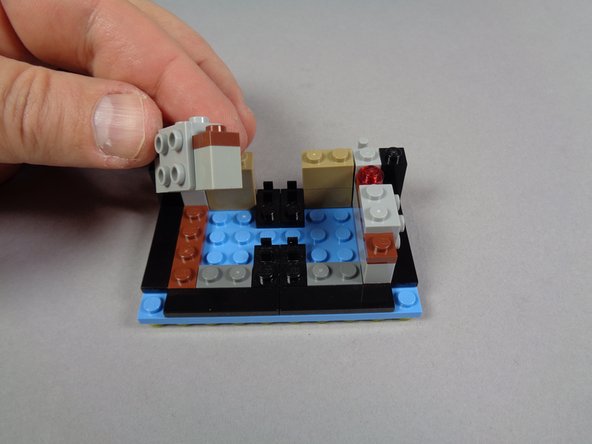
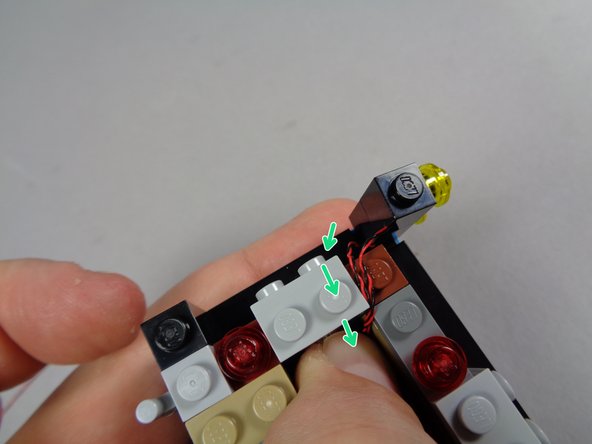
As shown by the green arrows in the first photo for this step, position the brick stack with wires coming out the right side on the left side of the marquee base.
-
As shown by the orange rectangle in the second photo, carefully re-attach the gray bracket so the wires pass underneath. The bracket should hold the wires, and the two black bricks, in place.
-
Make sure the light wires pass between, not on top of, any studs.
-
The third photo shows what your marquee base should look like after mounting both stacks of front lights.
-
As shown in the third photo, it is ok if the stacks are a little bit loose. They will be held firmly in place in the next step.
-
-
-
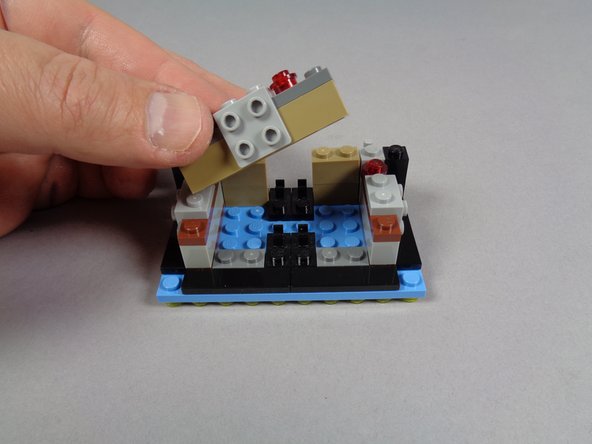
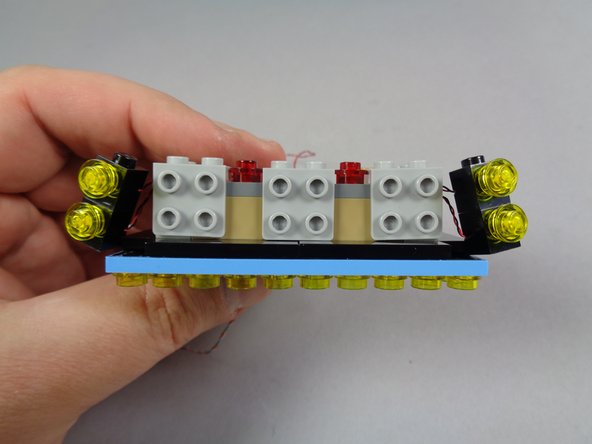
Begin re-assembling the marquee base buy replacing the top front plate as shown in the first photo for this step.
-
As shown by the orange arrows in the second photo, position the two stacks of front lights so they are held in place by the top plate.
-
Because of the pre-mounted lights on the bottom side of the marquee base, there will not be any support for the bottom brick stack on either side of the front. This is ok, as the stacks should be held in place by the top plate.
-
-
-
As shown in the three photos for this step, re-attach the two front and two side tiles on the marquee.
-
Because of the small gap behind the tiles, the light wires for the four front lights should be completely hidden.
-
-
-
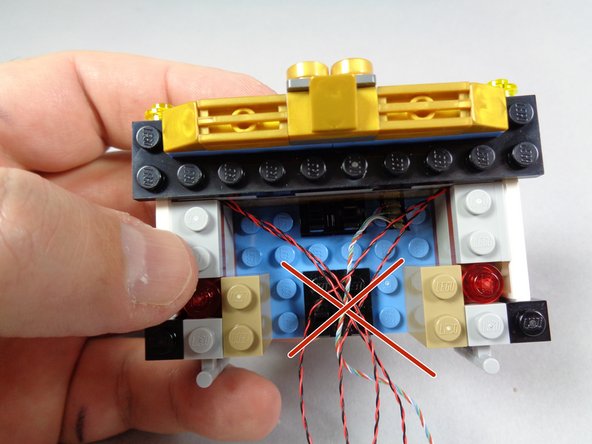
Before re-attaching the top marquee section, verify that all light wires pass out the back of the marquee without passing over the black plates with clips.
-
The green arrows in the first photo for this step show the correct way for the wires to pass, and the red square shows the area to keep wires out.
-
The third photo shows how the wires should NOT be passed-- the red "X" shows the wires crossing on top of the black plates with clip.
-
-
-
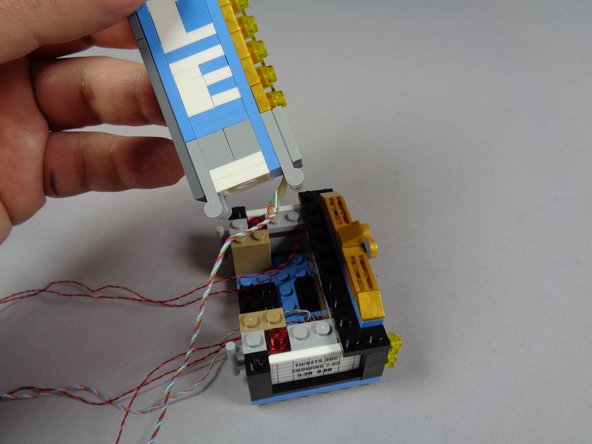
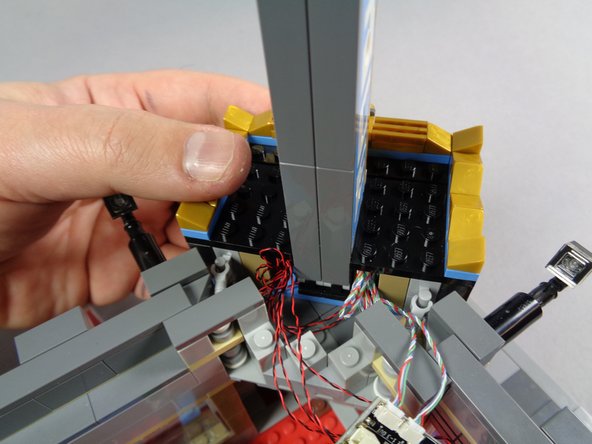
Next you will carefully re-attach the marquee top.
-
The most important part of this step is to make sure that no wires get pinched under the top (caught in the black plates underneath) when re-attaching the top.
-
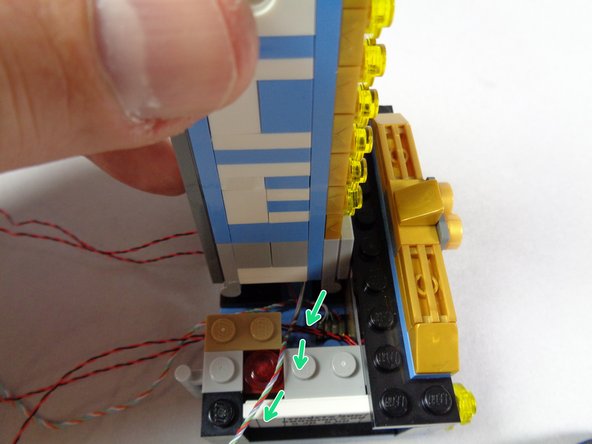
As shown by the green arrows in the second photo for this step, make sure the top marquee light wire is off to one side when re-attaching-- this will prevent it from getting pinched in the clips below.
-
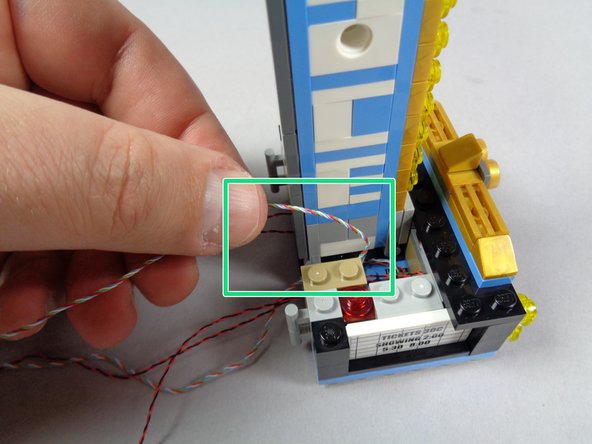
Once you are sure all wires are clear of the clips, firmly press down to re-attach the marquee top. The green rectangle in the third photo shows the top marquee light wire passing out the side, free of the black plates and clips underneath.
-
-
-
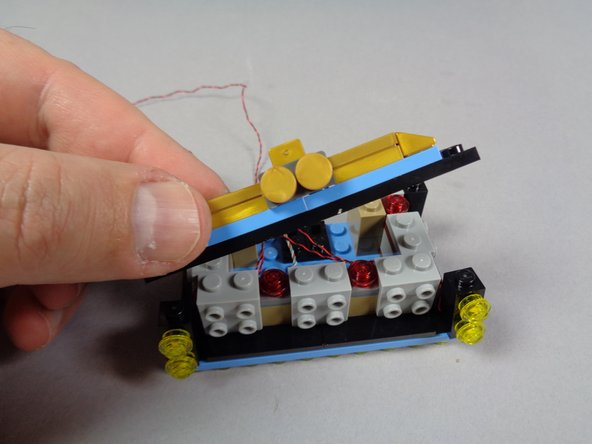
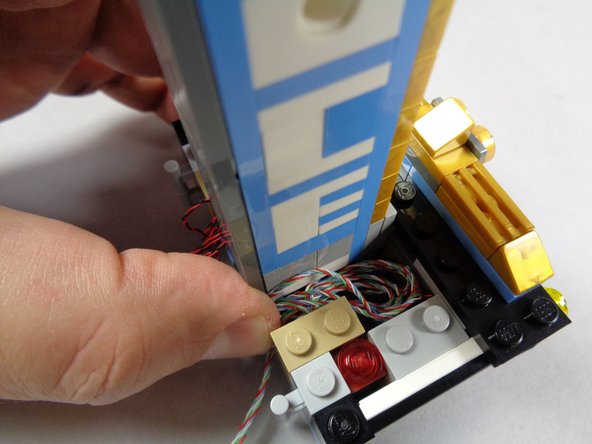
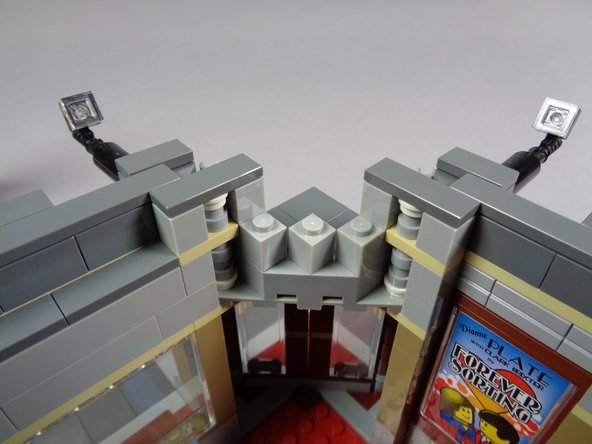
The wires for the marquee light sections may be longer than needed for your setup. If so, you can coil up the excess wire on either side of the top marquee section, inside the base, before re-attaching the top side sections.
-
The first and second photos for this step show excess wire being coiled up in the open space inside the base.
-
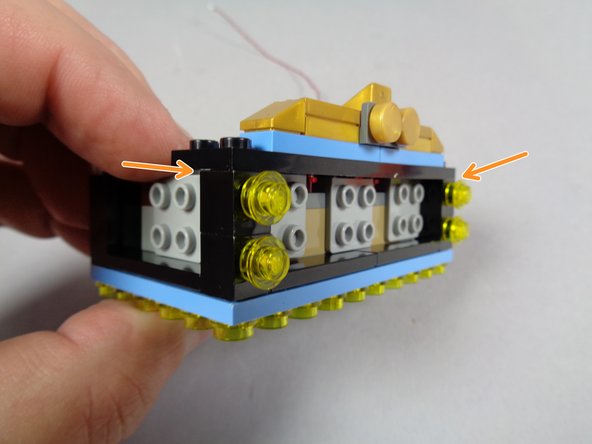
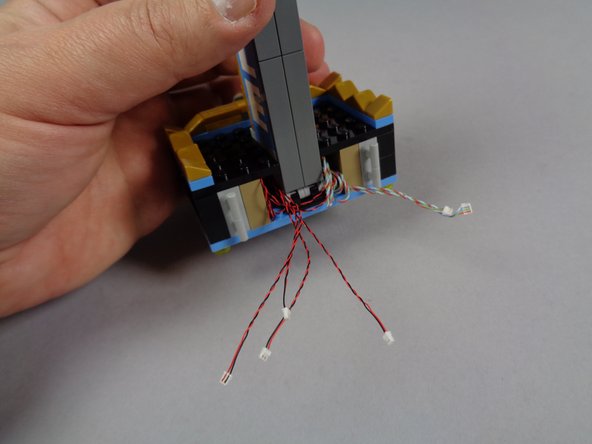
The third photo shows the two top side plates re-attached, and the shorter wires exiting out the back of the marquee.
-
When re-attaching the left and right side top plates, be careful not to pinch any wires.
-
As shown in the third photo, all wires should pass through the back of the marquee without being pinched under or by any LEGO parts.
-
-
-
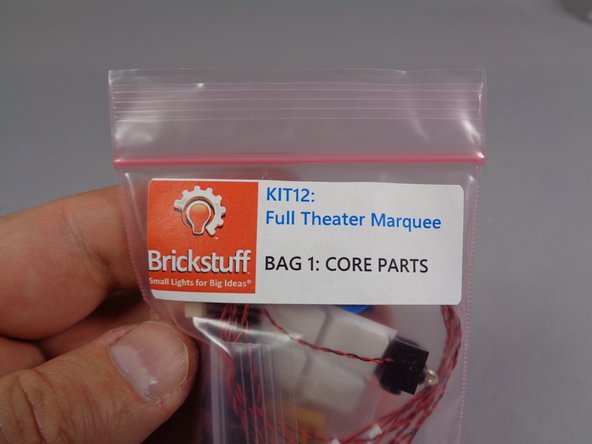
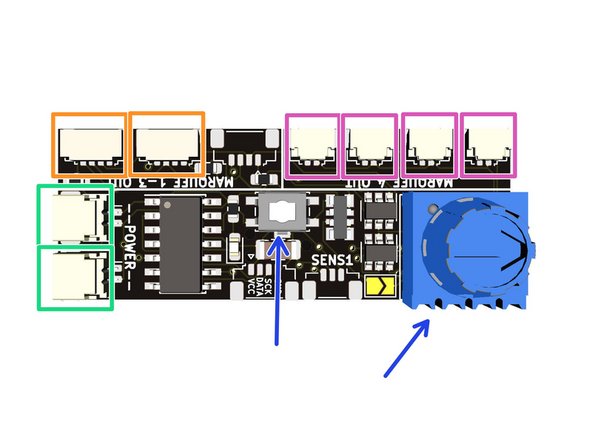
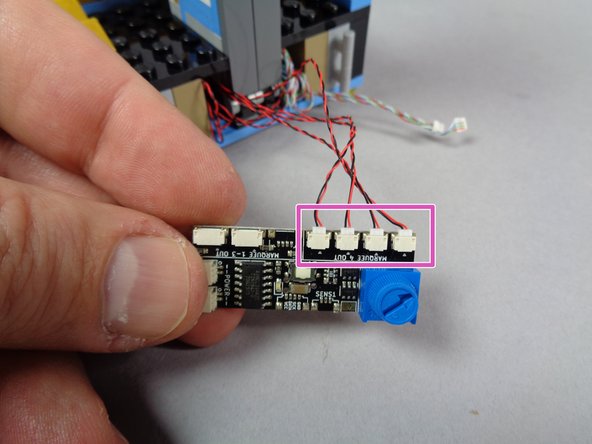
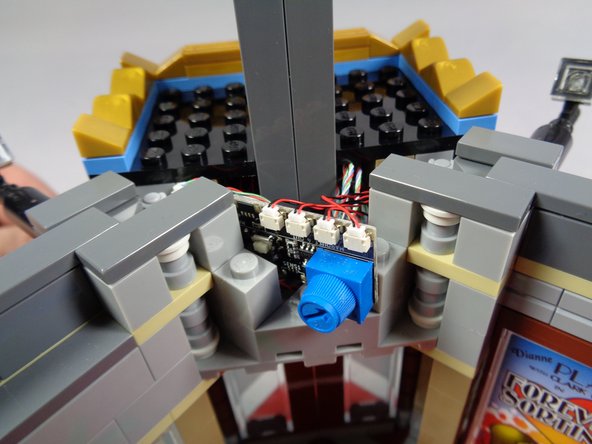
Included inside Bag 1 of your light kit is a specialized lighting effect controller. The first photo of this step shows its major connections and controls:
-
Green boxes show power inputs. Either or both plugs can be used for power input or output (to connect additional lights, for example).
-
Orange boxes show marquee connection plugs.
-
Pink boxes show the four plugs to connect the four front lights.
-
Blue arrows show the speed/brightness control dial and the mode select button.
-
As shown by the pink rectangle in the second photo, connect the four front lights to the four small plugs on the effect controller. It does not matter which light is connected to which plug.
-
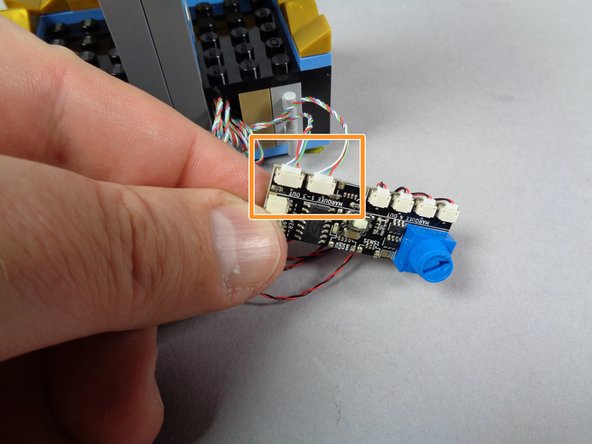
As shown by the orange rectangle in the third photo, connect the bottom and top marquee lights to the two marquee connection plugs. It does not matter which section (top/bottom) connects to which plug.
-
-
-
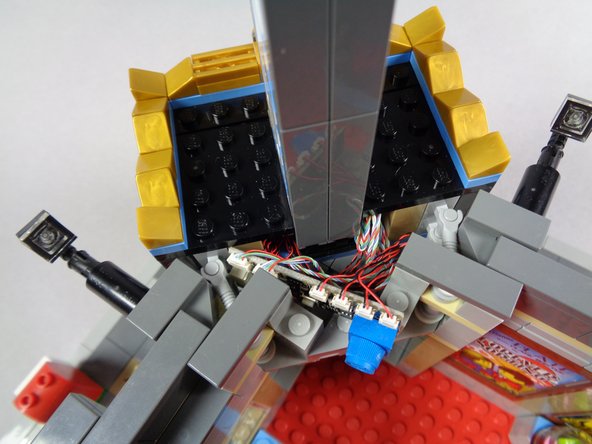
As shown in the first photo for this step, now you can re-attach your marquee to your Palace Cinema.
-
The second photo shows some bricks having been removed before re-attaching the marquee. This is up to you, but can make it easier to re-attach by giving the wires space to pass through.
-
-
-
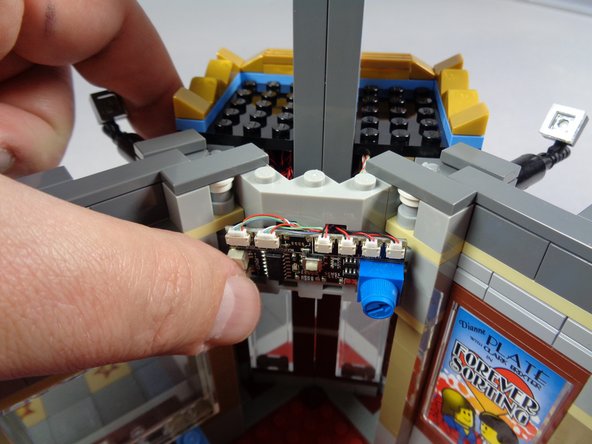
It's up to you how you want to mount the effect controller inside your Palace Cinema. The photos in this step show some different ideas, but there is no one "right" way to attach the controller.
-
One factor in determining where you will mount your controller is whether you plan to change the speed of the marquee over time. If so, you'll want to put the controller where you will have access to the dial.
-
The third photo shows the controller mounted to the wall of the Palace Cinema above the door. You can use the large sticky squares included with your light kit to attach the controller to an internal wall.
-
-
-
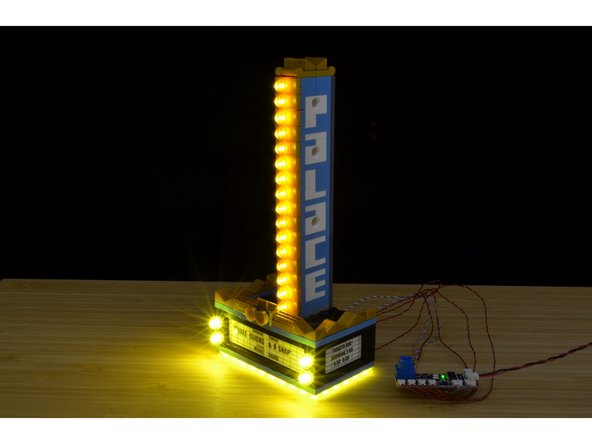
Congratulations! Your marquee setup is now complete. You can connect your marquee to a Brickstuff power source (sold separately), and the marquee should turn on and animate as soon as power is applied.
-
You can adjust the speed of the marquee by turning the blue dial on the effect controller.
-
You can switch between having the four front lights flash or not flash by quickly pressing and releasing the white button on the controller.
-
You can use the same method to change the direction of the marquee (scrolling up or down).
-
To change the brightness of all lights in the marquee:
-
Press and hold the button on the effect controller for 1-2 seconds, then release.
-
Turn the blue dial to adjust brightness.
-
When you have set your desired brightness, press and hold the button on the effect controller for 1-2 seconds again, then release. Animation should resume. You may need to adjust the dial again to set your desired speed.
-
-
-
Thank you very much for purchasing this Brickstuff product. We hope you enjoy it as much as we enjoyed making it for you.
-
If you have any questions or trouble, please contact us at support(at)brickstuff.com.
-