
Tools
Parts
-
-
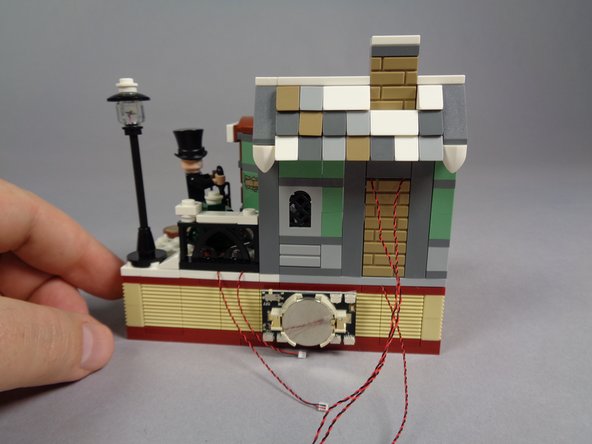
Begin by removing the battery, battery holder board, and two sticky squares from the "Core Parts" bag as shown in the first photo.
-
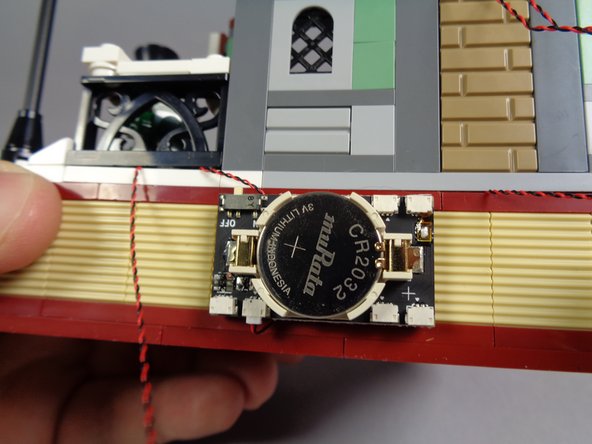
As shown by the red arrows in the second photo, carefully insert the battery into its holder making sure the two gold fingers of the battery holder sit on top of the battery.
-
As shown by the blue rectangle in the third photo, the two gold fingers should sit on top of the battery when it is pressed all the way in to the holder.
-
As shown by the green arrow in the third photo, make sure the power switch is in the OFF position.
-
-
-
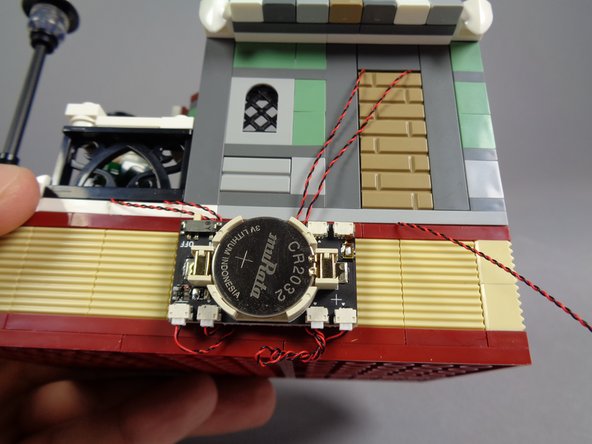
Attach the two sticky squares to the back side of the battery holder board, and attach it to the lower rear section of your model as shown in the photos.
-
Make sure the battery holder board is attached with its power switch at the top, as shown by the red circles.
-
-
-
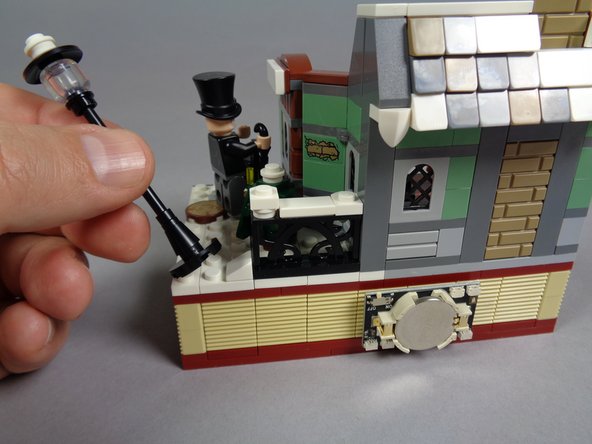
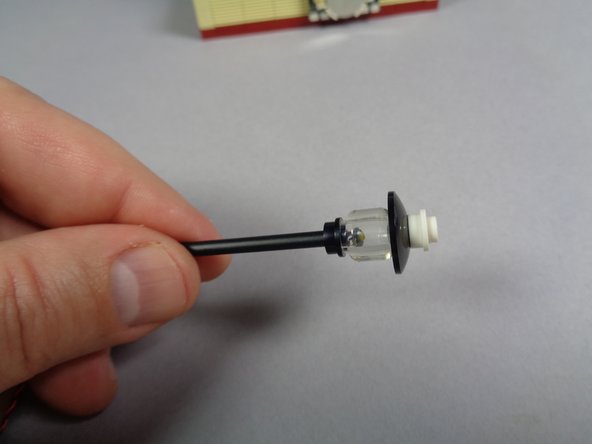
As shown in the first photo, carefully remove the black lamp post including its base.
-
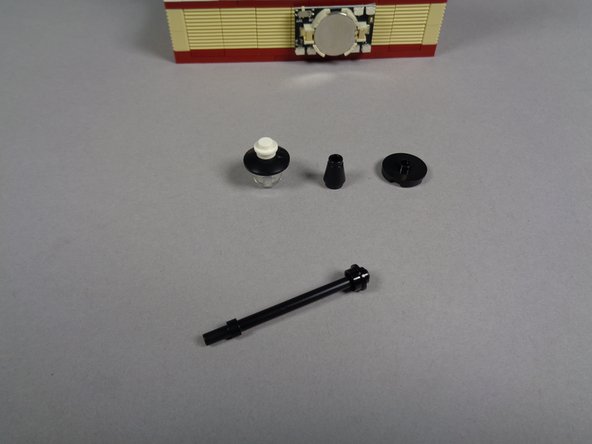
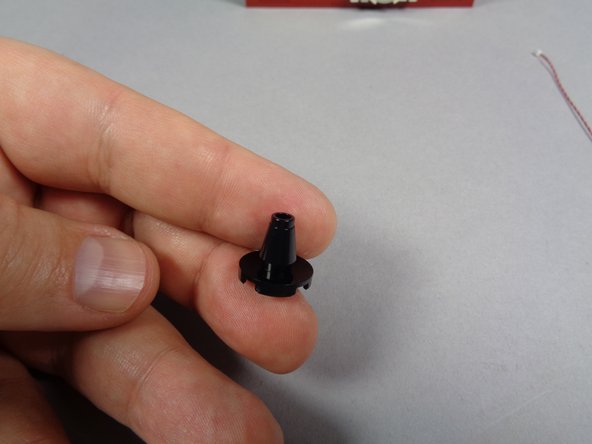
Remove/separate the lamp post pieces as shown in the second photo.
-
-
-
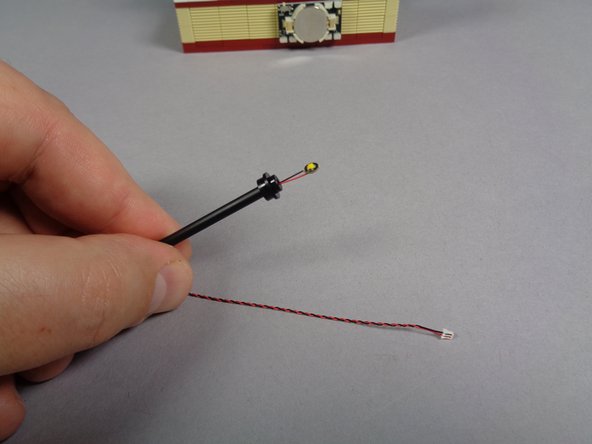
Remove the replacement lamp post section from the bag labeled "Orange Lights."
-
As shown in the second photo, carefully bend the round LED light board so it sits flat at the top section of the tubing.
-
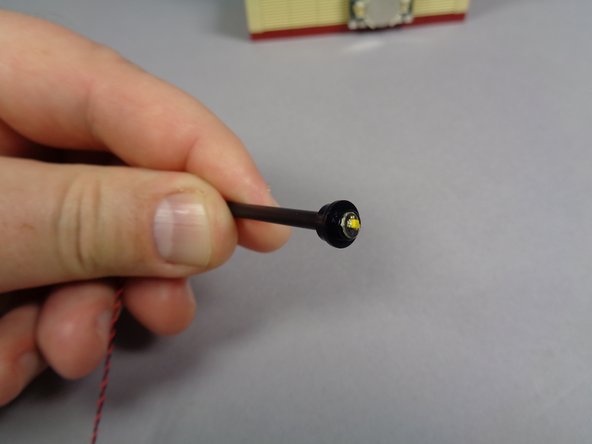
As shown in the third photo, re-attach the lamp post's top section.
-
-
-
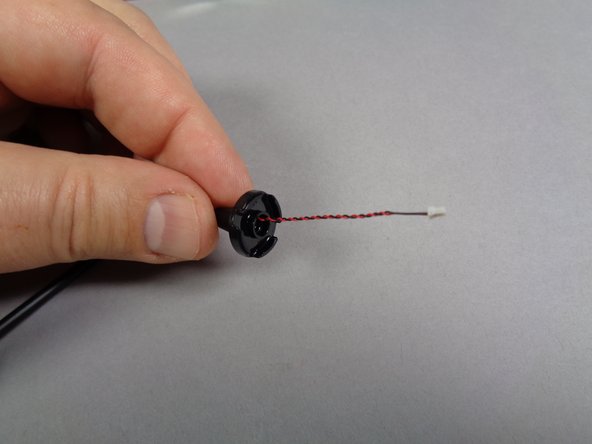
As shown in the first photo, re-assemble the two pieces that form the base of the lamp post.
-
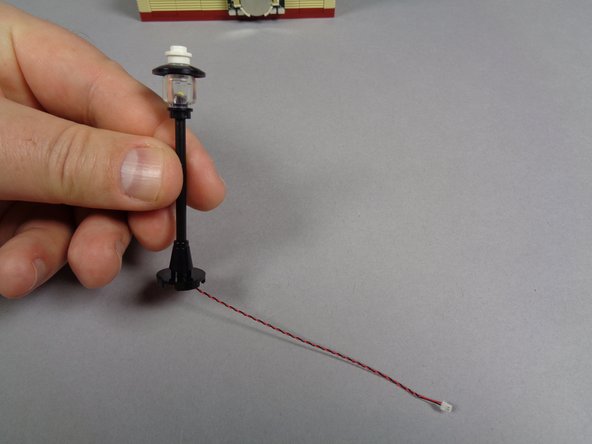
As shown in the second photo, carefully feed the LED light plug and wire through the center of the base, and re-attach to the lamp post pole as shown in the third photo.
-
-
-
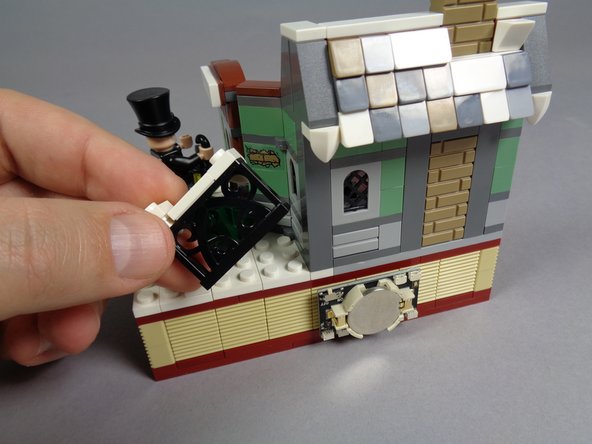
As shown in the first photo, remove the black gate.
-
As shown in the second photo, re-attach the lamp post to the base with the wire for the LED light passing toward the battery pack.
-
Make sure the LED light wires pass between, not on top of, studs. Wires can become pinched and damaged if they pass on top of studs.
-
-
-
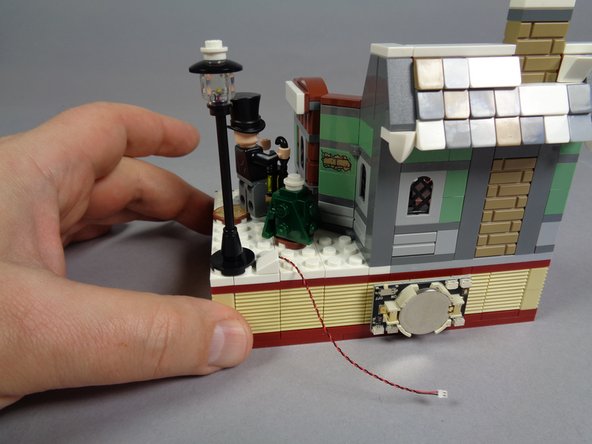
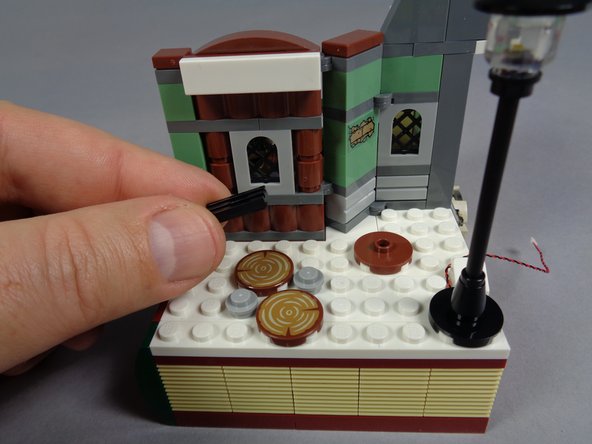
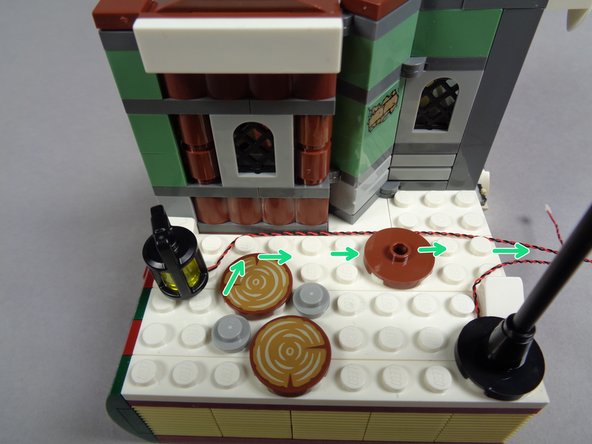
As shown in the first photo, remove the small tree.
-
As shown in the second photo, remove the lantern.
-
As shown in the third photo, remove the black grille piece.
-
-
-
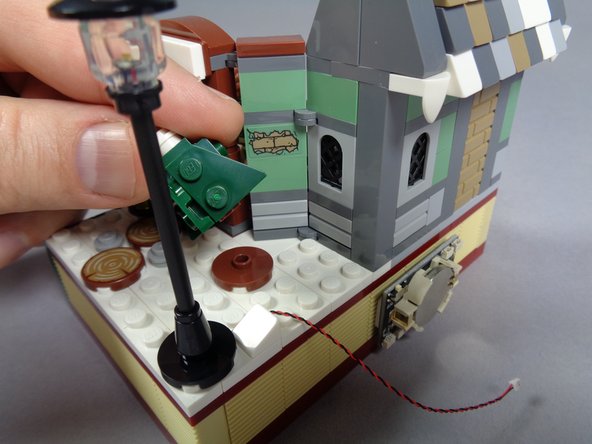
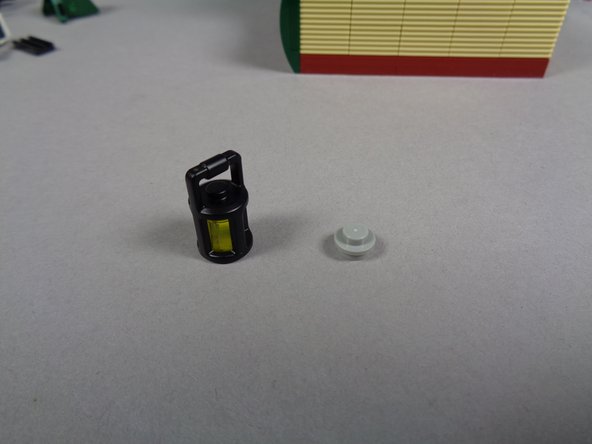
As shown in the first photo, remove the light bluish gray 1x1 round plate from the bottom of the lantern.
-
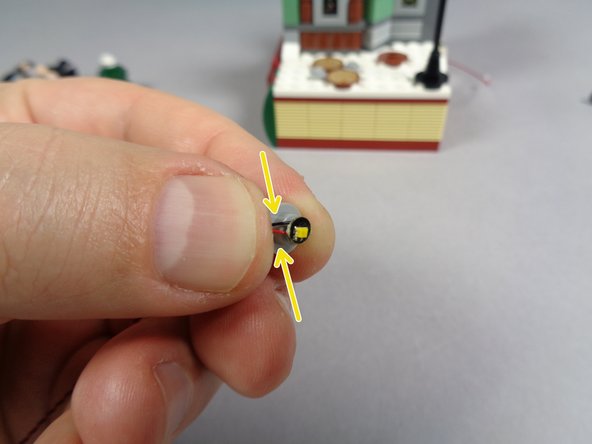
Take the LED light from the "Yellow Lights" Bag and place it on top of the stud of the round 1x1 plate as shown in the second photo.
-
As shown by the yellow arrows in the second photo, carefully bend the LED light wire around the side of the stud with your fingernail.
-
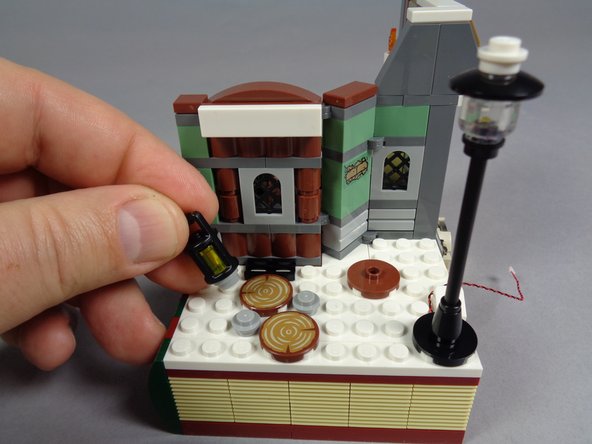
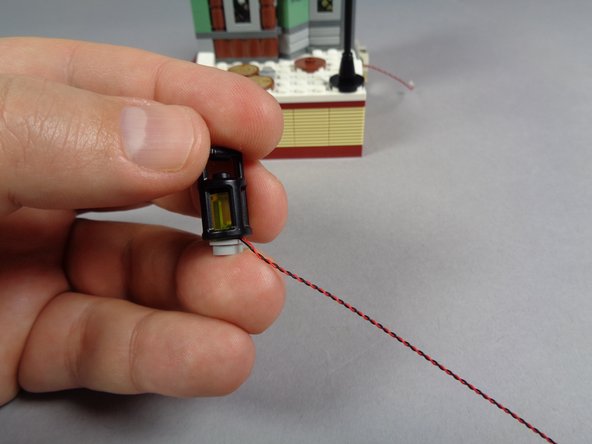
As shown int he third photo, carefully re-attach the lantern on top of the round plate and LED light.
-
-
-
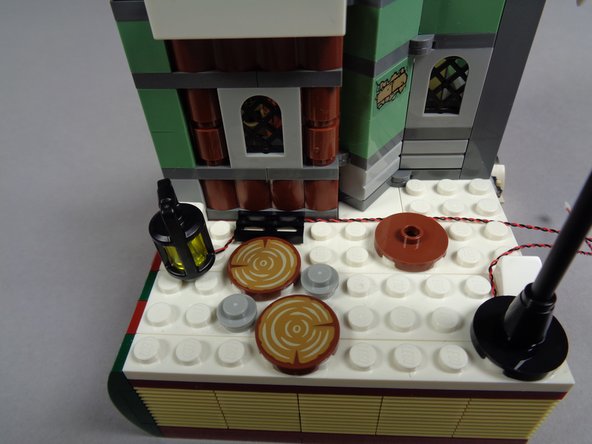
As shown in the first photo, re-attach the lantern to the white base, making sure its wires run up against the house and toward the back as shown by the green arrows.
-
Make sure the light wires run between, not on top of, studs.
-
As shown in the second photo, re-attach the black grille piece on top of the wire. This should hold it in place.
-
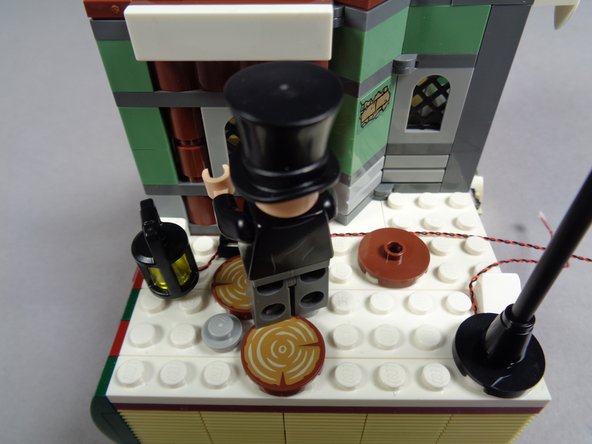
As shown in the third photo, put Mr. Scrooge back in his place.
-
Also, it's not shown in this step, but you can re-attach the little tree.
-
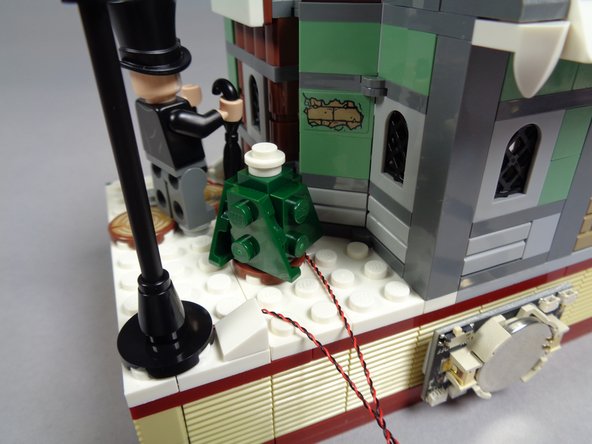
It is also possible to mount the lantern with Scrooge holding it in his hand. Just make sure you carefully run the light wires down to the base and toward the back.
-
-
-
As shown in the first and second photos-- and especially by the orange arrows in the second photo-- position the light wires for the lamp post and lantern so they pass toward the back and that they pass between, not on top of, studs.
-
As shown in the third photo, re-attach the black gate.
-
-
-
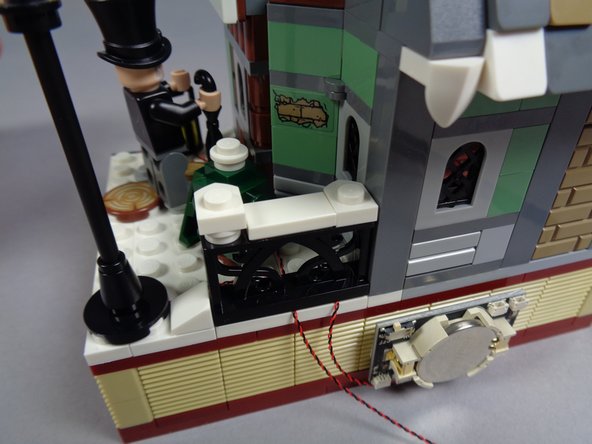
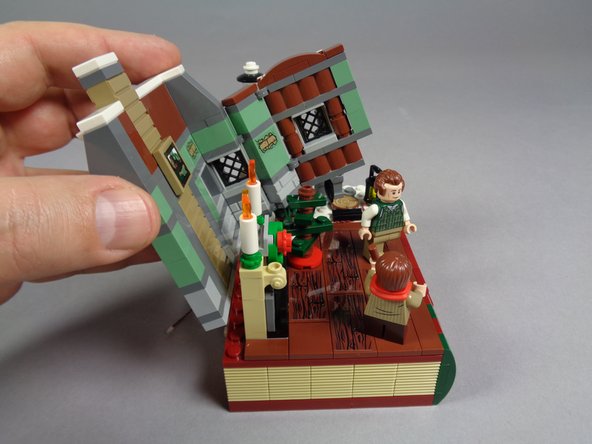
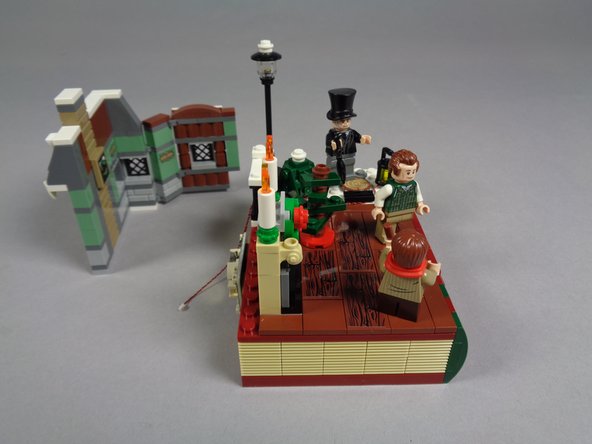
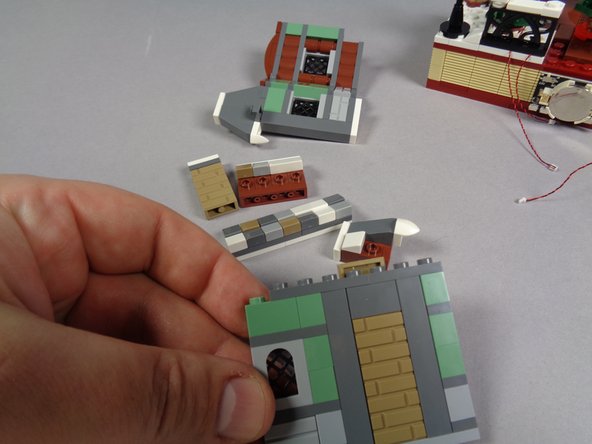
As shown in the photos for this step, you should be able to bend and then lift off the entire wall section of the house.
-
-
-
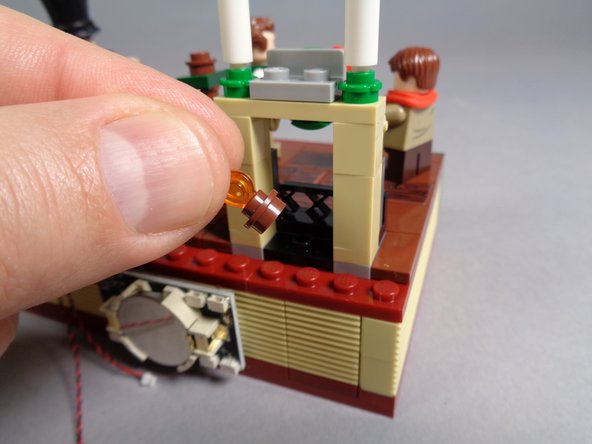
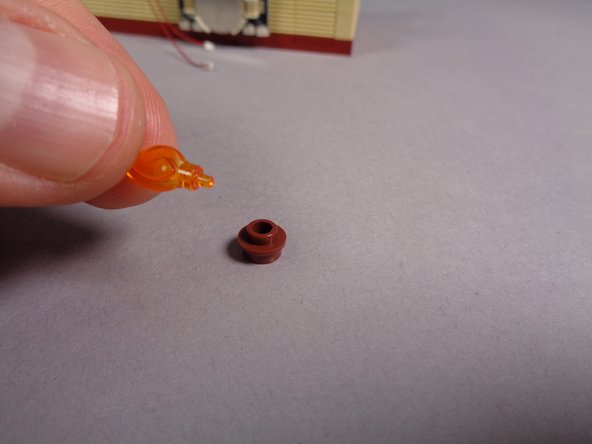
As shown in the first photo, remove the fireplace flame assembly from inside the fireplace.
-
As shown in the second photo, remove the transparent orange flame from the round brown 1x1 plate.
-
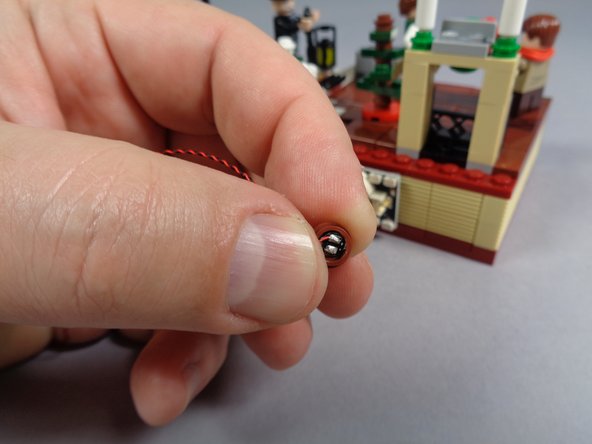
As shown in the third photo, take the orange Pico LED from the bag labeled "Orange Lights" and press it into the bottom of the round brown 1x1 plate.
-
-
-
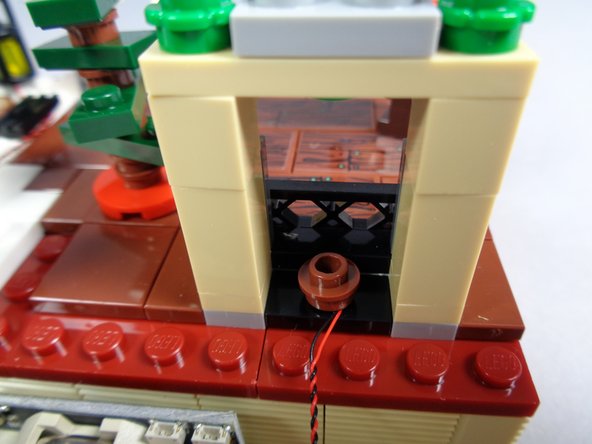
As shown in the first photo, carefully press the round brown 1x1 plate back into place in the fireplace. The orange Pico LED light should be underneath the brown plate.
-
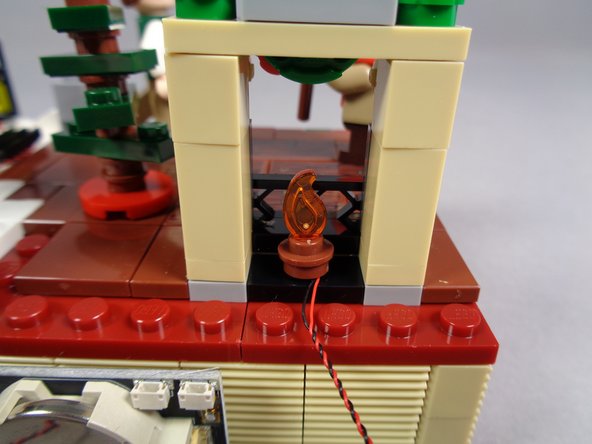
Take the small flame with the tip clipped off from the bag labeled "Core Parts" and press it into the top of the round brown plate as shown in the second and third photos.
-
-
-
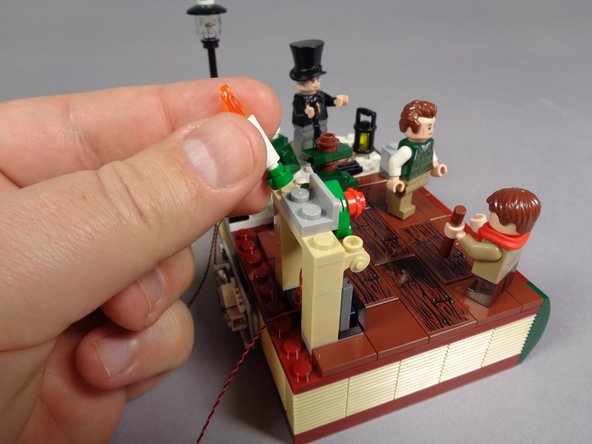
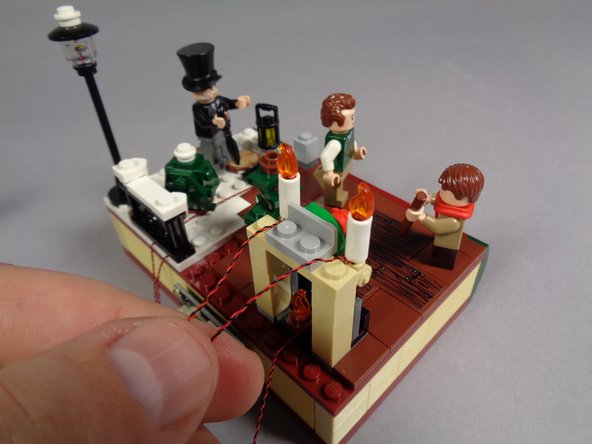
As shown in the first and second photos, remove the two fireplace candles including their green bases.
-
-
-
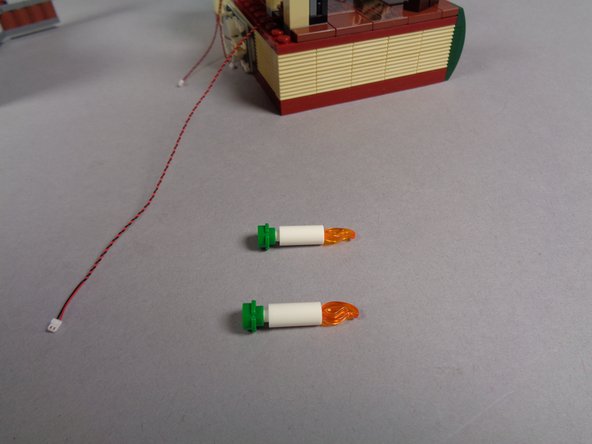
As shown in the first photo, take the two flickering candles from the bag labeled "Orange Lights."
-
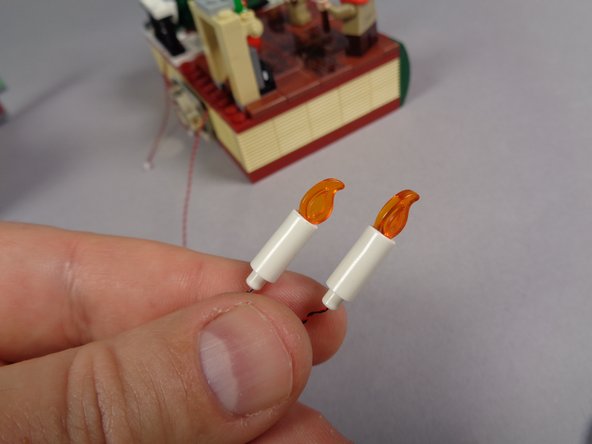
As shown in the second photo, carefully bend the light wires at the bottom of the candles so the wires are tight against the small white pins on the candle bottoms.
-
Do not try to remove the candle flames from the flickering candles. Doing so will damage the candle, and a damaged candle cannot be repaired.
-
As shown in the third photo, press the two candles into the holes on the fireplace mantle pieces so their wires extend out toward the back.
-
You may need to try several times to get the candles to stay in place. Making sure the candle light wires are bent against the white candle pins will help them remain in place.
-
-
-
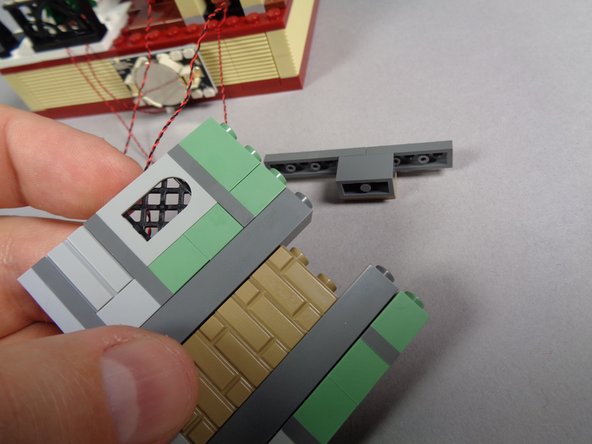
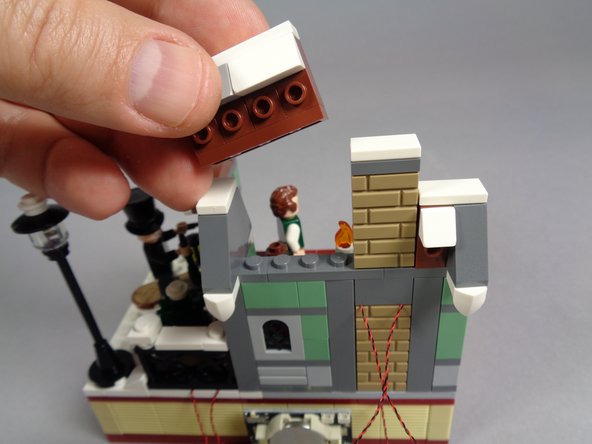
As shown in the first photo, separate the main wall section from its frame and remove the chimney and show/roof pieces from the back side.
-
As shown in the second photo, remove the top section of the fireplace back so there is space for the candle light wires to pass through.
-
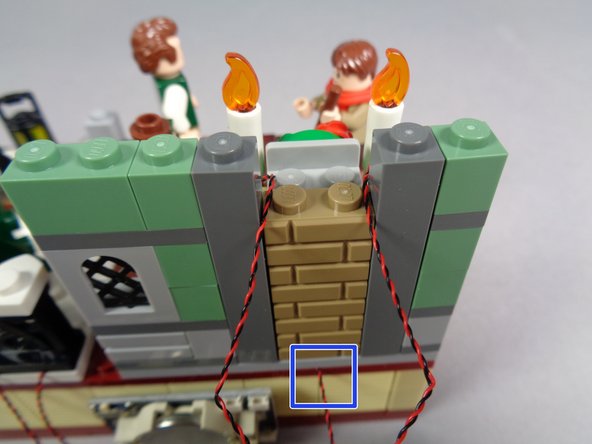
As shown in the third photo, re-attach the main wall section and pass the two candle light wires back through the gap in the chimney.
-
Be careful when re-attaching the main wall section that the wire for the main fireplace light (shown by the blue square in the third photo) passes between, not on top of, any studs.
-
For best results, leave a little bit of slack on the candle light wires inside the wall. This will make sure the candles don't get pulled out when you put the wall back together.
-
-
-
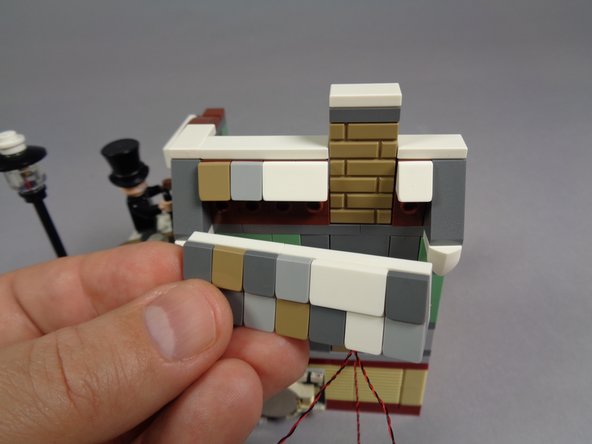
As shown in the first photo, carefully re-attach the top of the main wall section.
-
As shown in the first and second photos, the light wires for the two candles should now pass through the back of the chimney.
-
-
-
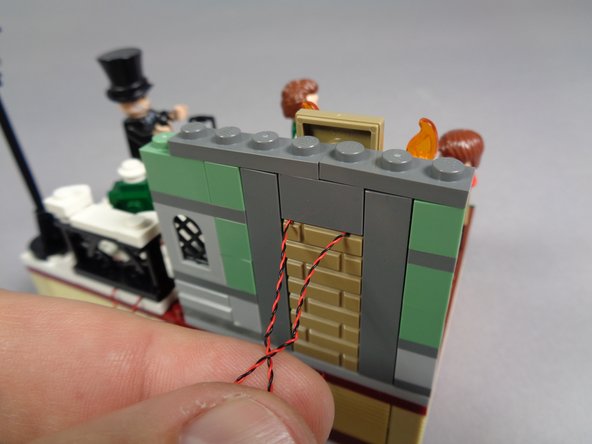
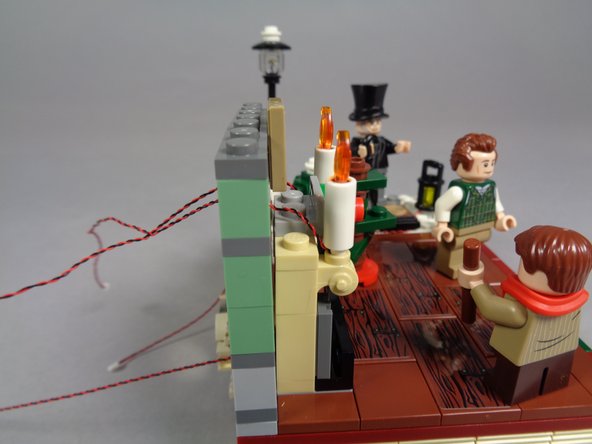
As shown by the first and second photo, re-attach the other main wall section, then finish re-attaching the remaining parts of the wall and roof.
-
When you are finished, the back of your model should look like the third photo, with five light wires passing toward the battery pack.
-
-
-
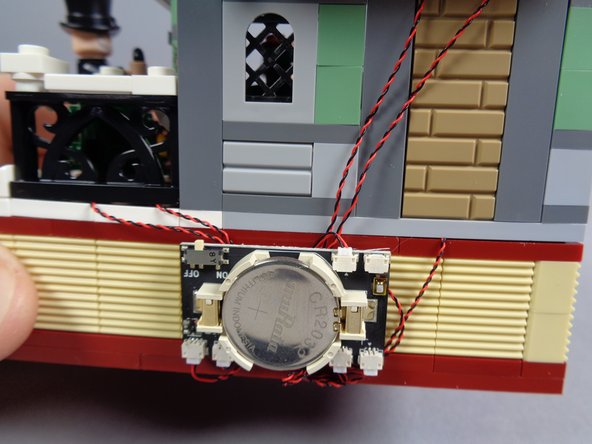
Now you will connect all five light wires to the plugs on the battery board.
-
Note that plugs can insert only one way. Do not force the plugs. You can press the plugs into place using your fingernail. When the plug is fully inserted, you should feel a soft "click".
-
You can connect any light to any of the six plugs on the battery board. You will have one open (unused) plug after connecting all lights.
-
You can see in the photos how the wires can be passed through the space behind the battery board and coiled up to eliminate any loose-hanging wires.
-
-
-
Once all five of your lights are connected to the battery board, you can turn on the battery switch and all five lights should turn on and begin flickering.
-
As shown in the second photo, you will have these extra parts from your original set. You can keep these in case you ever decide to remove the lights.
-
The included battery should power the lights for more than two days of continuous use. When replacing the battery, carefully pry it loose from its holder and replace with the same battery type.
-
We hope you enjoy your lights, and thank you for purchasing this Brickstuff product!
-


Cancel: I did not complete this guide.
One other person completed this guide.
