Tools
Parts
No parts specified.
-
-
This is a custom expansion kit that requires the Brickstuff lighting kit for the LEGO Bugatti, which has been discontinued. If you purchased the Bugatti light kit from us in the past, you can contact us through our website to request this custom add-on. The price is $23.99 plus shipping.
-
If you are installing these lights at the same time as your main light kit for the Bugatti, complete the main light installation first.
-
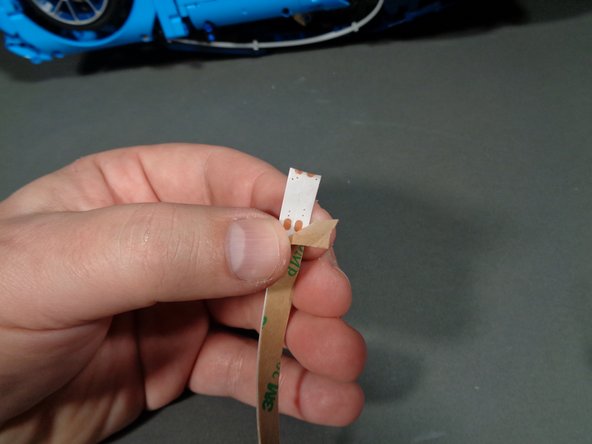
The photo for this step shows the parts included with your expansion kit:New line.
-
One BRANCH15 1:4 adapter.
-
Two self-adhesive light strips with 20 blue LED lights each. These strips have wires with Pico LED connectors on the ends.
-
-
-
Carefully turn your Bugatti upside down and place it on a soft, flat surface. Take extra care with the side mirrors on both doors.
-
-
-
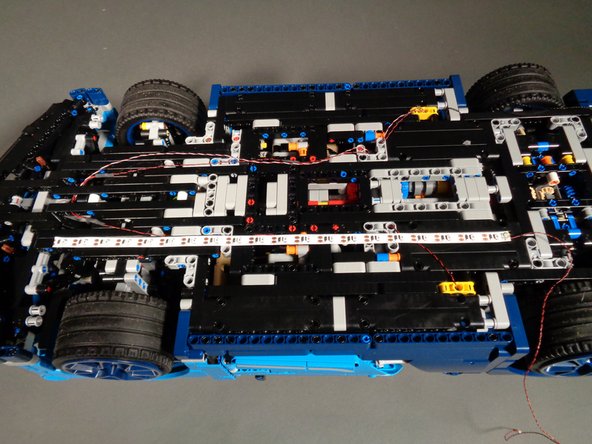
As shown in the first photo for this step, carefully peel the self-adhesive backing from the first light strip and attach it along one side of your Bugatti frame.
-
Make sure to mount the strip with the connecting wire and plug toward the REAR of the car.
-
Make sure the strip is straight, and press firmly to attach to the underside of the frame.
-
Make sure the strip does not touch any moving parts such as the wheel axles.
-
-
-
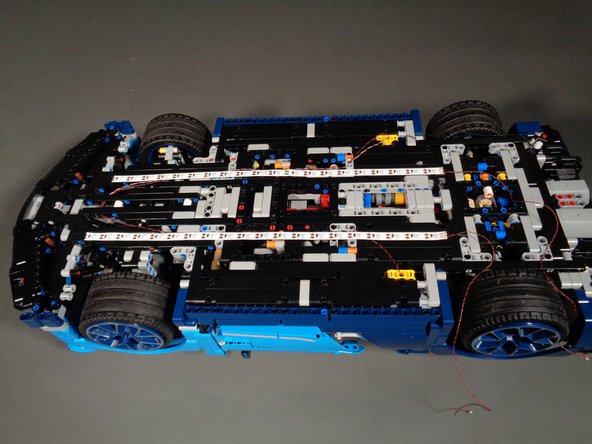
Repeat the process from the previous step to attach the second strip on the other side of the Bugatti frame.
-
Make sure the strips do not touch any moving parts like axles or gears.
-
-
-
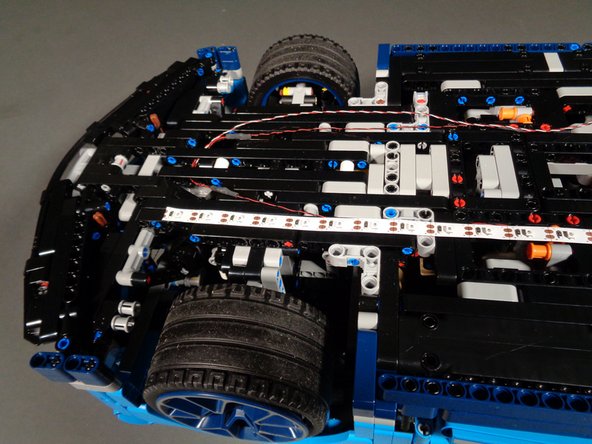
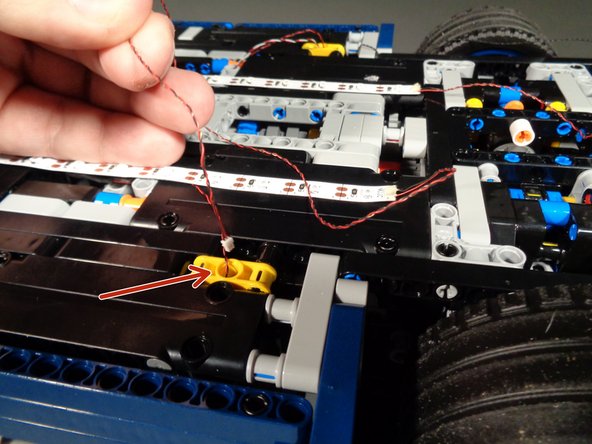
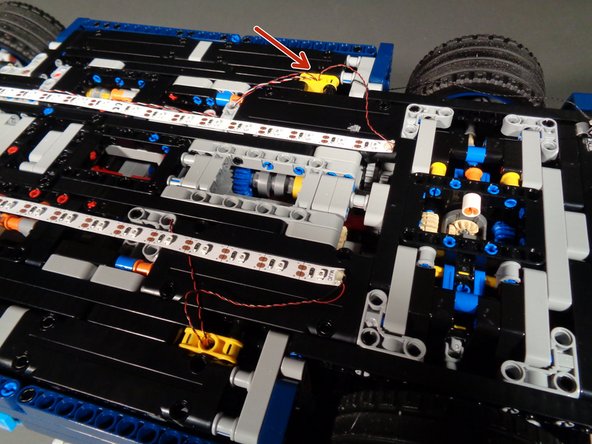
As shown by the red arrows in the first and second photos for this step, carefully feed the wires for both light strips through the hole in the center of the yellow Technic bracket on each side of the underframe.
-
Feed the wires down into the main body of the Bugatti. You will connect them later.
-
-
-
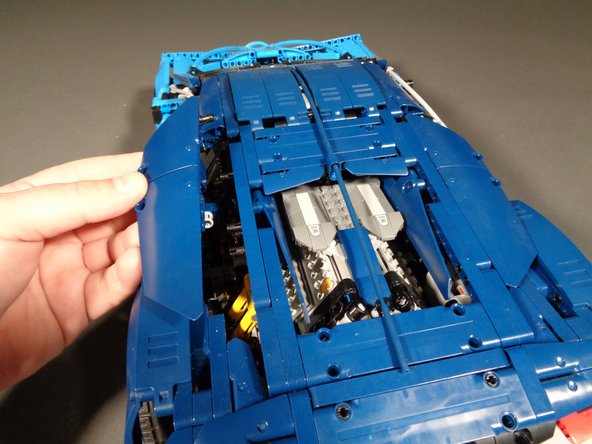
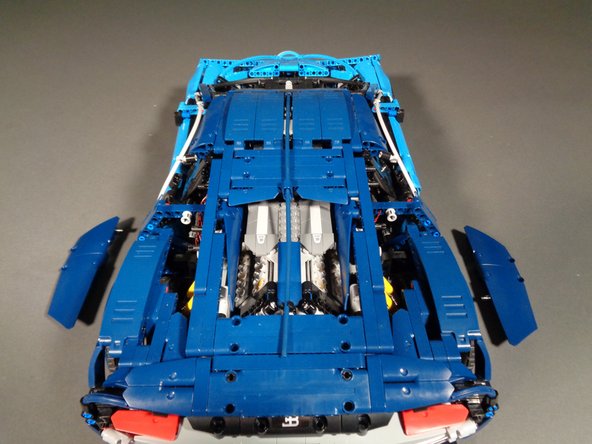
Carefully turn your Bugatti so it sits upright once again.
-
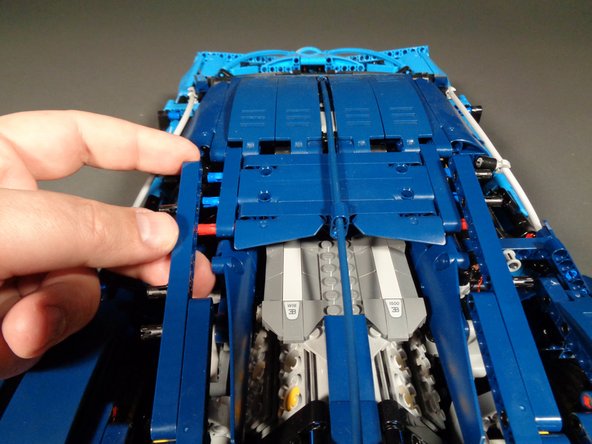
As shown in the three photos for this step, begin disassembling the panels holding the rear center window in place.
-
These are the same steps you completed when you initially installed your main light kit.
-
-
-
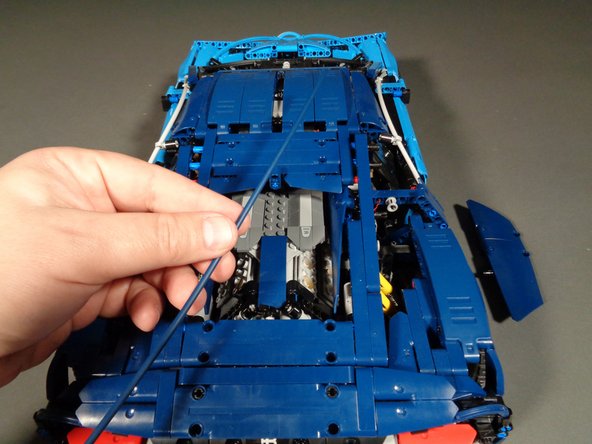
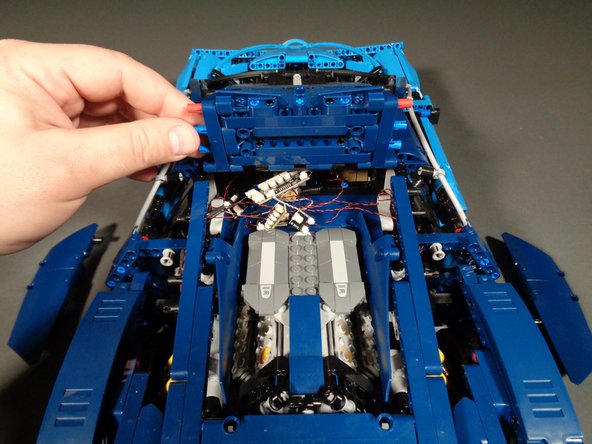
As shown in the two photos for this step, continue disassembly of the rear panels.
-
As shown in the second photo, you should now be able to flip up the rear window.
-
-
-
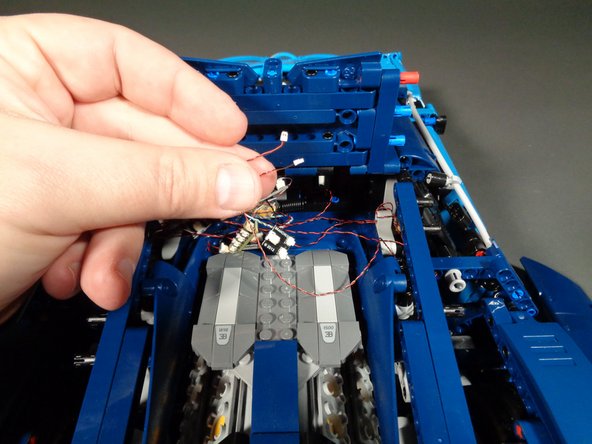
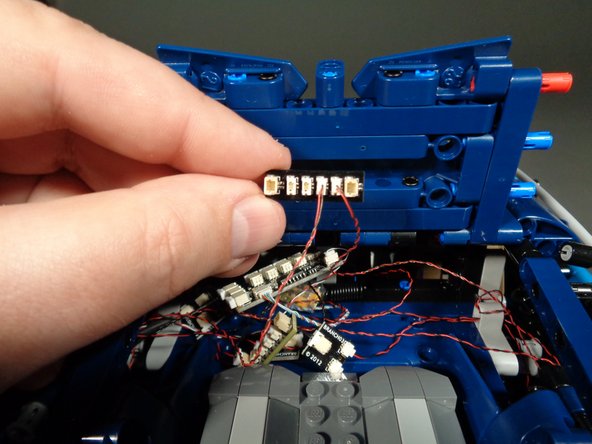
As shown in the first photo for this step, carefully reach inside the main frame of your Bugatti and pull out the two light wires from the strips you mounted earlier.
-
As shown in the second photo, take the BRANCH15 adapter board included with this expansion kit and connect the two light strip wires to any two of the center small plugs on the BRANCH15 board.
-
it does not matter which two plugs on the BRANCH15 adapter you connect the light strips to.
-
Note that plugs will only insert one way. Do not force. Press each plug into its socket with your fingernail. You will feel a soft "click" when the plugs are fully inserted.
-
-
-
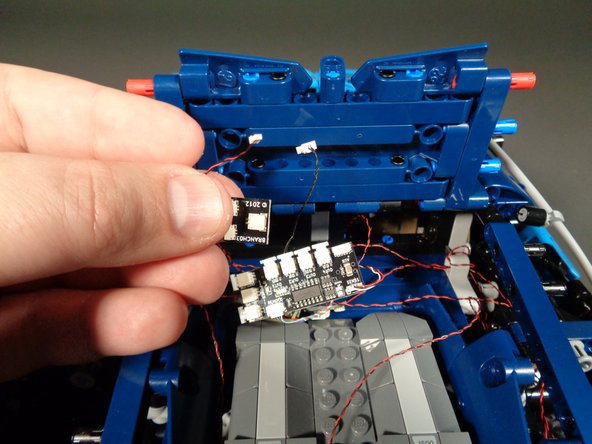
As shown in the photos for this step, you will take the BRANCH03 adapter board with the cool white interior fiber optic light connected to it and disconnect both the interior fiber optic light and the black larger plug from the BRANCH03 adapter.
-
As shown in the second photo, you can set your BRANCH03 adapter aside and use it for another project.
-
NOTE: the photos for this step show the radio-frequency (RF) version of the main controller inside the Bugatti. Depending on when you purchased your kit, you may have a controller that looks like this, or you may have an older controller design that uses an infrared remote control.
-
-
-
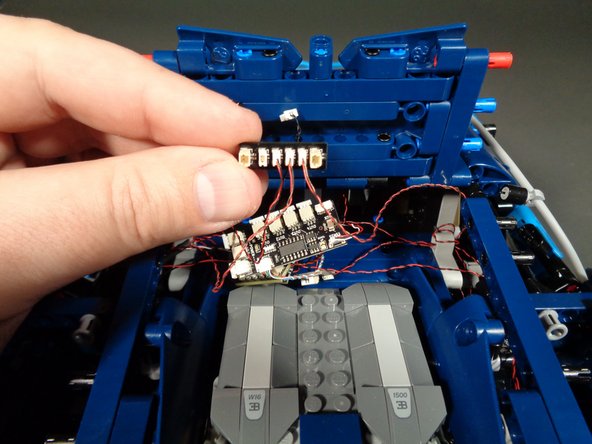
As shown in the first photo for this step, re-connect the interior fiber optic light to one of the two remaining small plugs on the BRANCH15 adapter board.
-
The blue underframe lights operate in sync with the interior fiber optic light. If you no longer want to have the interior light active, you can skip re-connecting it.
-
Alternately, if you would like to have your interior fiber optic light turn on and off in sync with the rear tail light instead, you can swap adapter boards to use the BRANCH15 adapter (provided with this kit) to connect the two tail light LEDs and the interior fiber optic light together on the same circuit.
-
If you decide to connect the interior fiber optic light to the same circuit as the two tail lights, you can use one of the BRANCH03 adapters to connect just the two underbody LED strip lights together.
-
-
-
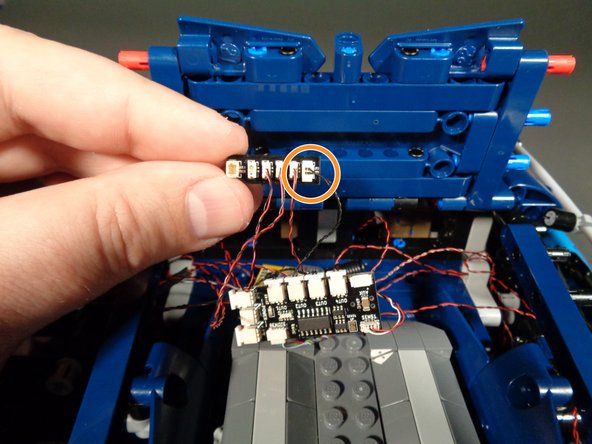
As shown by the orange circle in the photo for this step, re-connect the short black wire with larger plug to one of the large connectors on the BRANCH15 adapter board. You can connect to either of the large plugs on the BRANCH15.
-
Following the steps earlier in this guide, but in reverse order, carefully re-attach the side panels that hold the rear window in place.
-
-
-
You have now completed installation of your blue underbody expansion light strip kit.
-
To activate and change patterns for the strips, follow the operation instructions for your remote control unit that describe how to control the interior fiber optic light. Your new underframe lights will adopt the same changing patterns as you press the button controlling the interior fiber optic light.
-
Enjoy your kit! As always, please let us know if you have any questions or trouble, and please use a #brickstuff hashtag when posting photos or videos of your kit online!
-