Introduction
This guide outlines the steps needed to install the Brickstuff lighting kit for the LEGO Ideas Ecto-1 set (set #21108).
This is a made-to-order kit, so we do not feature it in the main section of our website. The price for the kit is $189.99 (lights only). If you would like to purchase one, please send an e-mail to support@brickstuff.com.
Tools
No tools specified.
Parts
-
-
Note that you can print this guide as a PDF if you'd like-- just click on the "Options" text in the upper right corner of the guide screen, and select "Download PDF" from the menu.
-
These instructions are written assuming you have already assembled your Ecto-1 kit.
-
-
-
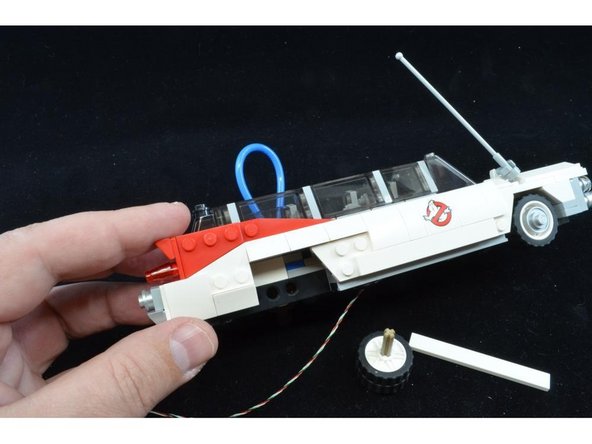
Carefully remove the roof from your Ecto-1, and also remove the top hood parts as shown in the first photo.
-
As shown in the second photo, remove the front wheels and axles, and also remove the silver parts and license plate from the front grille.
-
-
-
Remove the entire front hood assembly as shown in the first photo.
-
Remove the pre-assembled Brickstuff hood assembly from its anti-static bag, and mount onto the front of the Ecto-1 as shown in the third photo.
-
-
-
Remove the two black "boat stud" pieces from the bottom of the original hood assembly and attach them to the Brickstuff assembly as shown in the first photo by the red square.
-
As shown by the green square in the second photo, make sure the wire extends toward the back of the Ecto-1.
-
-
-
Re-attach the hood parts you removed in Step 2.
-
Your Ecto-1 should now look as it did before you started installing the lighting kit-- except for the wire on the underside.
-
-
-
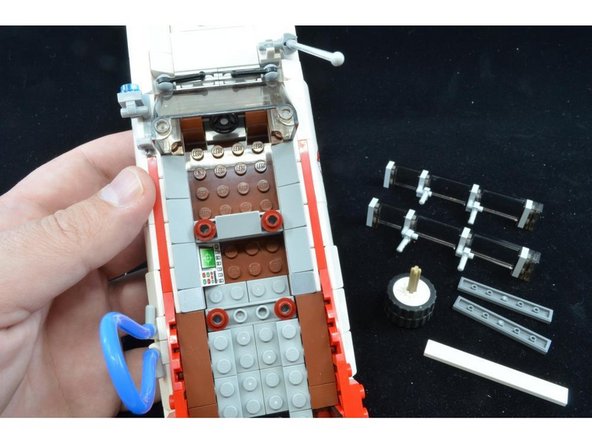
The wire coming from the front needs to be fed into the rear interior area of the Ecto-1. Remove the right rear wheel and side panel as shown in the first photo.
-
As shown in the second photo, remove the two dark gray tiles from the center back section, and also remove the two side window assemblies.
-
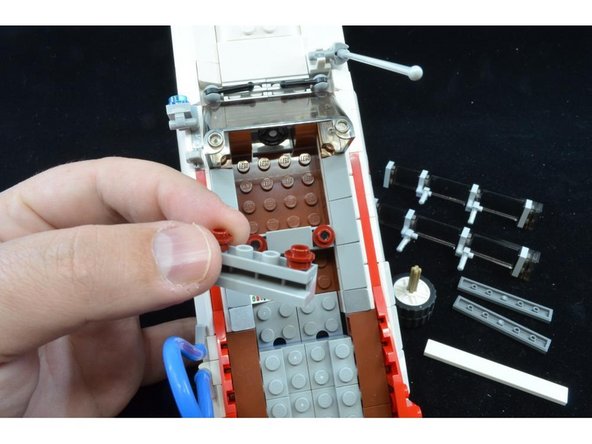
As shown in the third photo, remove the 1x4 brick with the two red plates on top.
-
-
-
As shown in the first photo, pull the wire up through the space above the wheel well.
-
As shown in the second photo, on the underside of the car, remove the black "boat stud" on the right side, and hold the wire so it is BETWEEN the four studs shown by the four red circles in the photo.
-
It is critical that the wire run between the four studs, so that when the "boat stud" part is re-attached, its studs do not pinch any wires. The wire must run in the gap between the studs.
-
As shown in the third photo, re-attach the "boat stud" so it holds the wire in place.
-
-
-
Make sure the wire runs the way it is shown in the first photo.
-
As shown in the second photo, re-attach the gray 1x4 brick on the inside of the Ecto-1. This should hold the wire in place.
-
before re-attaching the 1x4 brick, make sure the wire is pulled tight under the Ecto-1. This is necessary so the wire does not rub against the wheel.
-
As shown in the third photo, re-attach the wheel, and spin it to make sure the wheel does not rub against the wire.
-
If the wheel rubs against the wire, remove the wheel, remove the 1x4 brick inside the Ecto-1, pull the wire tighter, and re-attach the parts again, double-checking to make sure the rubbing has been fixed.
-
-
-
The Brickstuff kit includes replacement tail light assemblies with red Pico LEDs pre-mounted. As shown in the first photo, remove the existing tail light and its surrounding parts.
-
As shown in the second and third photos, attach the Brickstuff tail light part, and then re-attach the surrounding parts.
-
Repeat for the other tail light.
-
-
-
As shown in the first photo, the two tail light wires should extend into the rear section of the Ecto-1.
-
Remove the BRANCH15 adapter board from its anti-static bag, and connect the two tail lights to two of the small connecting plugs on the adapter board as shown in the second photo.
-
You can connect the tail lights to any of the small plugs on the adapter.
-
When connecting the plugs to the adapter board, note that the plugs will insert only one way-- Do not force the plugs in the wrong way. Press firmly with your fingernail to insert the plugs. You will feel a soft "click" when the plugs are in all the way.
-
-
-
Re-attach the dark gray tiles and rear windshield that you removed in Step 9. Also re-attach the two side window assemblies.
-
-
-
Remove the pre-assembled roof assembly from its anti-static bag, and connect the white power plug to one of the large connectors on the BRANCH15 adapter as shown in the first photo.
-
The other large connector on the BRANCH15 adapter board is for connecting power. The lighting kit includes a USB power cable, but you can use other Brickstuff power sources as well.
-
As shown in the second photo, connect the 4-wire connector from the roof to the matching connector coming from the front hood.
-
Make sure to align the two white dots on the 4-wire connectors as shown by the two red arrows in the second photo.
-
For a completely self-contained lighting solution, you can use the Brickstuff LiPo power source (search for "SEED08" on our website). With a 500mAh LiPo battery and our LiPo power source, you can have power and lighting fully self-contained.
-
-
-
Re-attach the Ecto-1 roof, and take the decorative parts from your original kit roof and attach them to the Brickstuff kit roof to complete your installation.
-
Turn on the power, and your Ecto-1 should come to life!
-
if you have any trouble with the installation, or if anything does not work after connecting, send an e-mail to support@brickstuff.com and we'll help in any way we can.
-
Enjoy your Ecto-1!
-