
Tools
No tools specified.
Parts
-
-
Assemble your LEGO® set.
-
Open your Brickstuff lighting kit and remove the parts. There should be four bags plus a USB cable, as shown in this photo.
-
-
-
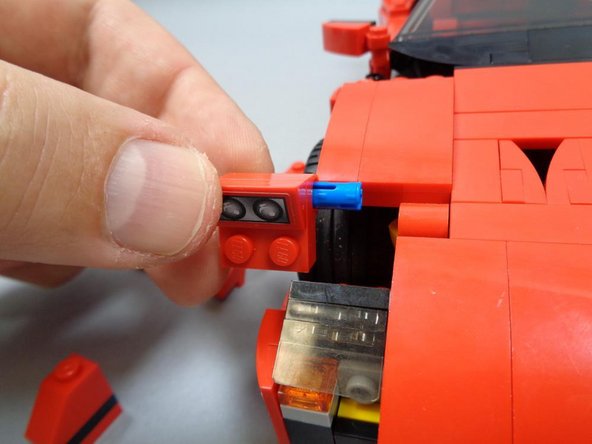
As shown in the second photo in this step, carefully remove the parts from the front headlight section of the car as shown.
-
-
-
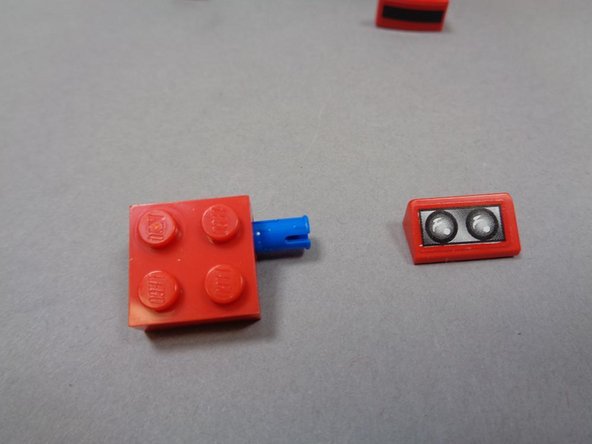
Carefully remove the left and right headlight assemblies, making sure the blue Technic pins remain inserted into the headlight sections.
-
Remove the two top red slopes with the headlight stickers on them. You won't need these any longer, so you can set them aside or put them back into the LEGO® box your Ferrari set came in.
-
-
-
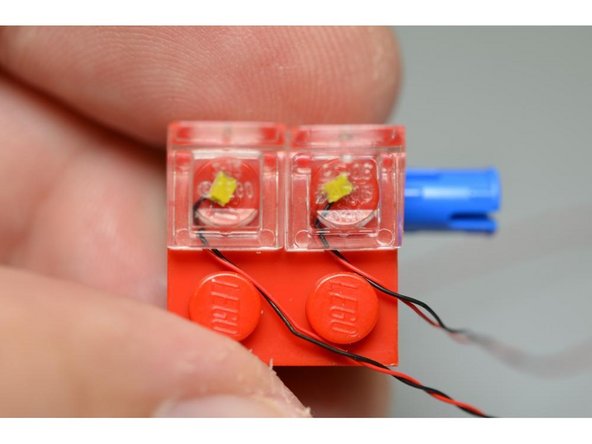
Your Brickstuff kit includes two 3-light assemblies with "Smaller than Pico" (STP) LEDs. These lights fit on top of LEGO® studs, but before mounting them, it is important to prepare the wires on two of the three LEDs in each bunch.
-
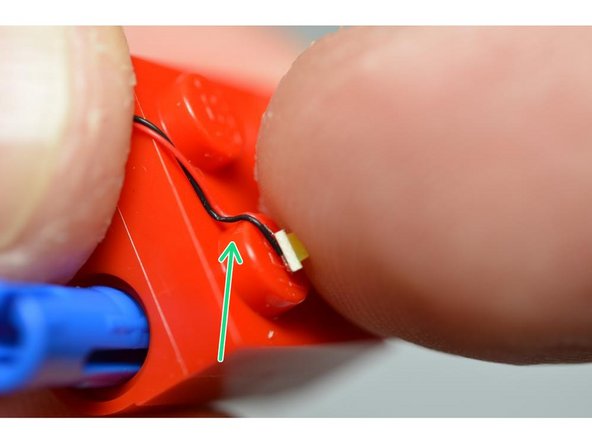
The green arrows show how the LED wires need to be bent in order to prevent them being cut when completing the next step.
-
You can prepare the LED wires by placing each LED on top of a LEGO® stud and then bending the wires over the edge of the stud using your fingernail.
-
-
-
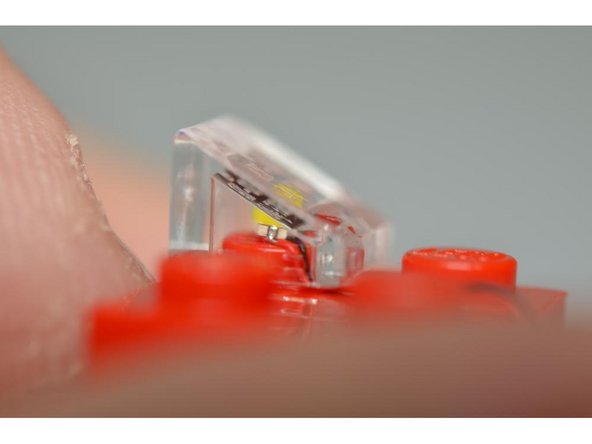
Remove the four transparent 1x1 LEGO® slopes from Bag #2 of the kit. You will use these to snap on top of the STP LEDs and mount them in place as the new headlights.
-
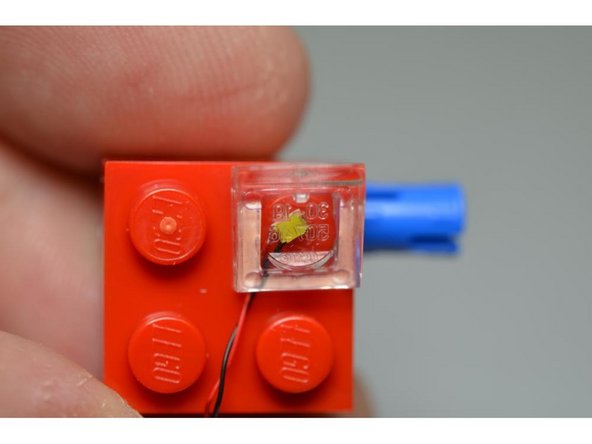
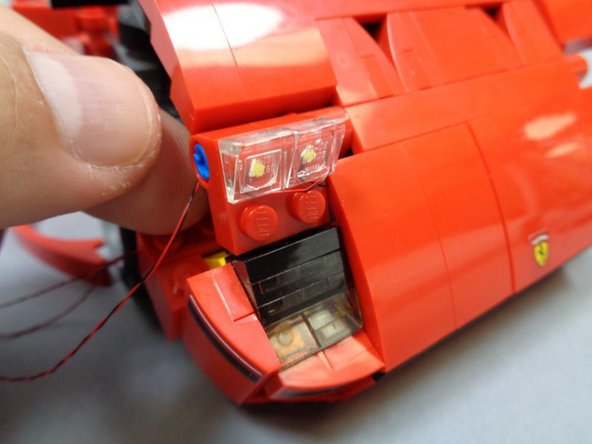
As shown in the photos, make sure the yellow part of the LED is facing up and is as close to the center of the LEGO® stud as possible when snapping the slopes on top of the LEDs.
-
As long as you have prepared the LEDs as outlined in the previous step, snapping the slopes on top should not break the wires. Try to snap the slopes on top of the LEDs only once-- removing and re-attaching the slopes increases the chances that the wire will be cut.
-
Repeat for both headlights as shown in the third photo.
-
-
-
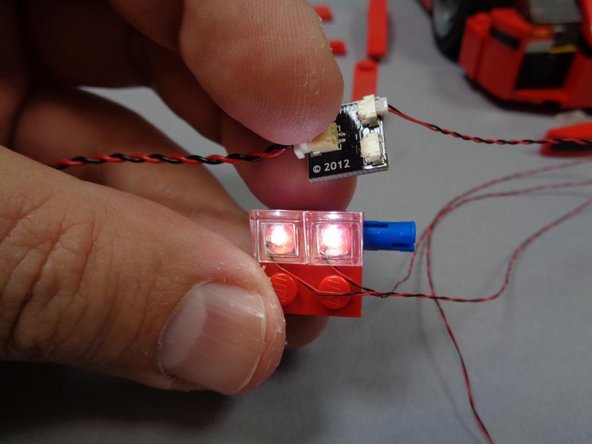
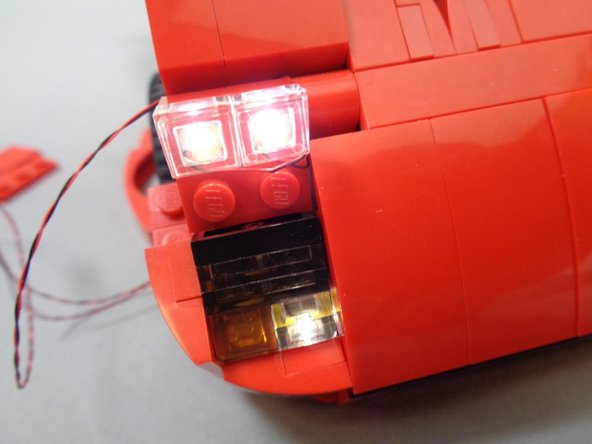
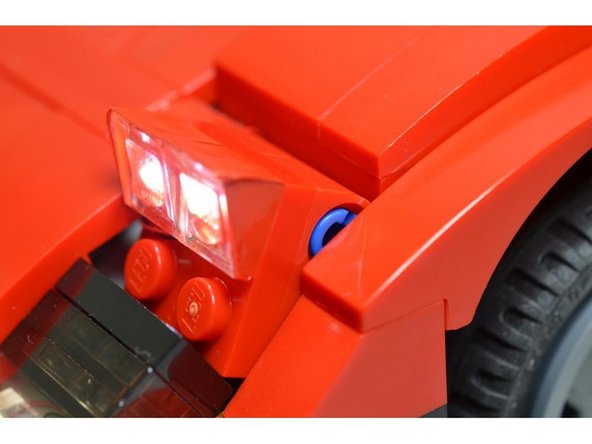
Using the included USB cable and BRANCH03 adapter board, test the headlight assembly you completed in the previous step. Both headlights should light up.
-
If one or both headlights do not light, it is possible the wires were damaged. Please contact us at support@brickstuff.com for assistance.
-
-
-
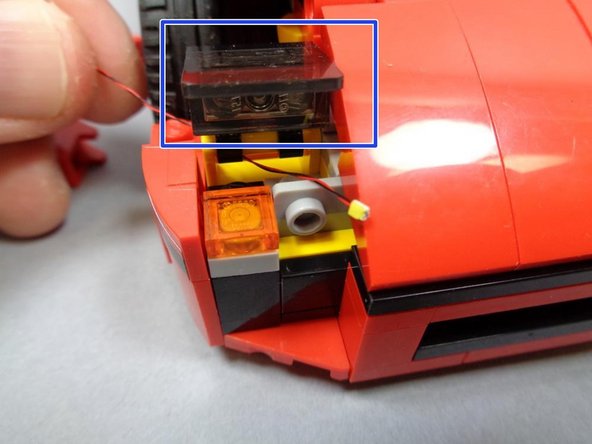
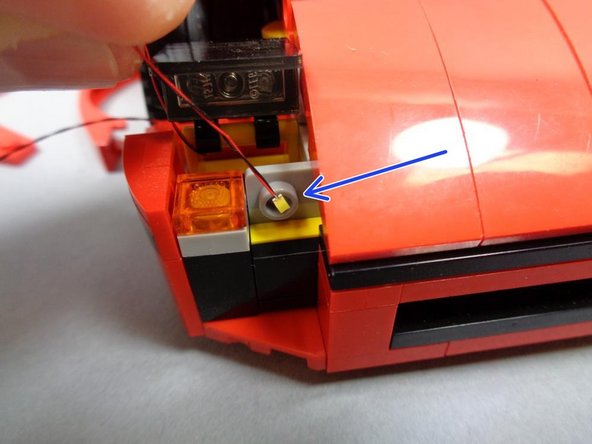
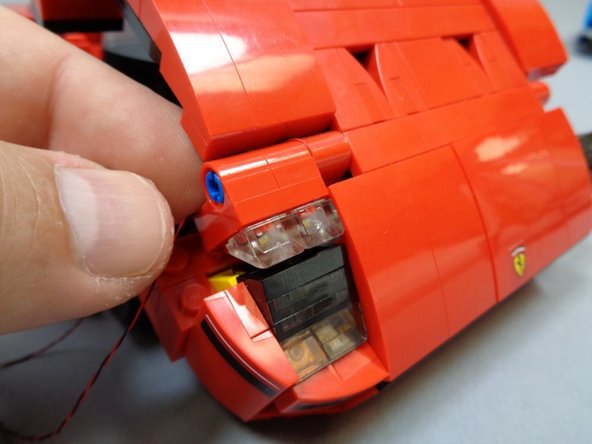
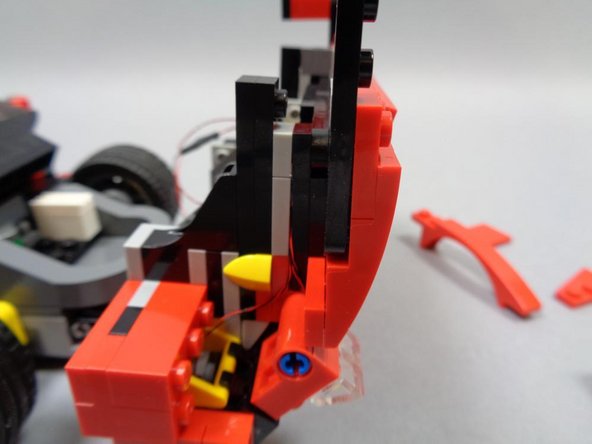
Next you will mount the third LED in the headlight bunch into the lower front position.
-
As shown by the blue square, tilt up the headlight cover so you can feed the LED wire through the yellow bracket.
-
As with the main headlight assembly, make sure the LED is in the center of the LEGO® stud opening as shown by the blue arrow in the second photo, and prepare the LED by bending its wires over the edge of the stud opening with your fingernail.
-
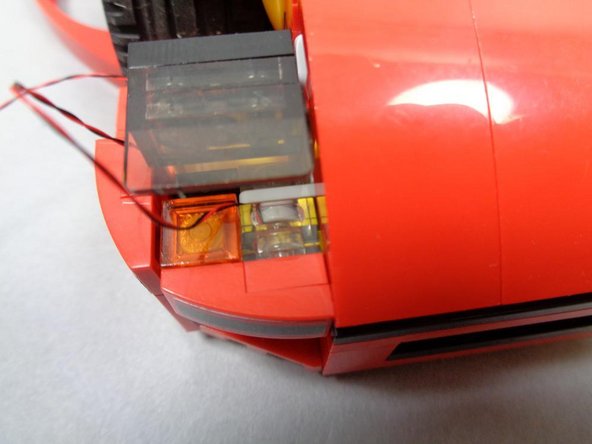
Carefully re-attach the outer headlight cover as shown in the third photo.
-
-
-
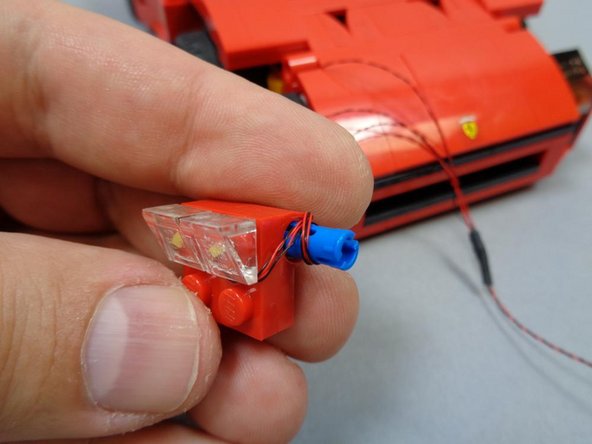
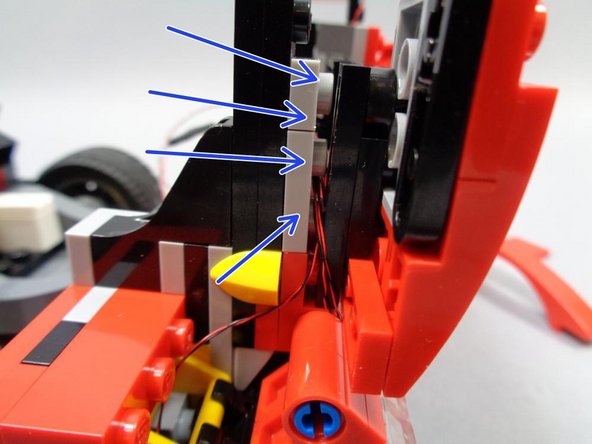
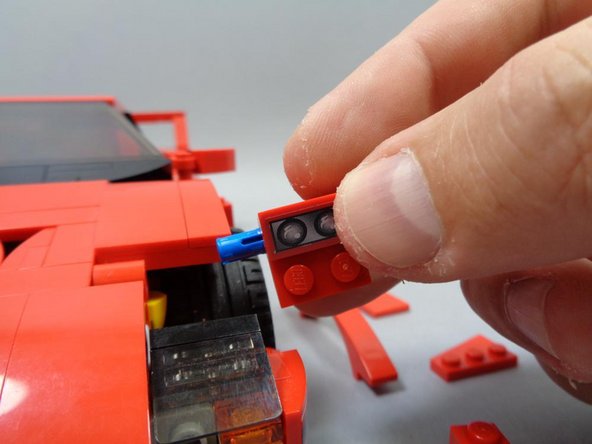
As shown in the first photo, wind the wires for the two main headlight LEDs around the blue Technic pin.
-
Be careful that the wires do not slide into the grooves of the Technic pin. The wires need to remain outside the grooves and wrap around the outside of the pin only.
-
Carefully re-insert the headlight assembly back onto the main body of the car, pressing all the way in and making sure the LED wires remain on the outside of the pin and don't get pinched inside the grooves.
-
-
-
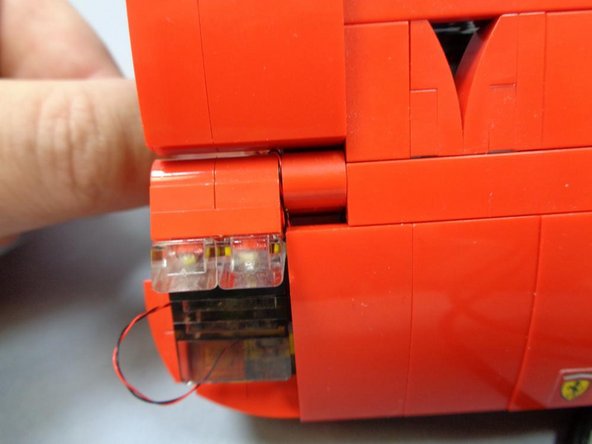
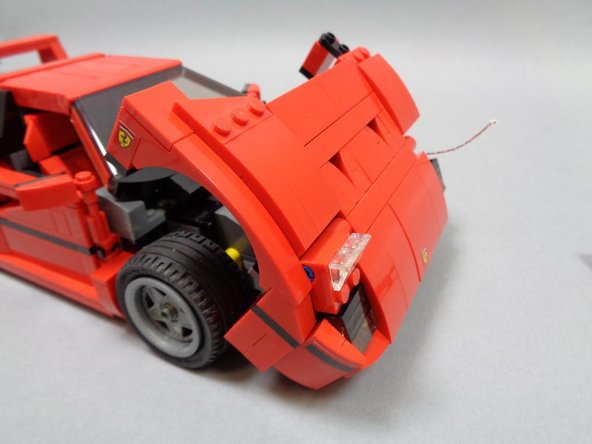
Pull in any loose LED wires so no wires are visible outside of the car body.
-
If you mounted the main headlight wires correctly in the previous steps, you should be able to move the main headlights into the fully up position without pulling on the wires as shown in the second photo.
-
-
-
As you did in Step 6, test the headlights one more time to make sure all three lights work correctly.
-
If one or more of the lights do not light up, this probably means one of the wires got pinched or cut during installation. Please contact us at support@brickstuff.com for assistance.
-
-
-
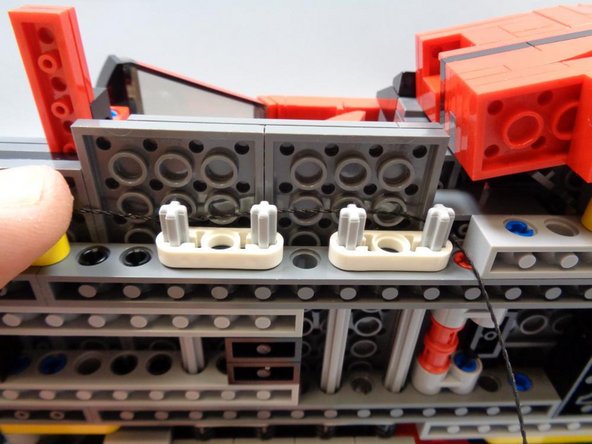
As shown by the blue arrows in the first photo, gently separate the plates under the hood so the headlight wires can run between one of the LEGO® studs.
-
Do not run any wires over the top of a LEGO® stud, or this will increase the chance of a wire getting pinched or cut. Make sure all wires run between studs.
-
Carefully re-attach the plates you removed to run the wires. The wires should now run into the center of the underside of the hood.
-
Make sure there is not a lot of slack on the outside of the hood, or the wires could get caught in the tires when they turn.
-
Re-attach the bricks on the left side of the hood that you removed in Step 2.
-
-
-
Repeat Steps 4-11 for the right side of the car to mount the other set of headlights.
-
Remember to test the headlights at each installation step as indicated.
-
-
-
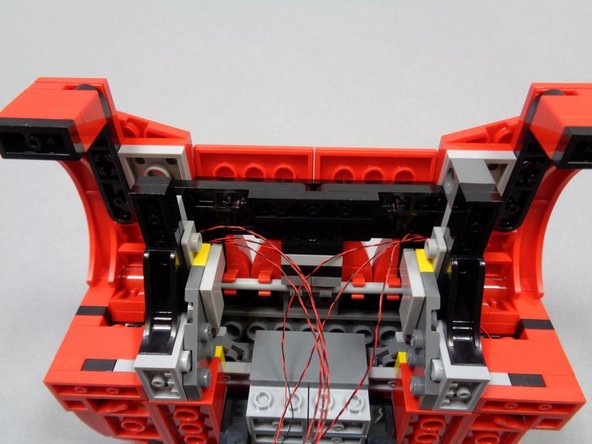
As shown in the first photo, you should now have two sets of headlight wires coming into the center part of the underside of the hood.
-
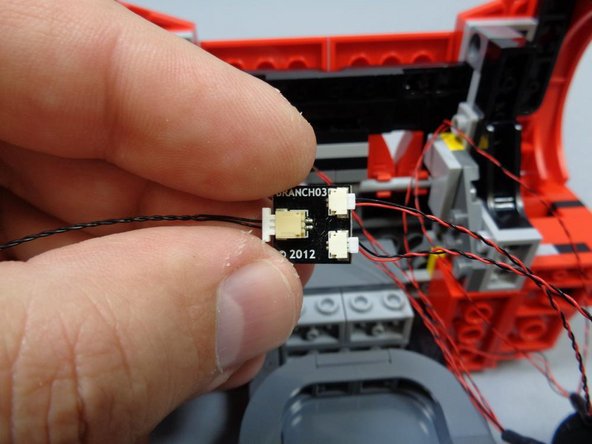
As shown in the second photo, connect the two headlight assemblies to the small connectors on the BRANCH03 adapter board, and connect the included black 12" cable to the large connector on the BRANCH03 board.
-
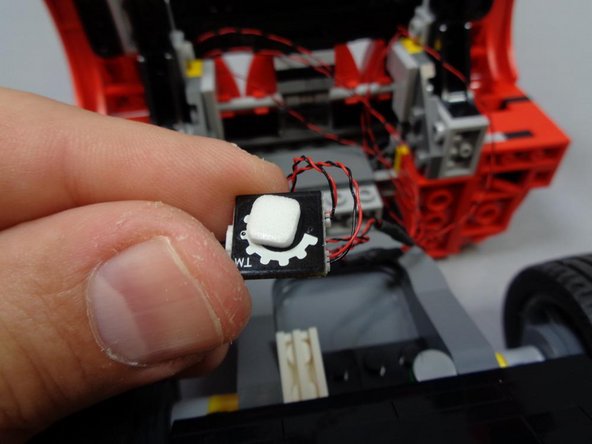
As shown in the third photo, put a small sticky square on the back of the BRANCH03 adapter board for mounting in the next step.
-
You can use a pencil or tweezers to coil up any excess headlight wires so they don't stick out and allow the hood to close.
-
-
-
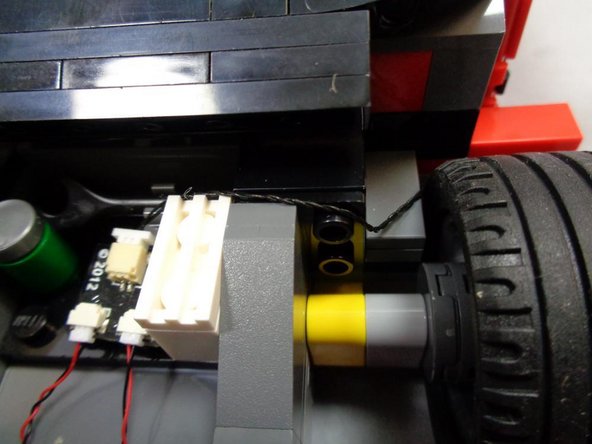
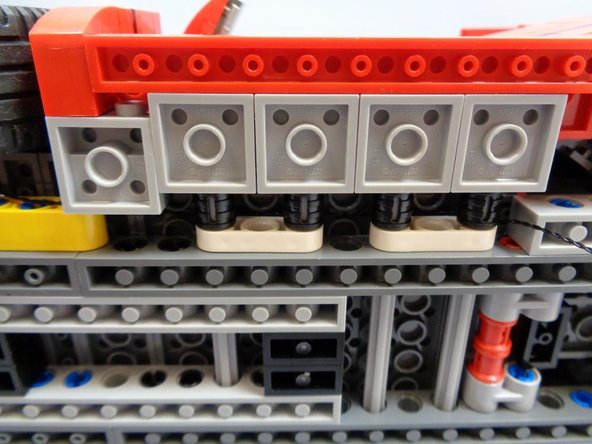
Remove the dark bluish gray arches between the wheels (blue arrows in the first photo), run the LED wires underneath, and attach the BRANCH03 adapter board next to the white brick as shown.
-
Re-attach the dark bluish gray arches.
-
As shown by the orange arrow and the third photo, make sure the black connecting cable extends behind the white brick.
-
After you have mounted the BRANCH03 adapter board, make sure the hood closes fully. If not, check the wires to see if any need to be coiled in order to allow the hood to close.
-
-
-
Remove the LEGO® parts on the left side of the car as shown. This should expose the four Technic axles under the drivers' seat.
-
Run the black 12" extension cable above the Technic axles.
-
Make sure there is no slack in the black extension cable. This is necessary to make sure the cable is long enough to reach all the way to be rear of the vehicle.
-
-
-
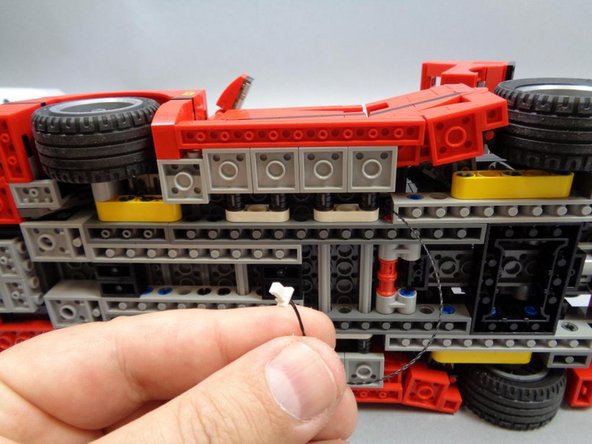
Carefully re-attach the side panels and parts you removed in the previous step, being careful not to catch the black extension cable and pinch it.
-
As shown in the second photo, you should now have the black extension cable extending out to the bottom of the car, with enough length to reach up into the back hatch (you will run the cable this way in a later step).
-
-
-
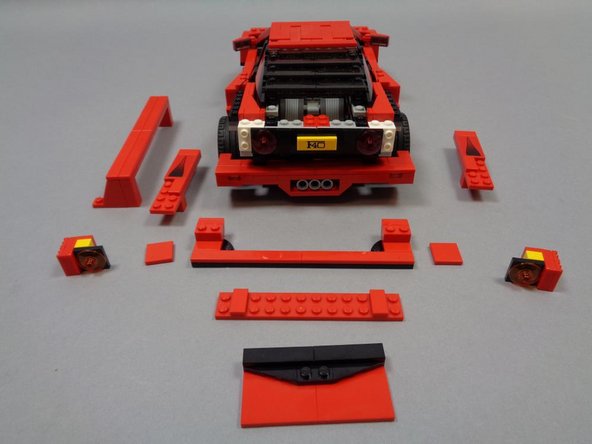
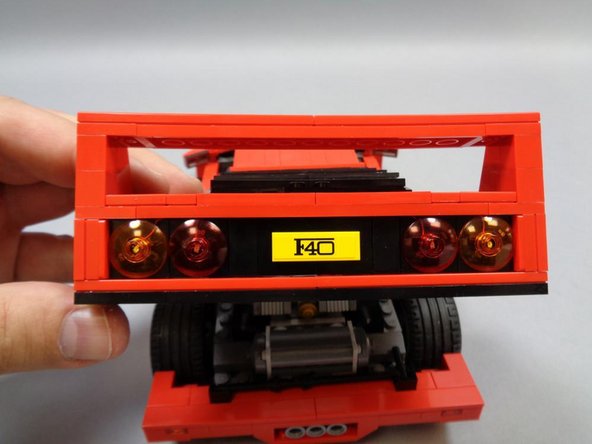
As shown in the photo, carefully remove the parts shown to expose the tail light assembly.
-
-
-
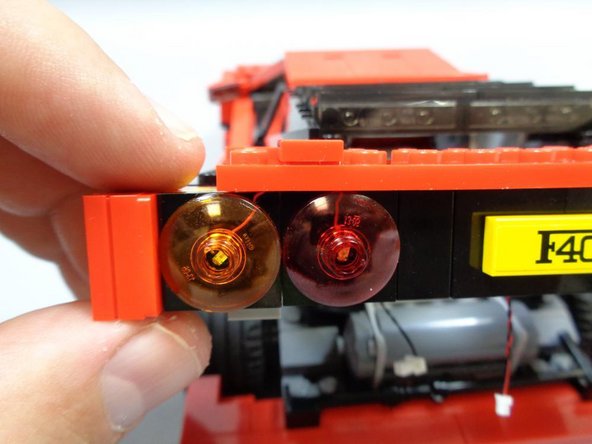
As shown in the first photo, remove the large orange and red transparent LEGO® dishes from the rear of the car.
-
Bag#3 of this kit includes two orange Pico LEDs, and Bag #4 includes two red Pico LEDs. You will mount all four LEDs in this step.
-
Mount both red LEDs first, then both orange LEDs. This will reduce confusion as both LEDs look identical when not powered on.
-
To mount each LED, carefully place it over the top of the LEGO® stud hole as shown, and GENTLY press the round transparent LEGO® part back down over the LED wire.
-
Refer to Step 4 if needed to see how to prepare the LED wires by bending them with your fingernail before re-attaching the large transparent LEGO® dishes. This will help make sure the wires don't get pinched or cut when re-attaching the dishes.
-
-
-
The first photo shows what the tail light assembly should look like once you have mounted the four Pico LEDs and re-attached the four transparent LEGO® dishes.
-
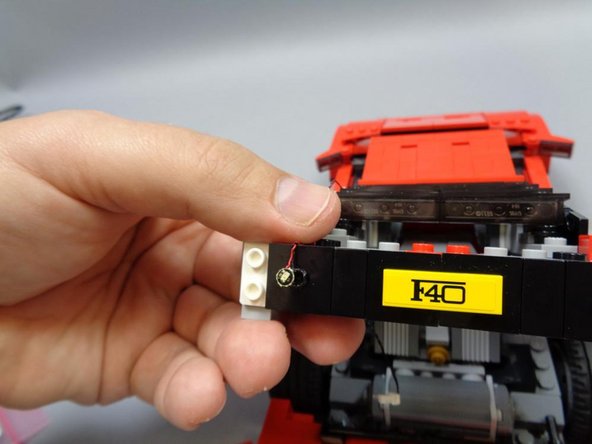
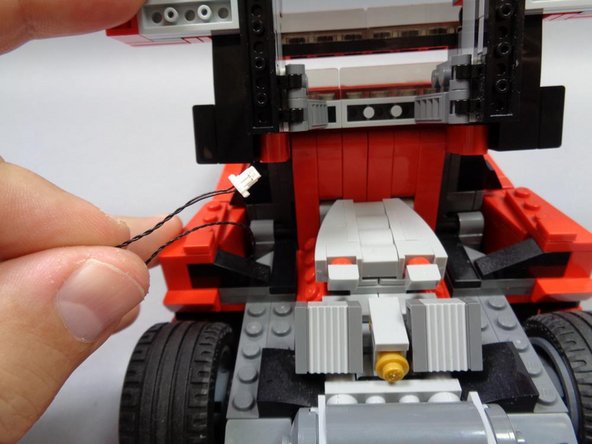
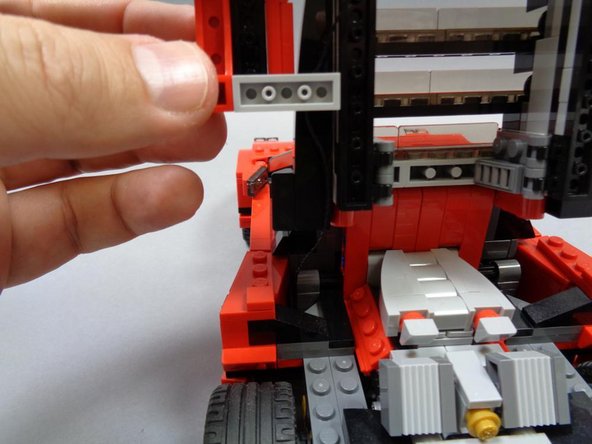
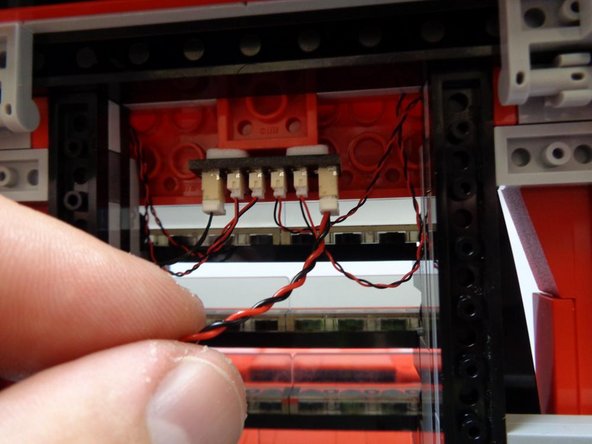
As shown in the second and third photos, take the black connecting cable you ran from the front of the car in Steps 15-16, pull it up from the bottom of the car into the space under the rear hatch, and secure the cable with the light gray 1x3 plate.
-
When running the black cable, make sure to have the rear hatch lifted up all the way before securing with the 1x3 plate. This will make sure there is enough slack in the cable to allow the rear hatch to be lifted in the future.
-
-
-
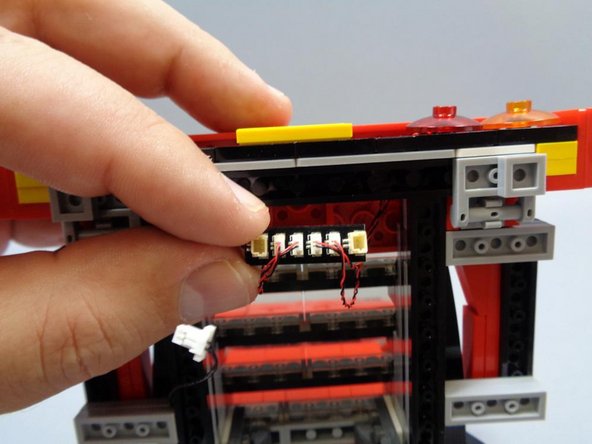
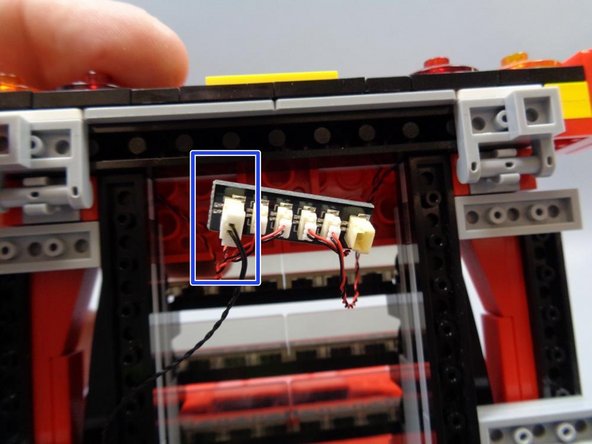
Connect the two red two orange tail lights to the small plugs on the BRANCH15 4-port adapter included with this kit.
-
Note that the plugs will fit only one way into the BRANCH15 adapter board. Do not force plugs. It might be easier to insert the plugs using a tweezers.
-
Connect the black connecting cable to the large plug on the LEFT side of the BRANCH15 adapter board as shown in the second photo.
-
Use two sticky squares to mount the BRANCH15 adapter board as shown in the third photo.
-
The BRANCH15 adapter board needs to be mounted as shown in order to allow space for the rear hatch to fully close.
-
-
-
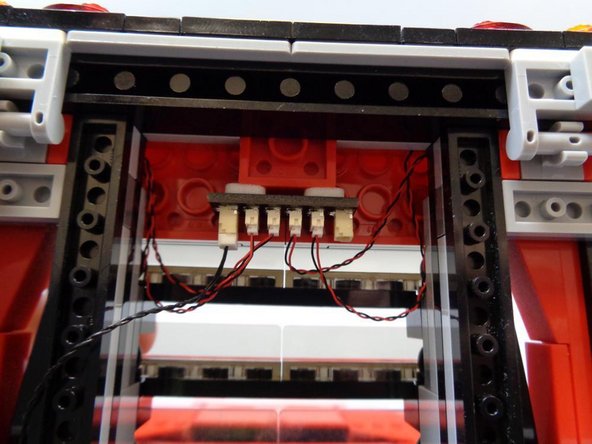
Re-attach the LEGO® parts you removed in Step 18, making sure that all LED wires run BETWEEN studs and not on top of them.
-
-
-
Connect the USB power cable to the RIGHT side large plug on the BRANCH15 adapter board.
-
Carefully route the power cable out the bottom of the car behind the wheels, and close the rear hatch.
-
Connect the USB adapter to a standard mains adapter, and all 10 lights in your kit should come on.
-
Enjoy, and thank you for purchasing this Brickstuff lighting kit!
-
-
-
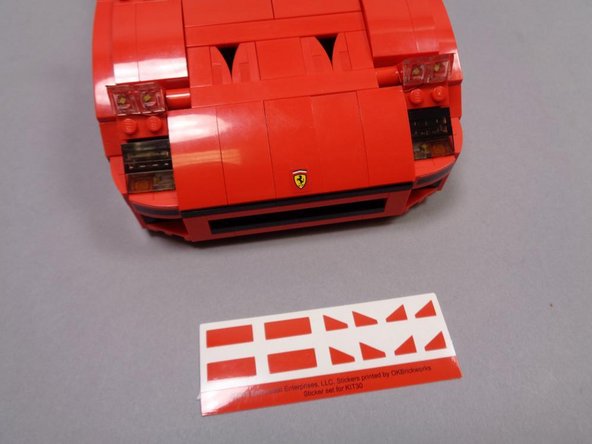
Your lighting kit includes a sheet of red stickers, which are designed to cover the top and sides of the clear headlight slopes.
-
Your kit includes twice the number of stickers needed to cover the headlights because two layers of stickers are needed on each face/side in order to block the light.
-
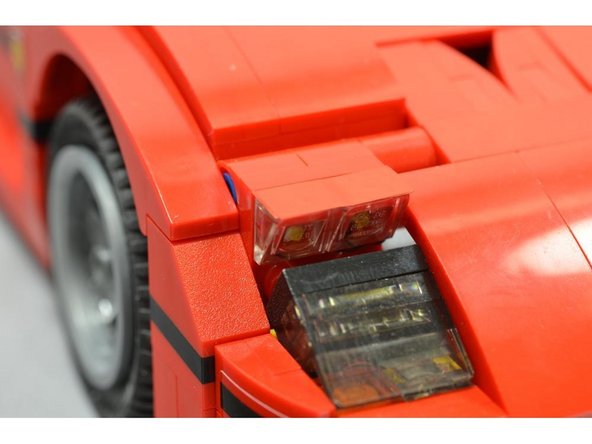
Begin by tilting the headlights of your Ferrari all the way up, so you can fully access the sides of the clear pieces.
-
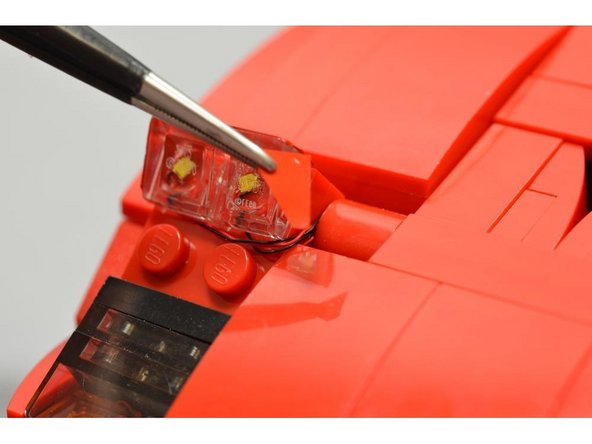
Using a tweezers, carefully remove the rectangle stickers and apply two of each to the top of the right and left headlights as shown in the second photo.
-
Make sure you use a tweezers or sharp knife to remove the stickers from their sheet. The vinyl is very thin, and it is easy to remove the paper layer instead of the sticker if you don't use something sharp.
-
-
-
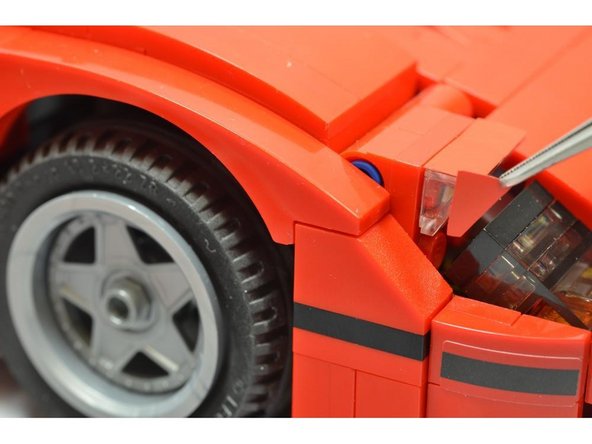
Carefully remove the triangle (side) stickers and apply them to both sides of each headlight as shown.
-
Remember to use two layers of stickers for each side, to fully block the light.
-
The third photo shows what the completed assembly should look like from one side.
-
Your headlights should now look as realistic as the real-world Ferrari!
-


Cancel: I did not complete this guide.
3 other people completed this guide.
