Tools
Parts
-
-
There are several ways to read this guide:
-
Reading it on the web in your browser.
-
Downloading a PDF copy of the guide. You can do this by selecting "Download PDF" as shown by the red rectangle in the first photo. Click on the Options heading in the upper right corner of the screen (see the green rectangle).
-
In the "Dozuki" application, which is available for download from the Apple App Store and various Android and Google marketplaces.
-
If you view this guide in the Dozuki app, search for "Brickstuff" the first time you open the app, then select "Product Guides" from the categories listed under Brickstuff. Scroll down to find this guide.
-
You can also translate this guide into another language when viewing on the web. To do this, install a translator extension into your browser and use that extension/plug-in to translate the page. Using the main Google translate website (translate.google.com) does not work.
-
-
-
Note: the instructions here are written assuming you have built the table-top version of the wreath, but you can adapt the steps here to light the candles in any variation of the wreath you build.
-
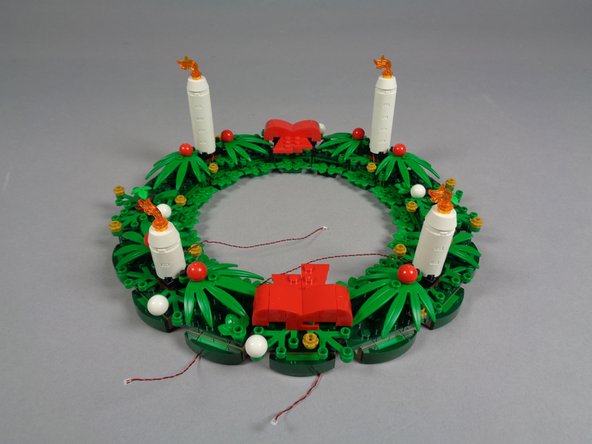
Begin by assembling your LEGO set.
-
As shown in the second and third photos, remove the four candles, and also remove the cone tops with the flames. Set these aside for later.
-
-
-
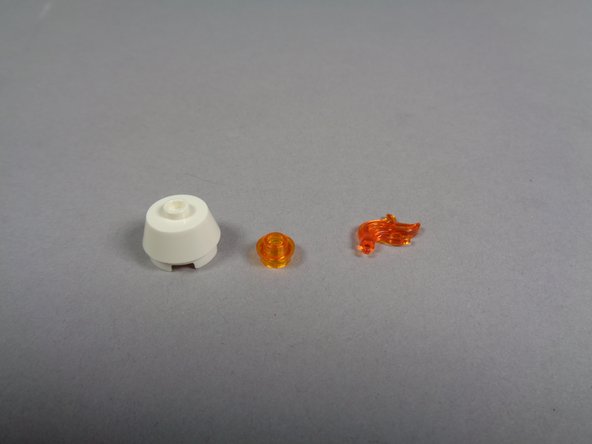
Take the four pre-lit cones from your Brickstuff kit bag as shown in the first photo.
-
Two cones will have short wires and two will have long wires.
-
As shown in the second and third photos, feed the LED light wire down the center of each candle. Pull the wire all the way through so you can firmly attach the cone to the top of the candle.
-
Repeat this process for the remaining three candles.
-
-
-
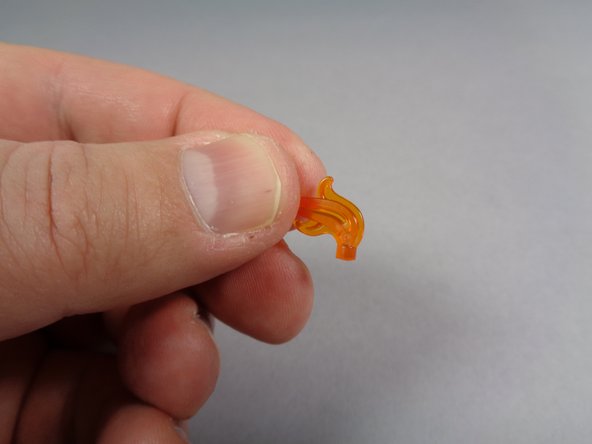
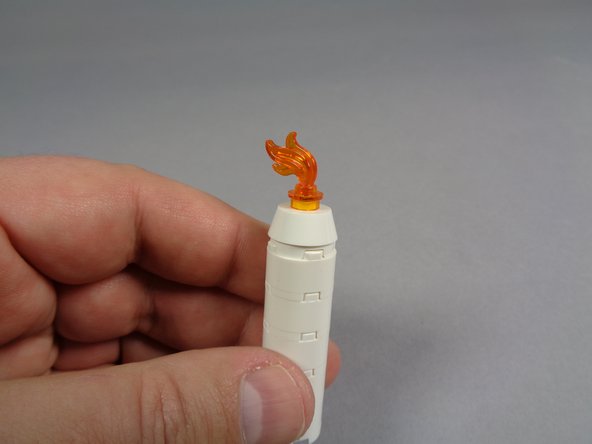
As shown in the first photo, remove the two transparent top pieces from each candle cone as shown.
-
Your Brickstuff kit includes four transparent orange LEGO flames with the pins cut off. As shown in the second and third photos, take these flames and use them along with the round transparent orange plate to replace the flames on top of each candle.
-
The tiny LED light should fit underneath the round transparent orange plate, under the flame with the clipped pin.
-
-
-
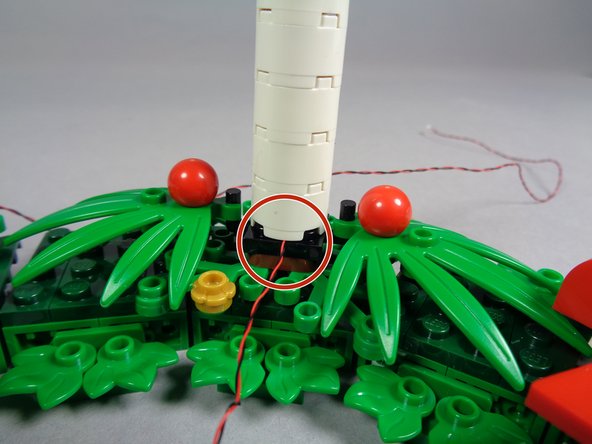
As shown by the orange square in the photo, the goal in re-attaching the candles is to place the two candles with the long wires farthest away from the red bow at the top (center) of the wreath.
-
As shown by the red circle in the second photo, when you re-attach the two candles with the long wires, make sure the wire for each candle extends toward the inner side of the wreath, and make sure the wire runs between, not on top of, studs.
-
The third photo shows how you will begin wrapping the LED light wires in the next step.
-
-
-
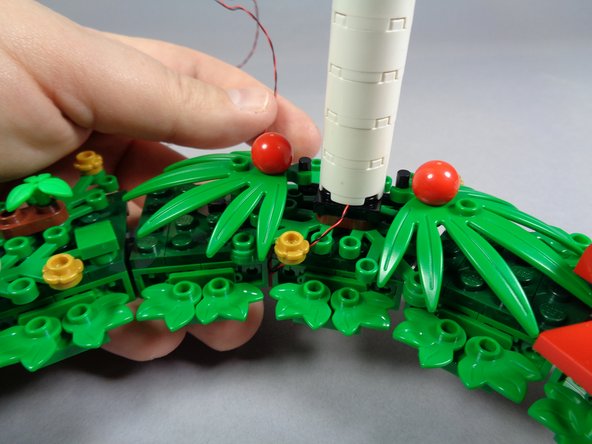
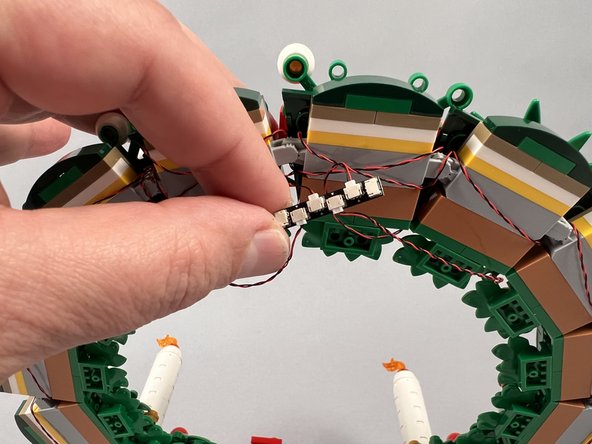
As shown by the two photos for this step, you should feed the LED light wire under the wreath and around the clips holding each segment together. Continue this looping motion as you work your way around the wreath toward the bow at the top center.
-
When looping the wires over the top side of the wreath, make sure to hide them under the leaf/foliage parts. This can be tricky, and the leaves will want to separate from the wreath, so take your time.
-
-
-
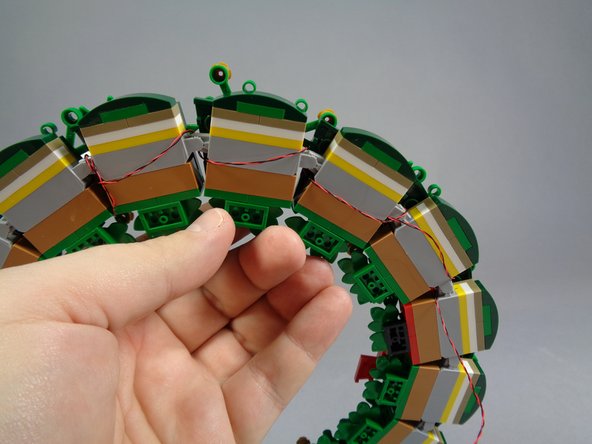
As shown in the photo for this step, when you are finished running the wire for the first candle, the plug should reach the top center of the wreath, at the bow.
-
-
-
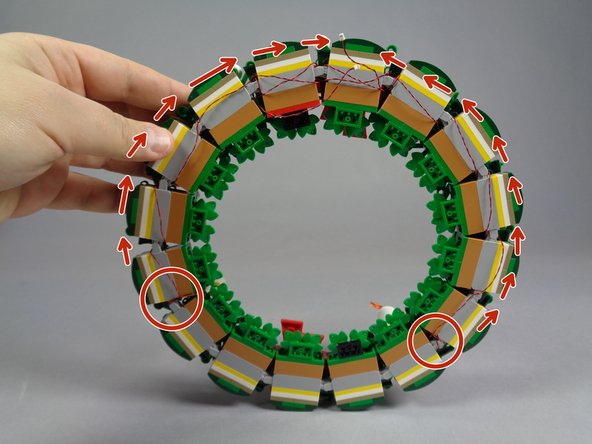
As shown by the red circles and arrows in the first photo, loop the wire for the second candle along the opposite side of the wreath using the same steps as you did for the first candle.
-
When you have finished looping the long wires for both candles, your wreath should look like the second photo, with two light wires extending to the top/center of the wreath at the bow.
-
-
-
As shown in the first photo, re-attach the two candles with short wires.
-
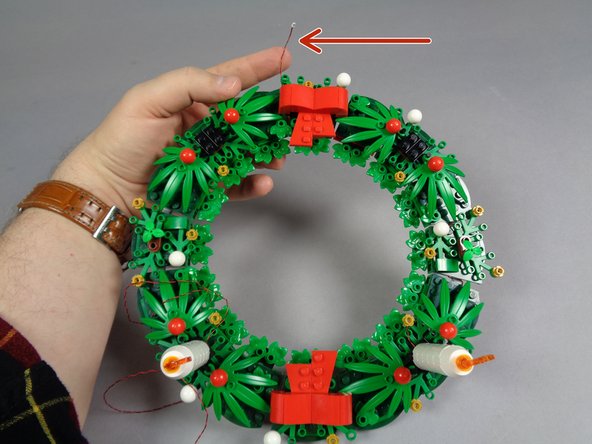
As shown in the second photo, loop the short wires once under the wreath so they both reach the area near the bow.
-
You should now have wires for all four candle lights extending from beneath the wreath at the bow.
-
-
-
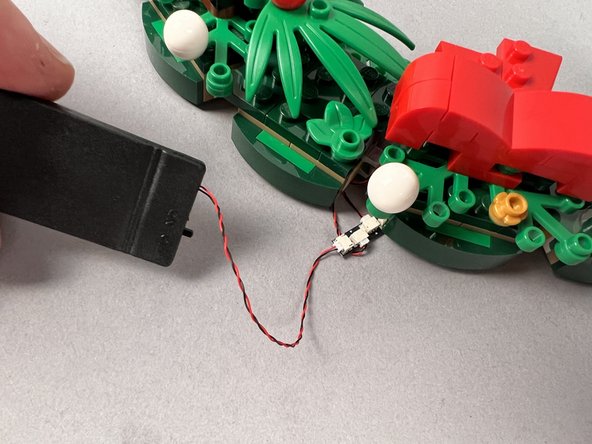
As shown in the first photo for this step, carefully connect the four light wires to the plugs on the BRANCH20 adapter board that is included with your Brickstuff kit.
-
Note that plugs can only be inserted in one orientation. Do not force. You can press the plugs fully into place with your fingernail, and you should feel a soft "click" when the plug is fully inserted.
-
As shown in the second photo, connect the plug from the battery pack to any of the remaining open connectors on the BRANCH20 adapter board.
-
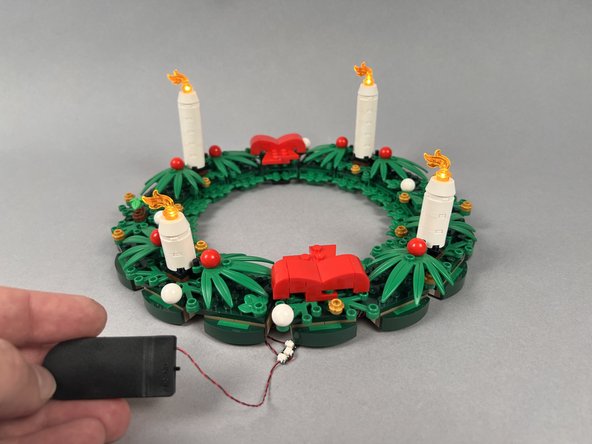
Turn on the battery pack switch. Your four candles should turn on and begin flickering.
-
Your kit includes several self-adhesive sticky squares. You can use these if desired to attach the BRANCH20 adapter board to the side of the wreath, or to attach the battery pack to the backside of the wreath if hanging it.
-
-
-
When the time comes to put your wreath into storage, you can keep the lights connected. Just gently fold the four candles toward the inside of the wreath as shown in the photo, then carefully place inside the LEGO box.
-
-
-
Thank you very much for purchasing the Brickstuff light kit. We hope you enjoy it for years to come.
-