
-
-
In addition to a good soldering iron, we recommend also having some soldering flux on hand, along with a good pair of angle-cut clippers and a good pair of tweezers. We use the Xuron XUR410T sprue cutter and the Wiha 44518 tweezers.
-
-
-
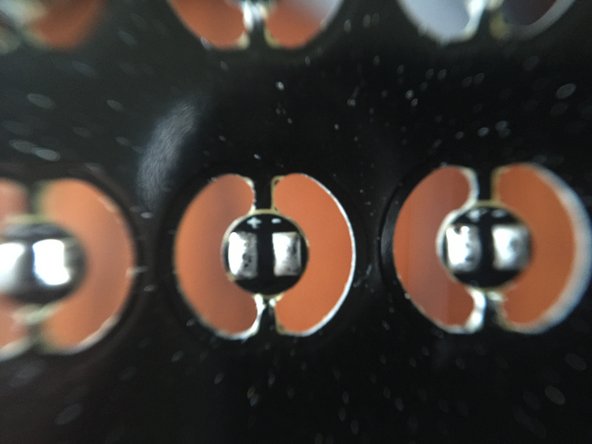
This is a full panel of Pico LEDs (120 in total). You may have purchased less than a full panel, but this photo shows how each Pico LED is attached to the panel with two "fingers"-- one on the top of each Pico LED and one on the bottom.
-
-
-
Each Pico LED has small markings above the copper pads-- one for positive ("+") and one for negative ("-"). We recommend orienting the Pico LEDs so the markings are on top as you solder-- this ensures that you know the + leads are on the left and - on the right.
-
-
-
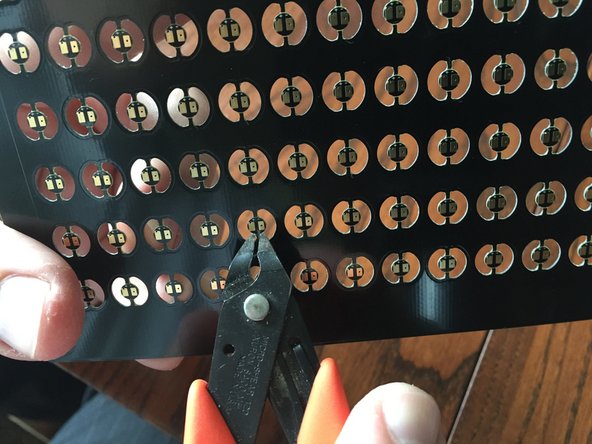
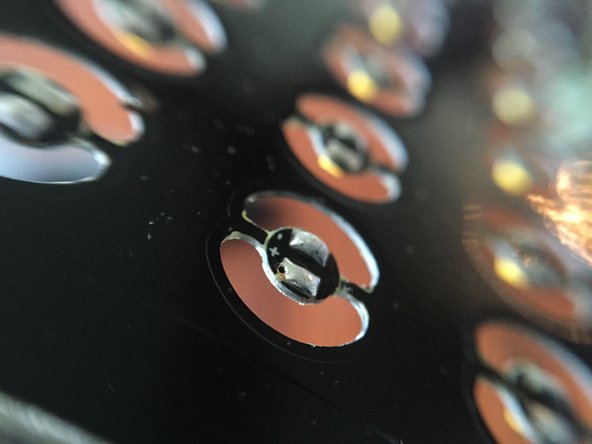
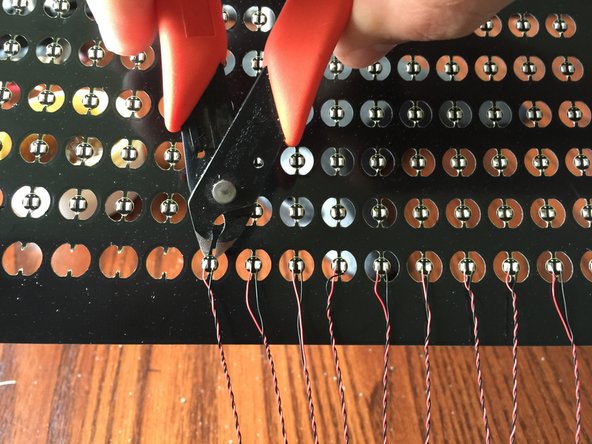
Before soldering wires to the Pico LED Light Boards, we recommend pre-cutting the bottom "finger" on each light board-- this will make it easier later to separate the light board from the panel without needing to stress or bend the wire after soldering.
-
The orange and red boxes in the second photo show an uncut finger (orange box) and a cut finger (red box).
-
Make sure to cut ALL lower fingers on the LED panel BEFORE soldering.
-
-
-
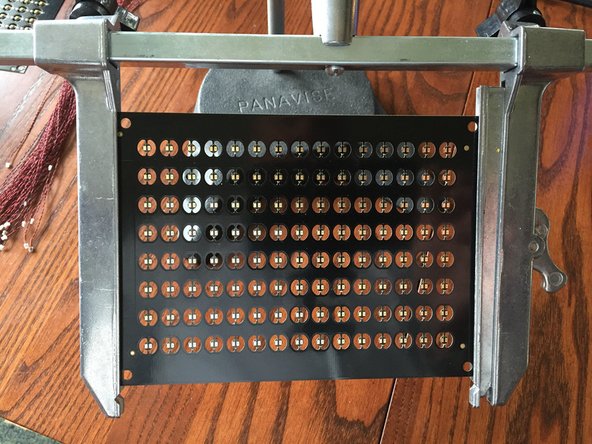
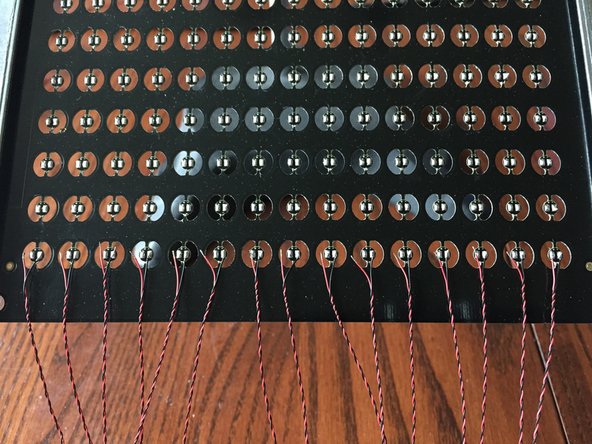
After you have pre-cut all lower fingers on the LED panel, secure the panel for soldering. We use the Panavise 333 Rapid Assembly Circuit Board Holder.
-
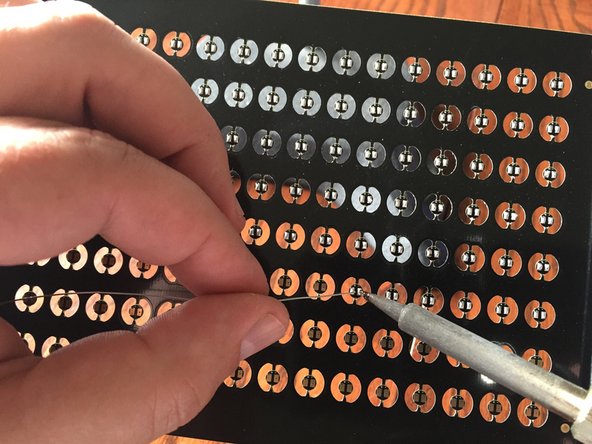
After securing the PC board panel, apply a liberal amount of solder to each copper pad. Here it is best to over-apply solder, but make sure you don't cause a short circuit by bridging the pads.
-
Solder all pads on a panel before soldering any wire leads.
-
-
-
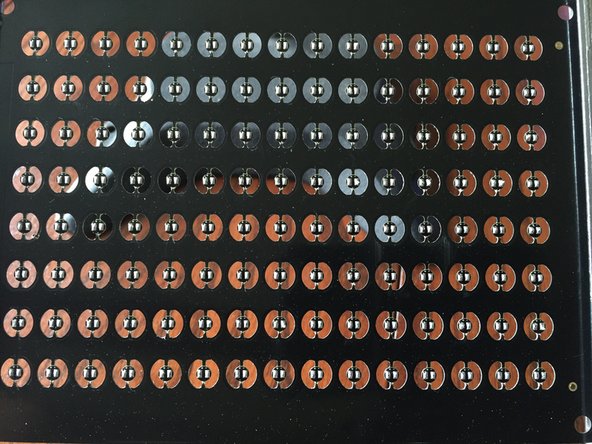
Make sure all copper pads have a liberal amount of solder applied.
-
The solder should be in a lump over each pad-- this is critical for later steps, when you will solder wires to each pad (you will need to fully cover each wire lead with solder to hold it firmly in place).
-
-
-
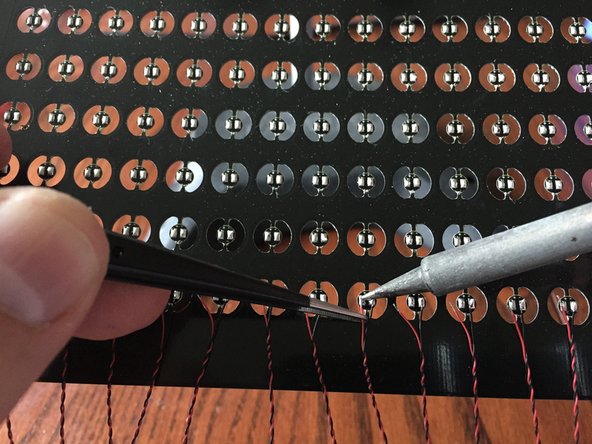
Carefully solder one wire to each Pico LED board. The photos show us soldering the negative ("-") lead first.
-
Solder one panel row at a time. If you solder more than one panel row before separating individual LED boards, wires will overlap, making removal more difficult.
-
When soldering wires, make sure the solder fully covers each wire-- the wire should be buried under a blanket of solder.
-
If you are using wires that have not been pre-tinned (wires that have solder already applied to them), either tin the wires yourself or dip each wire in a tiny amount of solder flux before soldering.
-
After each wire has been soldered, wait for the solder to cool and then gently tug at the wire to make sure it is firmly attached. If any strands of wire are not covered fully by solder, de-solder and re-solder the wire (using a tiny dab of flux if needed) to make sure the wire attaches firmly and cannot be pulled off.
-
-
-
Using tweezers to hold the second wire, solder these to each LED board.
-
As with the first wire, solder one full row of LEDs at a time.
-
As with the first wire, wait until the solder cools on each LED board and gently tug at the wire to make sure it is firmly attached and completely covered with a blanket of solder. Re-solder if necessary (using flux if needed) to ensure you have a firm attachment.
-
Closely examine the LED board to make sure no strands of wire are loose (these can cause a short circuit later), and also make sure the solder does not bridge between pads (this will also cause a short circuit).
-
-
-
After you have soldered both wires and gently tugged each to make sure both wires are firmly attached, use clippers to cut the top "finger" above each LED board.
-
We recommend cutting a full row before removing LEDs-- they should easily pull away from the panel.
-
Repeat the previous steps for each row in the panel to solder the rest of the LEDs.
-
-
-
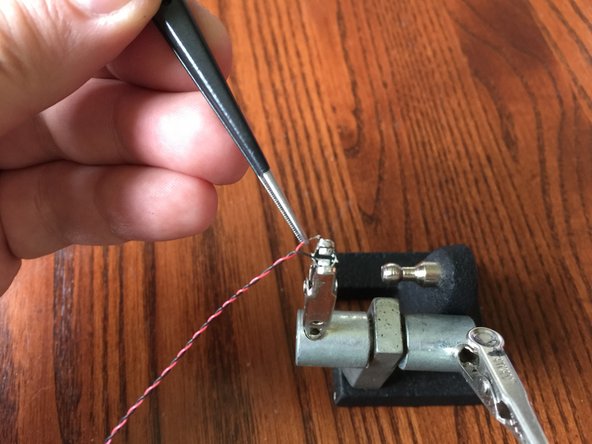
If you have only one Pico LED Light Board to solder, or if you need to repair a board, use alligator clips to hold the board firmly.
-
Use tweezers to hold the wire in place while soldering or re-soldering.
-
If re-soldering, use a tiny amount of flux on the wire to ensure a solid bond.
-
-
-
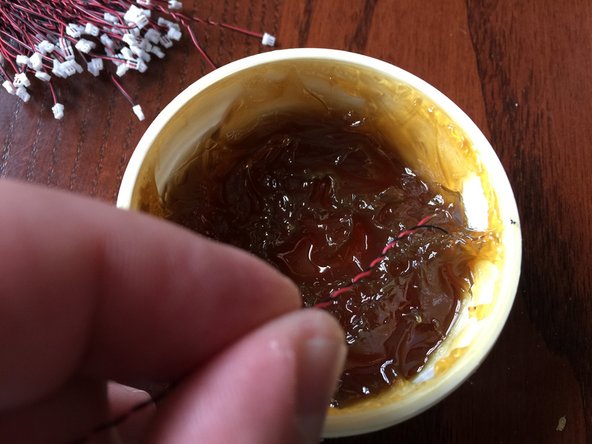
If you are having trouble getting wires to stay attached, use a TINY amount of flux on the tip of each wire.
-
Flux is best used sparingly. It will greatly aid in creating a strong bond, but if you use too much, it will stick to the back and potentially the front of the LED board. Use only a TINY amount of flux for each solder joint.
-
We recommend dipping the ends of the wire in flux vs. applying flux directly to the LED board.
-


Cancel: I did not complete this guide.
11 other people completed this guide.
