You're viewing a previously published revision of this guide.  View latest revision

Older Newer
  1. In addition to a good soldering iron, we recommend also having some soldering flux on hand, along with a good pair of angle-cut clippers and a good pair of tweezers.  We use the Xuron XUR410T sprue cutter and the Wiha 44518 tweezers.
    • In addition to a good soldering iron, we recommend also having some soldering flux on hand, along with a good pair of angle-cut clippers and a good pair of tweezers. We use the Xuron XUR410T sprue cutter and the Wiha 44518 tweezers.

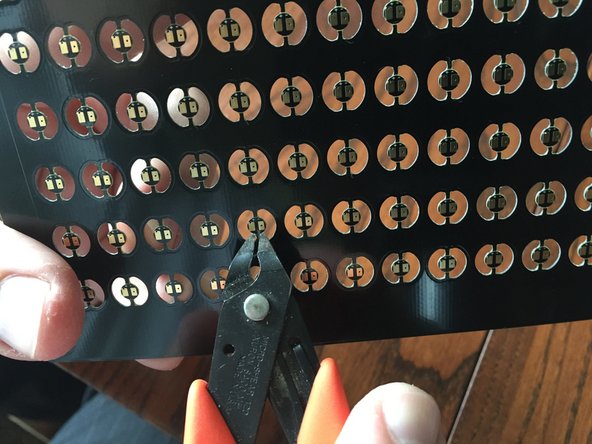
  2. This is a full panel of Pico LEDs (120 in total).  You may have purchased less than a full panel, but this photo shows how each Pico LED is attached to the panel with two "fingers"-- one on the top of each Pico LED and one on the bottom.
    • This is a full panel of Pico LEDs (120 in total). You may have purchased less than a full panel, but this photo shows how each Pico LED is attached to the panel with two "fingers"-- one on the top of each Pico LED and one on the bottom.

  3. Each Pico LED has small markings above the copper pads-- one for positive ("+") and one for negative ("-").  We recommend orienting the Pico LEDs so the markings are on top as you solder-- this ensures that you know the + leads are on the left and - on the right.
    • Each Pico LED has small markings above the copper pads-- one for positive ("+") and one for negative ("-"). We recommend orienting the Pico LEDs so the markings are on top as you solder-- this ensures that you know the + leads are on the left and - on the right.

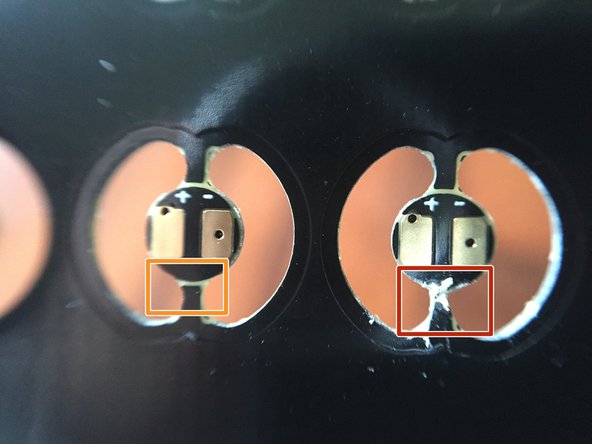
  4. Before soldering wires to the Pico LED Light Boards, we recommend pre-cutting the bottom "finger" on each light board-- this will make it easier later to separate the light board from the panel without needing to stress or bend the wire after soldering. The orange and red boxes in the second photo show an uncut finger (orange box) and a cut finger (red box).
    • Before soldering wires to the Pico LED Light Boards, we recommend pre-cutting the bottom "finger" on each light board-- this will make it easier later to separate the light board from the panel without needing to stress or bend the wire after soldering.

    • The orange and red boxes in the second photo show an uncut finger (orange box) and a cut finger (red box).

    • Make sure to cut ALL lower fingers on the LED panel BEFORE soldering.

Rob K

Member since: 06/18/2012

48 Guides authored

View Statistics:

Past 24 Hours: 0

Past 7 Days: 1

Past 30 Days: 22

All Time: 4,305